
 サトリク
サトリク
この講座では、ToDoリストアプリの削除機能と保存機能を追加していきたいと思います。
動作環境
| item | Version |
|---|---|
| Swift | 5.2.4 |
| Xcode | 11.5 |
現状
テーブルにデータを追加することができるようになりました。
しかし、アプリを終了してから開き直すと、保存できていないため、データがなくなってしまいます。
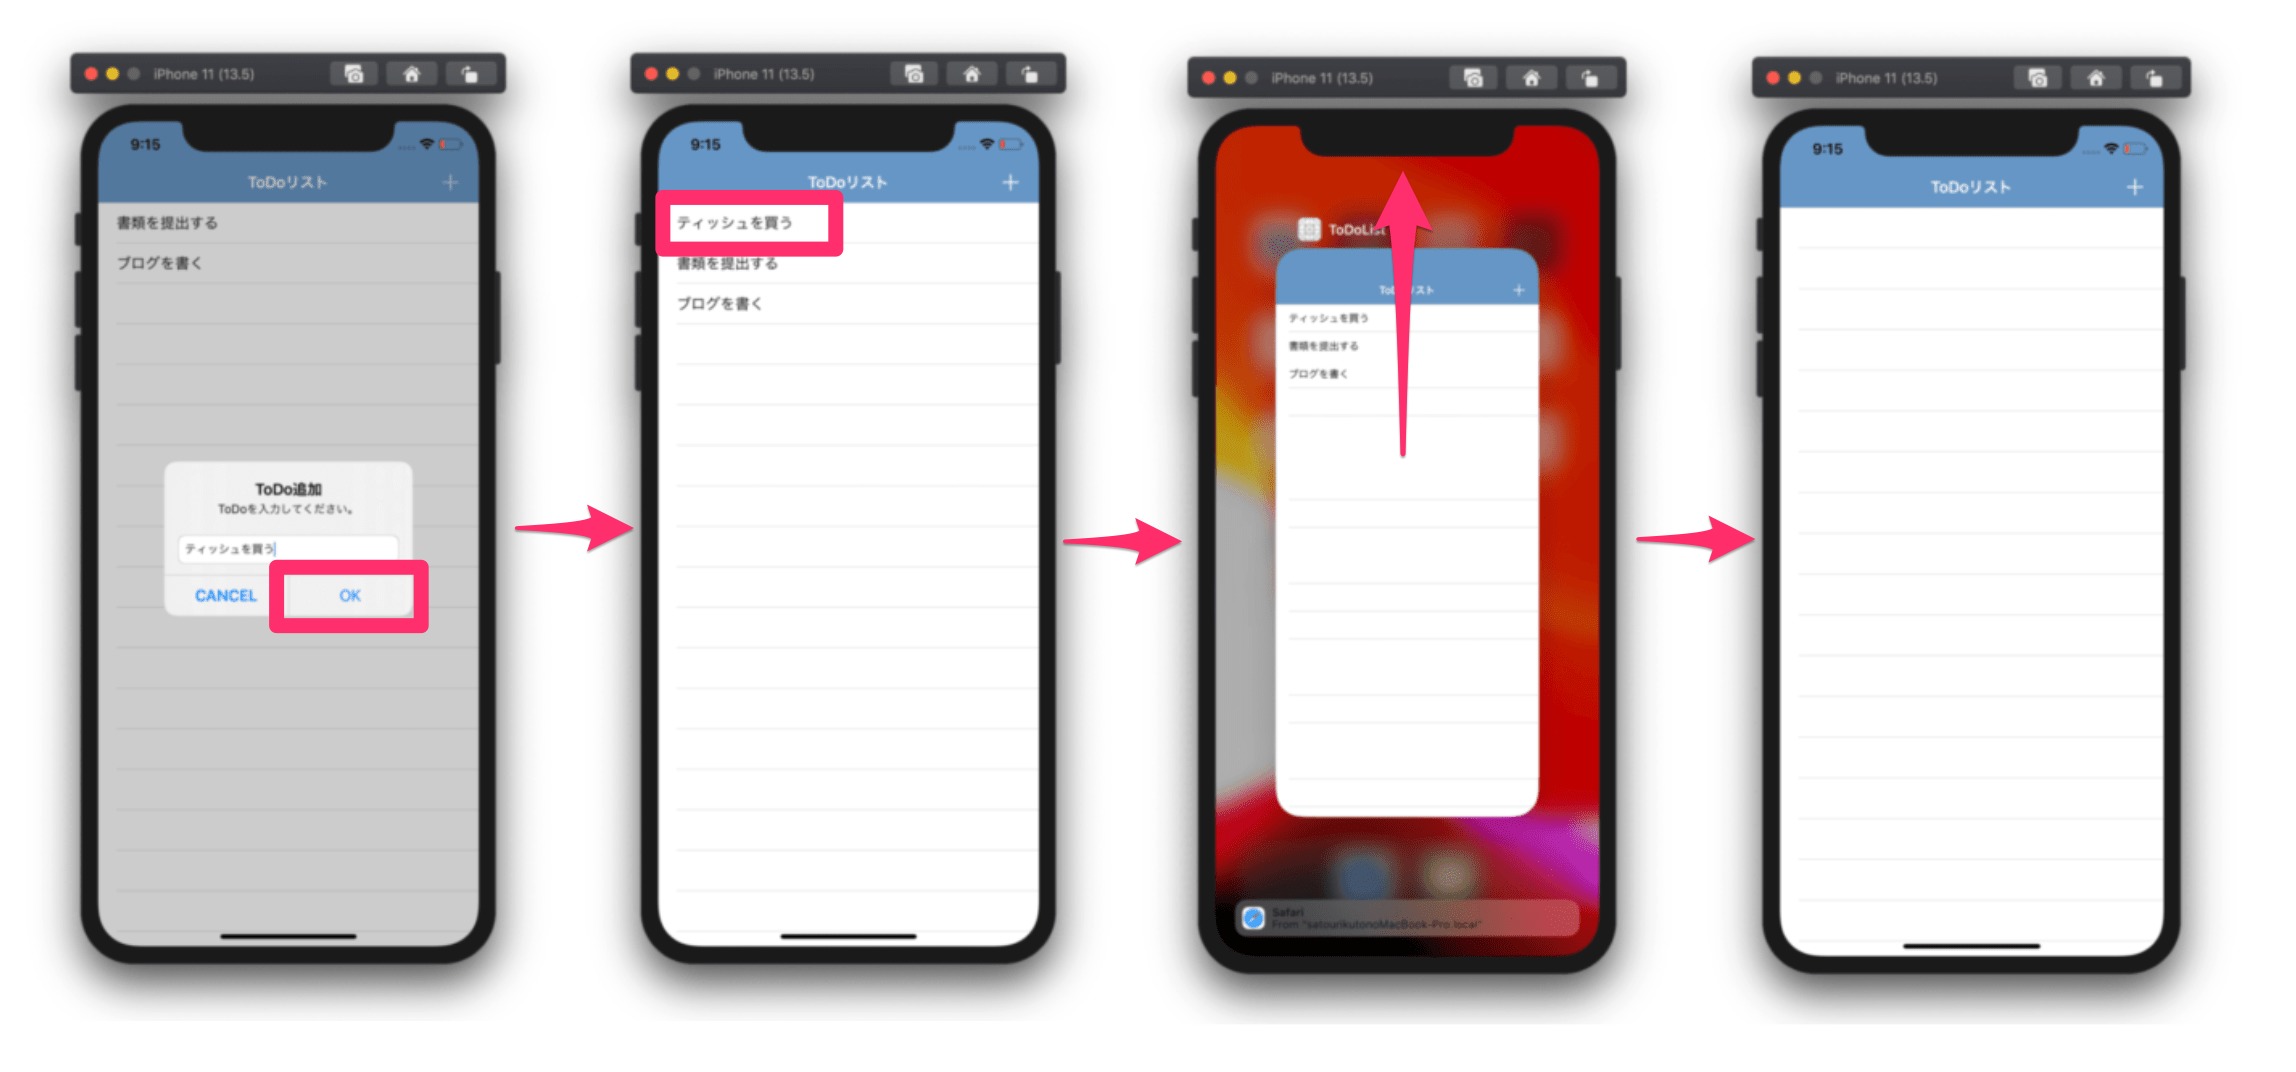
あと、肝心の削除機能がありません。
削除機能追加
まずは、削除機能を追加していきたいと思います。
以下のように、メソッドを追加しましょう。
    //~~~~省略~~~~
    // セルの中身を設定
    func tableView(_ tableView: UITableView, cellForRowAt indexPath: IndexPath) -> UITableViewCell {
        let cell = tableView.dequeueReusableCell(withIdentifier: "todoCell", for: indexPath)
        let todoTitle = todoList[indexPath.row]
        cell.textLabel?.text = todoTitle
        return cell
    }

    // 追加:セルの削除機能
    func tableView(_ tableView: UITableView, commit editingStyle: UITableViewCell.EditingStyle, forRowAt indexPath: IndexPath) {
        if editingStyle == UITableViewCell.EditingStyle.delete {
            todoList.remove(at: indexPath.row)
            tableView.deleteRows(at: [indexPath as IndexPath], with: UITableView.RowAnimation.automatic)
        }
    }
}
これだけで削除できるようになりました。
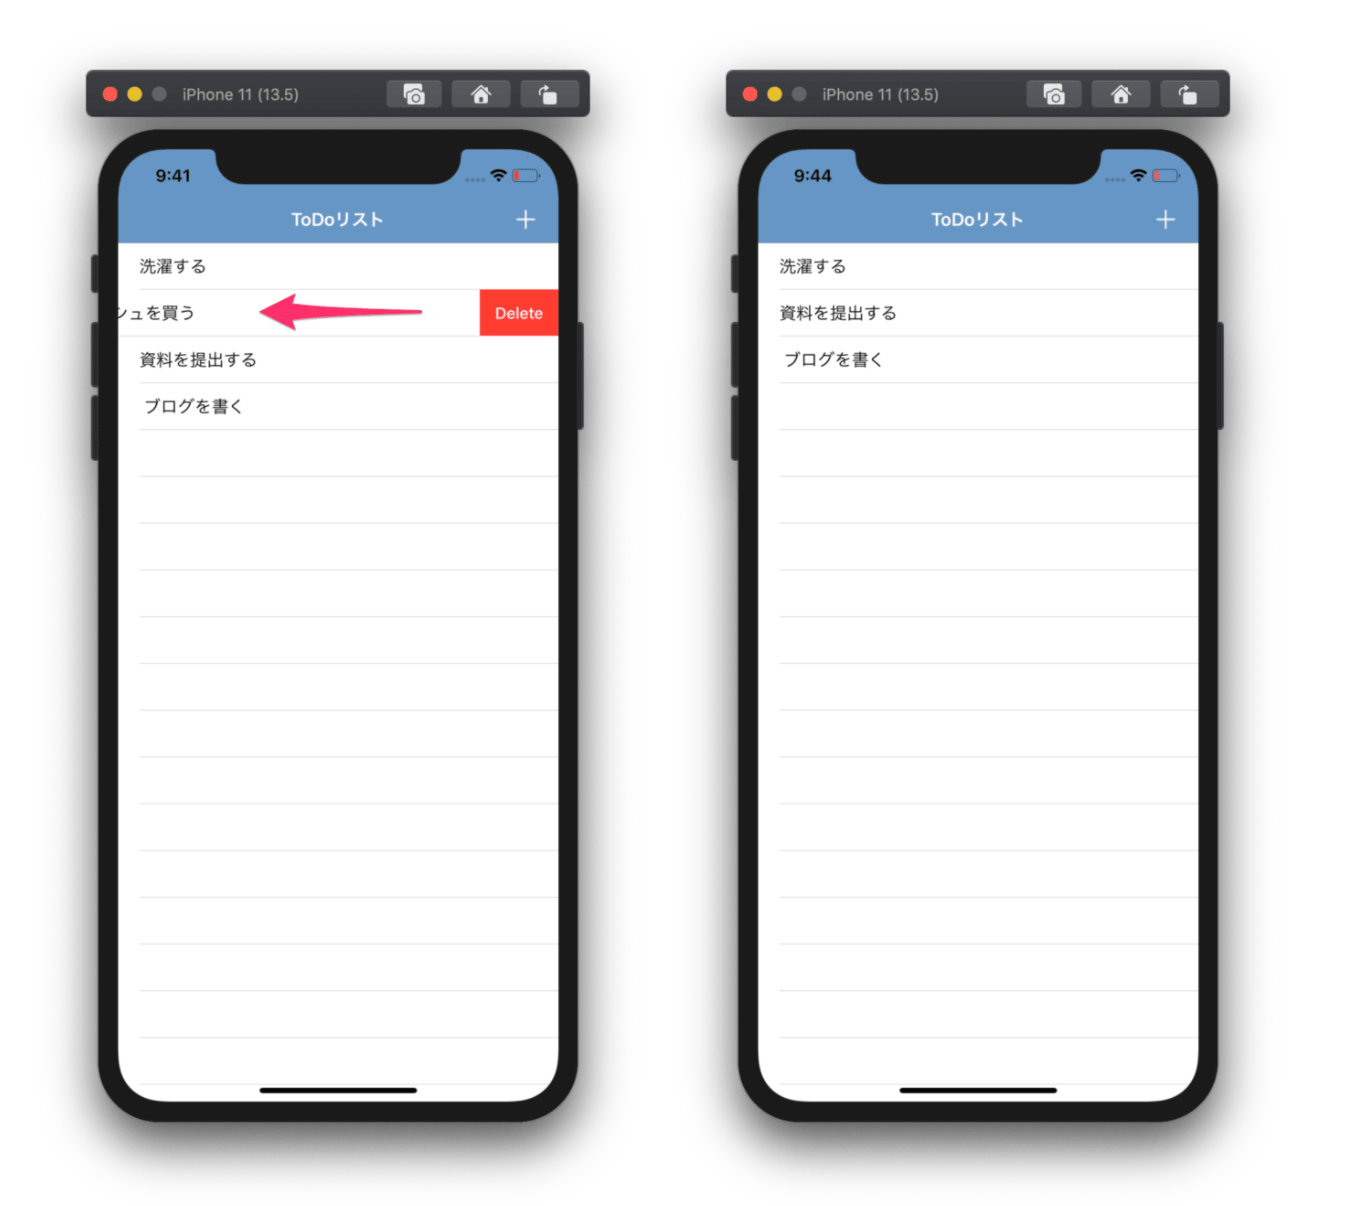
セルを左にスライドしてdeleteを押すと削除できます。
保存機能追加
次は、アプリを終了してもデータが消えないように、端末内にデータを保存したいと思います。
var todoList = [String]()のしたに以下の記述を追記してください。
var todoList = [String]()
// 追記:インスタンスの生成
let userDefaults = UserDefaults.standard
これで、UserDefaultsというローカルにデータを保存するインターフェイスを使えるようにしました。
viewDidLoadにデータを読み込む処理を以下のように追記しましょう。
override func viewDidLoad() {
    super.viewDidLoad()
    // 追記:データ読み込み
    if let storedTodoList = userDefaults.array(forKey: "todoList") as? [String] {
        todoList.append(contentsOf: storedTodoList)
    }
}
これで、保存したデータを読み込みます。
//OKをタップした時の処理
if let textField = alertController.textFields?.first {
    self.todoList.insert(textField.text!, at: 0)
    self.tableView.insertRows(at: [IndexPath(row: 0, section: 0)], with: UITableView.RowAnimation.right)

    // 追記:追加したToDoを保存
    self.userDefaults.set(self.todoList, forKey: "todoList")
}
これで、OKを押したときにデータを保存します。
削除したときも保存しなければなりません。なので、削除するメソッドにも同じように追記しましょう。
// セルの削除機能
func tableView(_ tableView: UITableView, commit editingStyle: UITableViewCell.EditingStyle, forRowAt indexPath: IndexPath) {
    if editingStyle == UITableViewCell.EditingStyle.delete {
        print(todoList)
        todoList.remove(at: indexPath.row)
        tableView.deleteRows(at: [indexPath as IndexPath], with: UITableView.RowAnimation.automatic)
        // 追加:削除した内容を保存
        userDefaults.set(todoList, forKey: "todoList")
    }
}
これで、削除したときにデータを保存します。
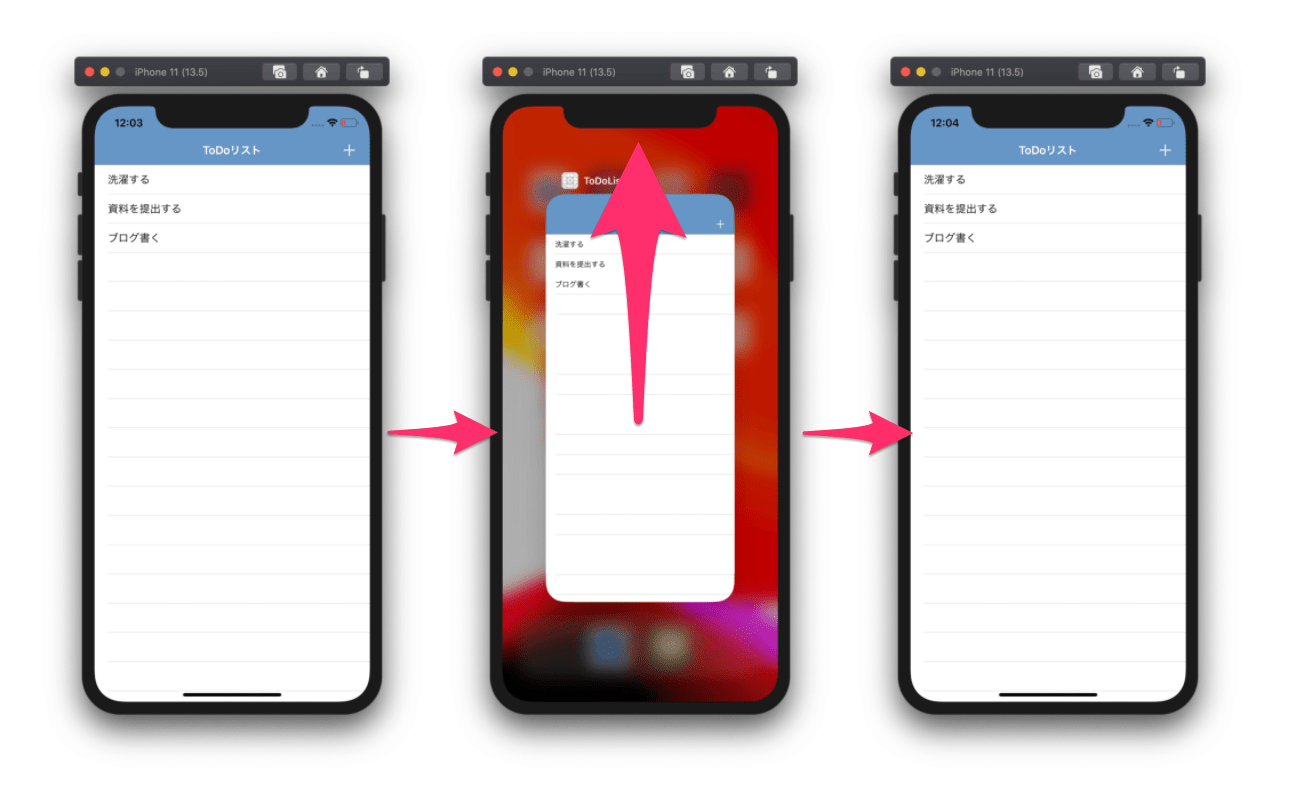
このように、アプリを終了してもToDoが消えなくなりました。
つまりデータが保存されるようになりました!
これで、簡単なToDoアプリの作成ができました!
確認
うまくいかない場合、このコードをまるっとコピペしましょう。
コピペしてもできないのであれば、前回の講座で間違えている可能性があります。
import UIKit

class ViewController: UIViewController, UITableViewDelegate, UITableViewDataSource {

    @IBOutlet weak var tableView: UITableView!

    // テーブルに表示するデータの箱
    var todoList = [String]()
    // UserDefaultsのインスタンスの生成
    let userDefaults = UserDefaults.standard

    override func viewDidLoad() {
        super.viewDidLoad()
        // データ読み込み
        if let storedTodoList = userDefaults.array(forKey: "todoList") as? [String] {
            todoList.append(contentsOf: storedTodoList)
        }
    }

    @IBAction func addBtnAction(_ sender: Any) {
        let alertController = UIAlertController(title: "ToDo追加", message: "ToDoを入力してください。", preferredStyle: UIAlertController.Style.alert)
        alertController.addTextField(configurationHandler: nil)
        let okAction = UIAlertAction(title: "OK", style: UIAlertAction.Style.default) { (acrion: UIAlertAction) in
            //OKをタップした時の処理
            if let textField = alertController.textFields?.first {
                self.todoList.insert(textField.text!, at: 0)
                self.tableView.insertRows(at: [IndexPath(row: 0, section: 0)], with: UITableView.RowAnimation.right)

                // 追加した内容を保存
                self.userDefaults.set(self.todoList, forKey: "todoList")
            }
        }
        alertController.addAction(okAction)
        let cancelButton = UIAlertAction(title: "CANCEL", style: UIAlertAction.Style.cancel, handler: nil)
        alertController.addAction(cancelButton)
        present(alertController, animated: true, completion: nil)
    }

    // セルの数を指定
    func tableView(_ tableView: UITableView, numberOfRowsInSection section: Int) -> Int {
        return todoList.count
    }

    // セルの中身を設定
    func tableView(_ tableView: UITableView, cellForRowAt indexPath: IndexPath) -> UITableViewCell {
        let cell = tableView.dequeueReusableCell(withIdentifier: "todoCell", for: indexPath)
        let todoTitle = todoList[indexPath.row]
        cell.textLabel?.text = todoTitle
        return cell
    }

    // セルの削除機能
    func tableView(_ tableView: UITableView, commit editingStyle: UITableViewCell.EditingStyle, forRowAt indexPath: IndexPath) {
        if editingStyle == UITableViewCell.EditingStyle.delete {
            print(todoList)
            todoList.remove(at: indexPath.row)
            tableView.deleteRows(at: [indexPath as IndexPath], with: UITableView.RowAnimation.automatic)
            // 削除した内容を保存
            userDefaults.set(todoList, forKey: "todoList")
        }
    }
}
まとめ
うまくできましたでしょうか?
わからない部分があれば、TwitterのDMか、コメントで質問して貰えばすぐ返します。(コメントはレス遅いかも)
次の講座
Coming Soon
本で勉強したい方はこちら 【2021年版】Swift5/Xcode/OSアプリ開発のオススメ参考書・本・書籍まとめ。初心者から上級者まで!
ゼロから学ぶiPhoneアプリ開発入門