サトリク
サトリク
この記事では、ライブラリ『BubbleTransition』の使い方を初心者でもわかるように解説していきたいと思います。
動作環境
| item | Version |
|---|---|
| Swift | 5.1.3 |
| Xcode | 11.3 |
『BubbleTransition』とは
BubbleTransitionとはこのような、おしゃれな画面遷移が簡単に実装できるライブラリです。
BubbleTransitionの実装方法
簡単に手順を説明
- ライブラリ導入
- SegueでpresentModally接続
- ViewControllerとNextViewControllerを変更←ここまでスキップ
ライブラリ導入
まずは、こちらの記事でをみながら、BubbleTransitionを導入してください。
 【CocoaPods】超初心者向け!CocoaPodsのインストールの仕方と使い方を丁寧に解説
storyboardの実装
まずは、遷移先の画面を配置します。
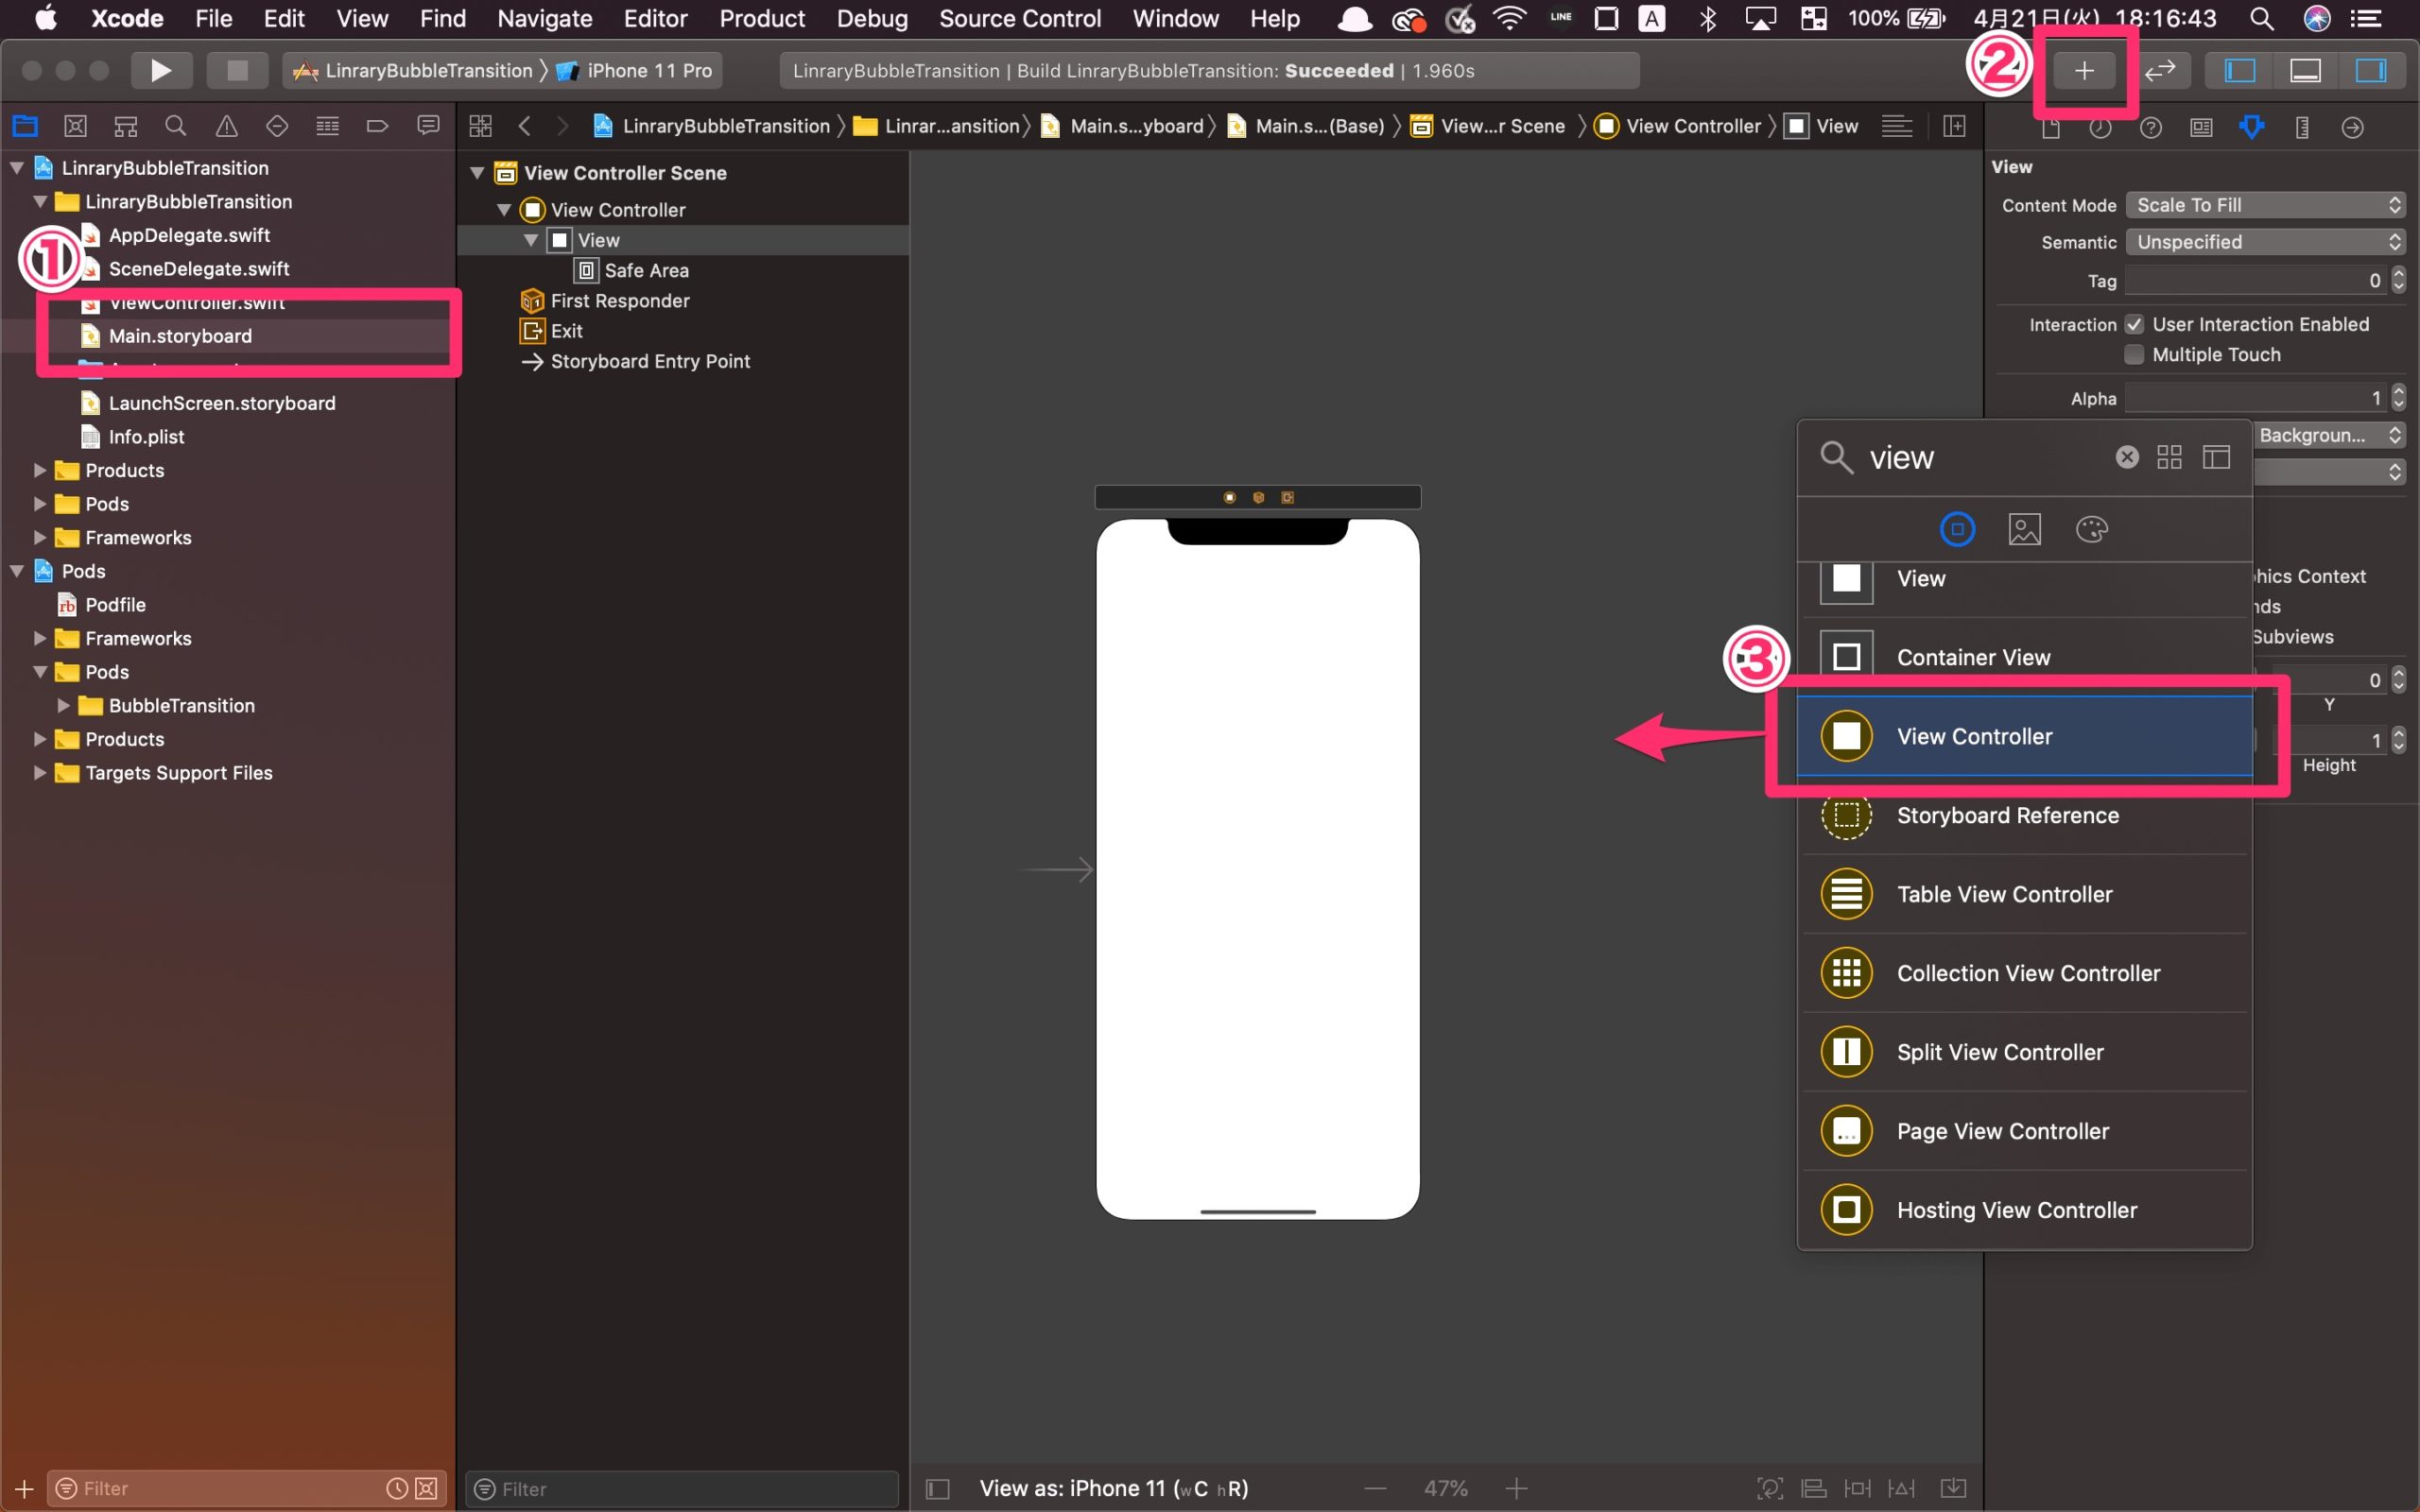
①Main.storyboardを選択
②「+」をクリックするか、command + shift + Lをしてオブジェクトウィンドウを表示
③ViewControllerをドラッグ&ドロップ
次に、2つの画面にボタンを配置します。
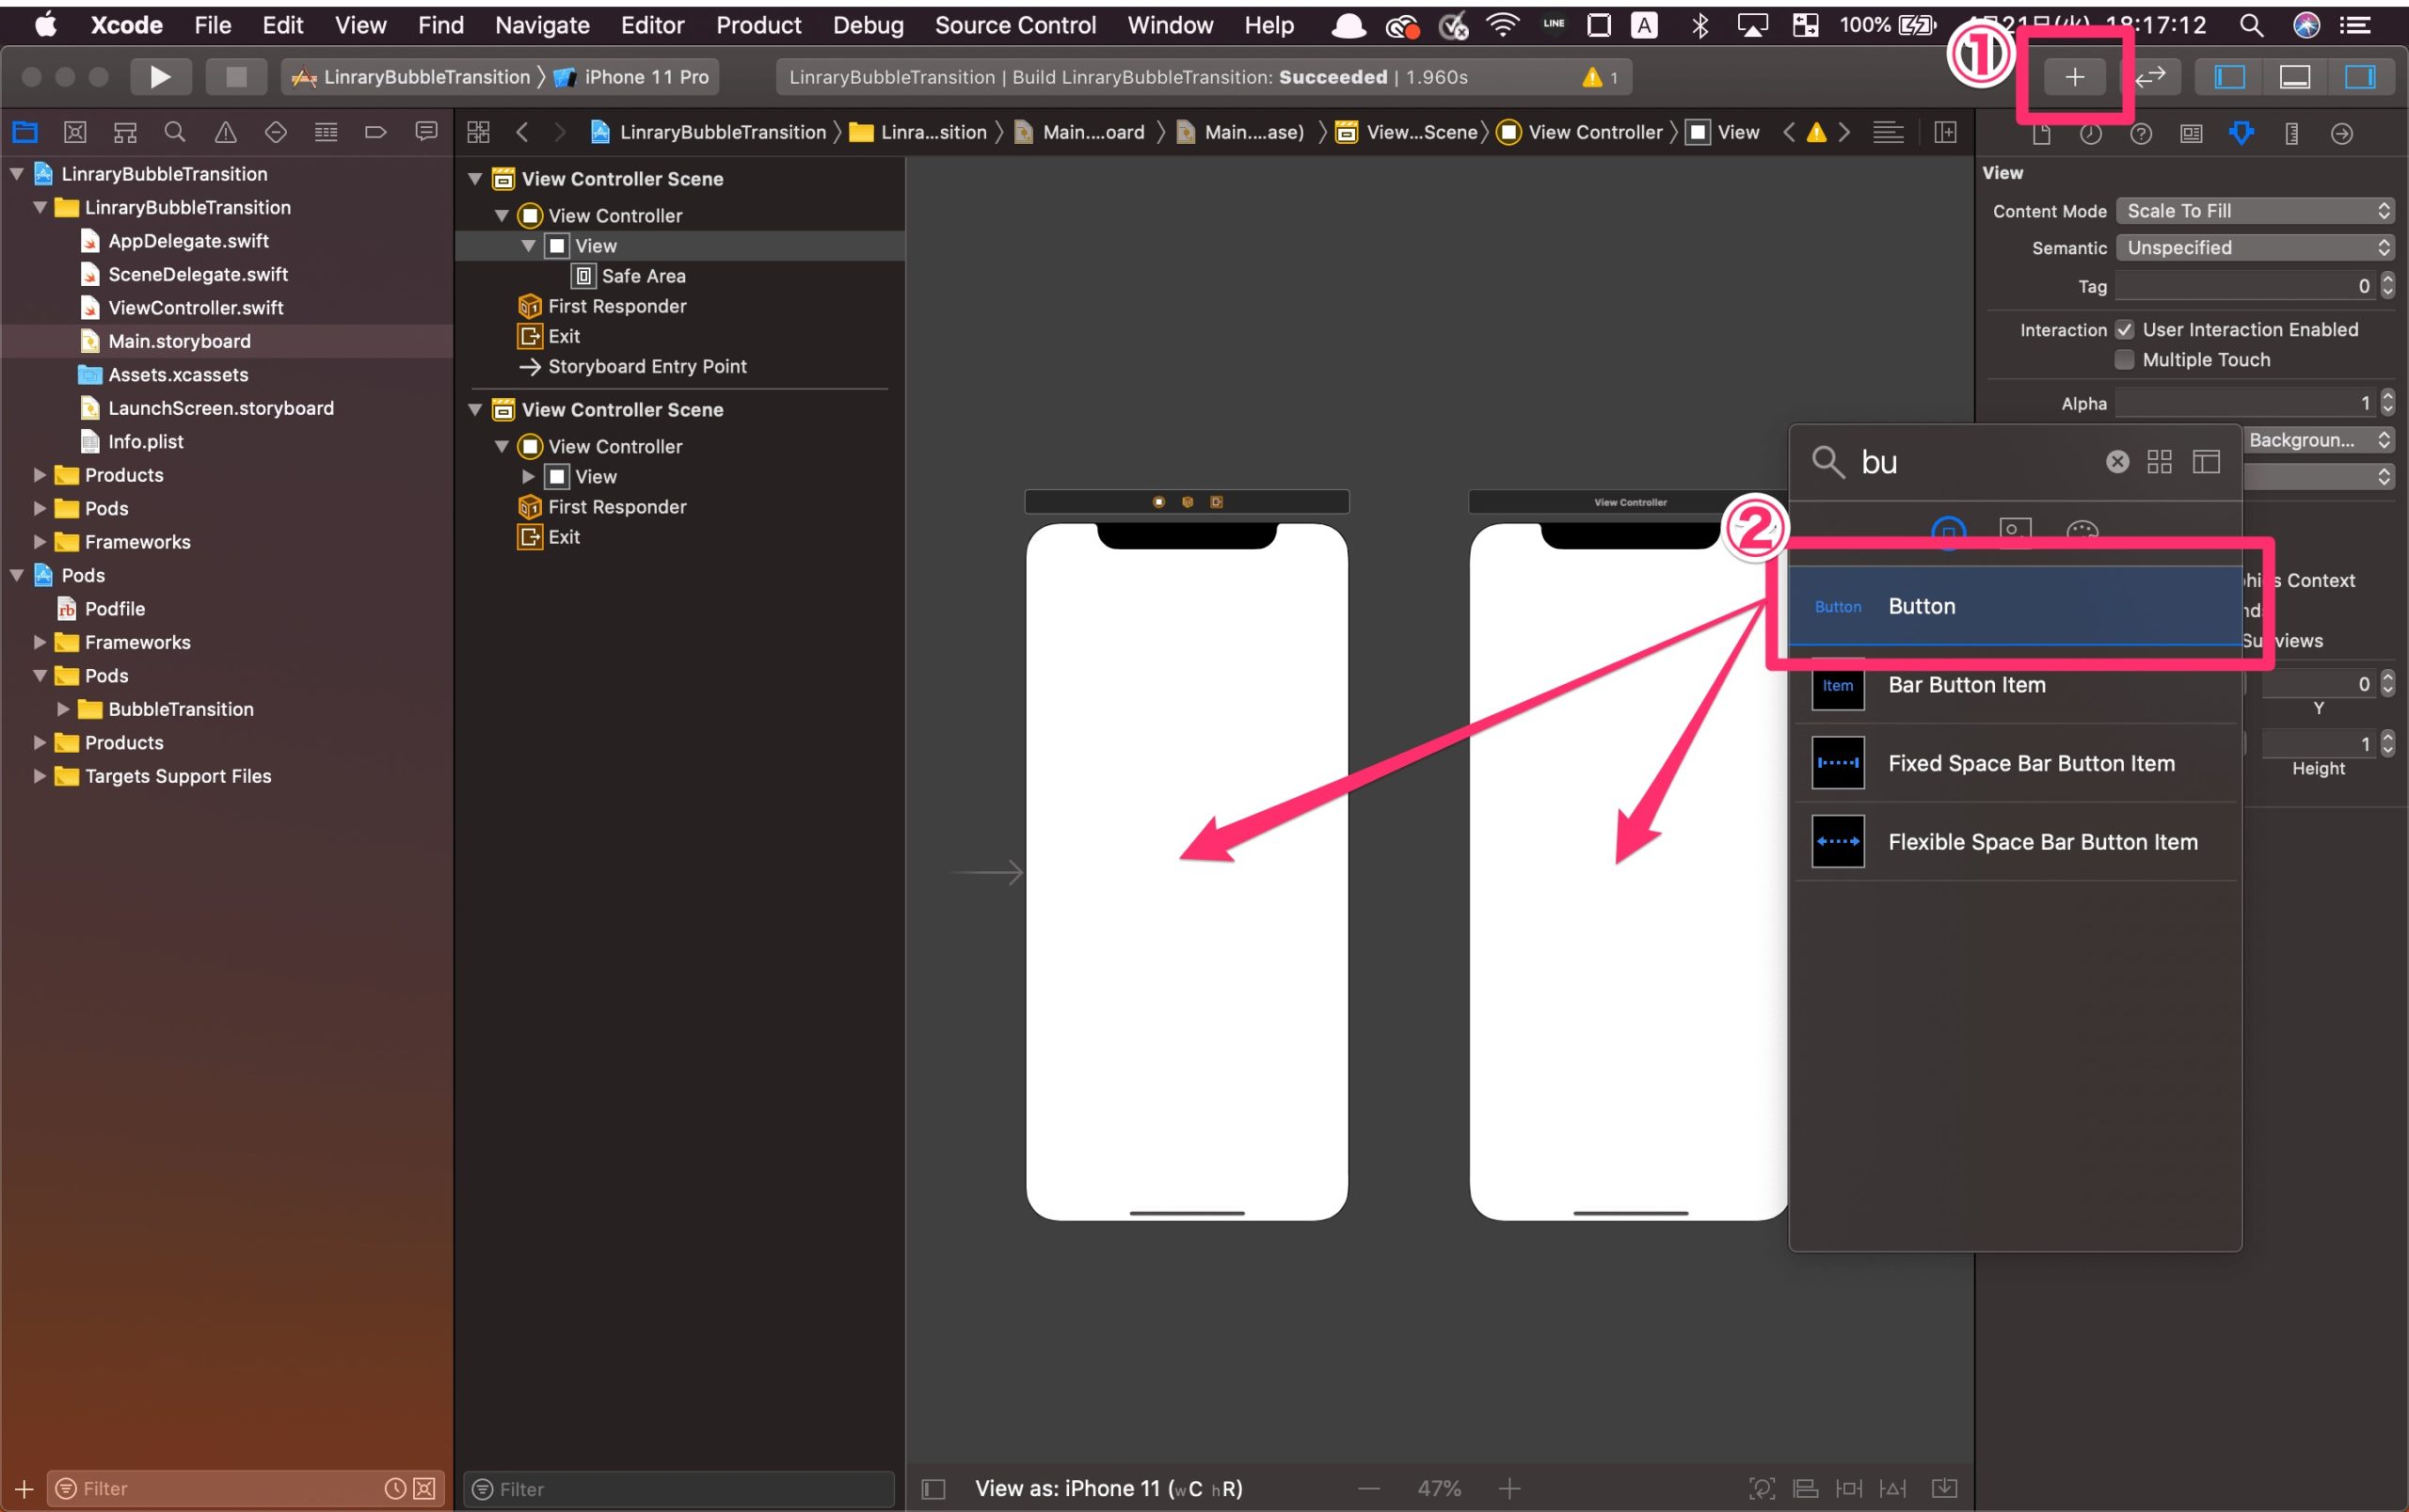
①「+」をクリックするか、command + shift + Lをしてオブジェクトウィンドウを表示
②2つの画面の真ん中に、Buttonをドラッグ&ドロップ
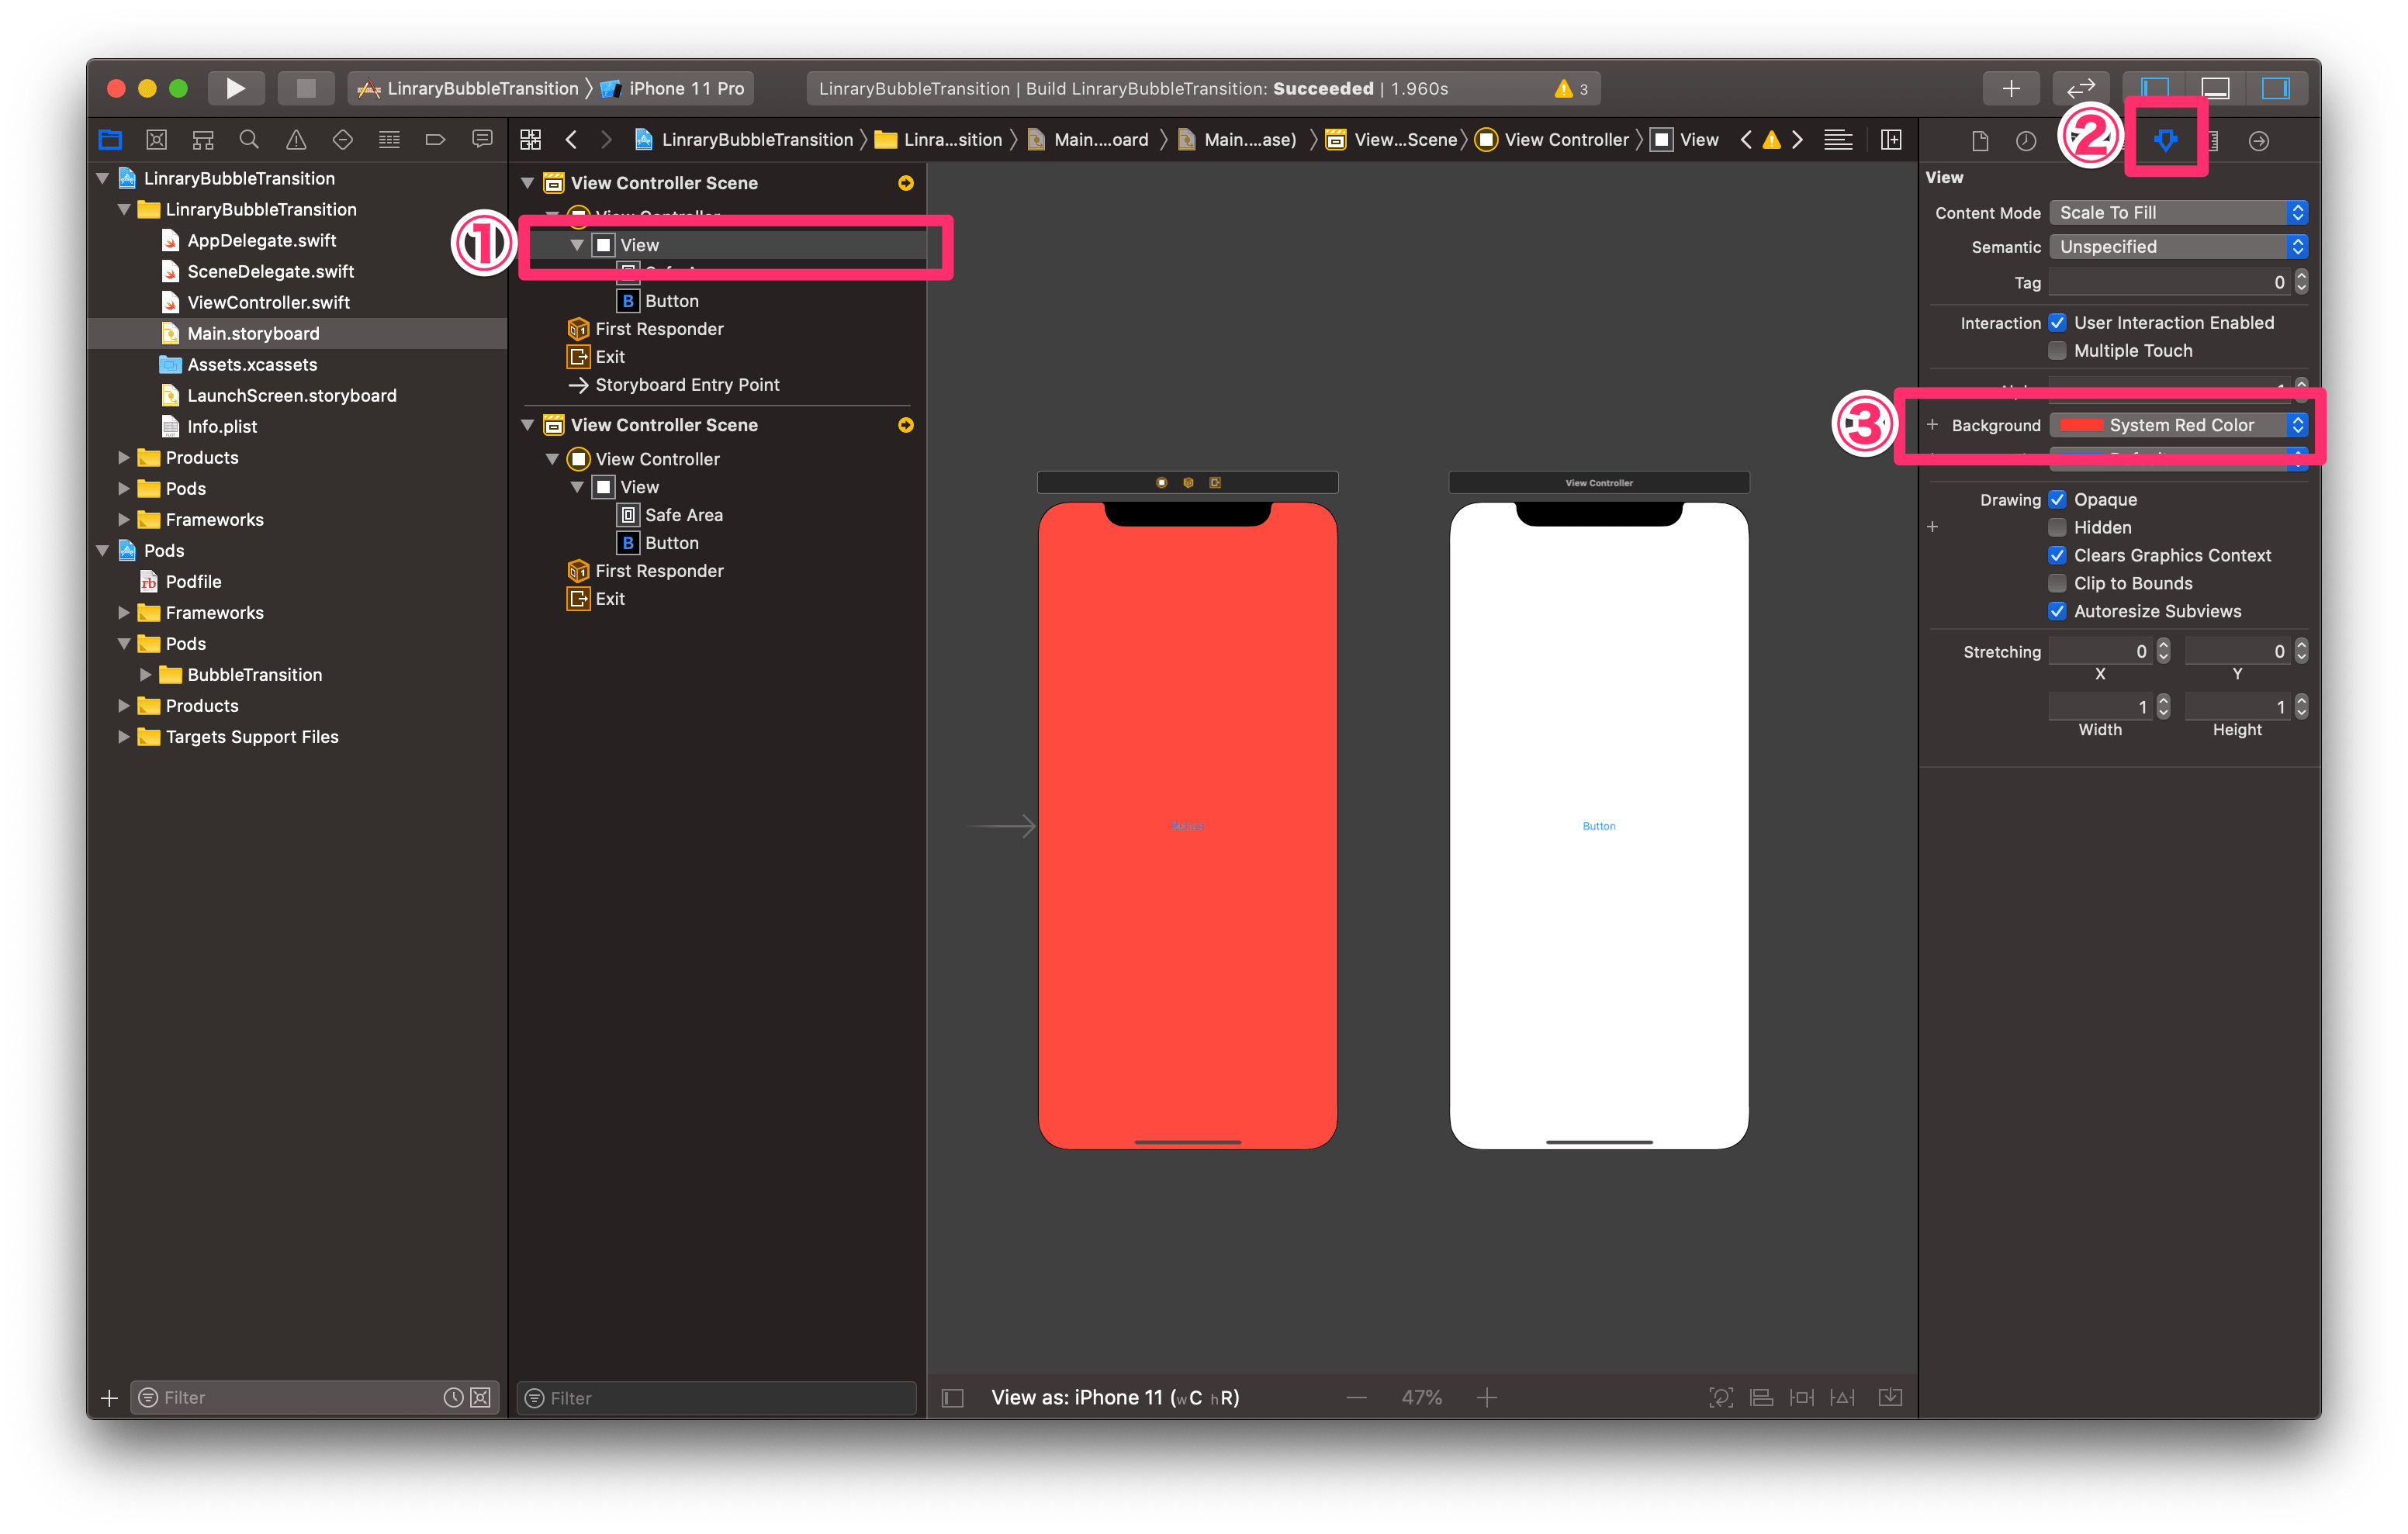
①Viewを選択
② ![]() (inspector)を選択
(inspector)を選択
③BackgroundでSystem Red Colorを選択
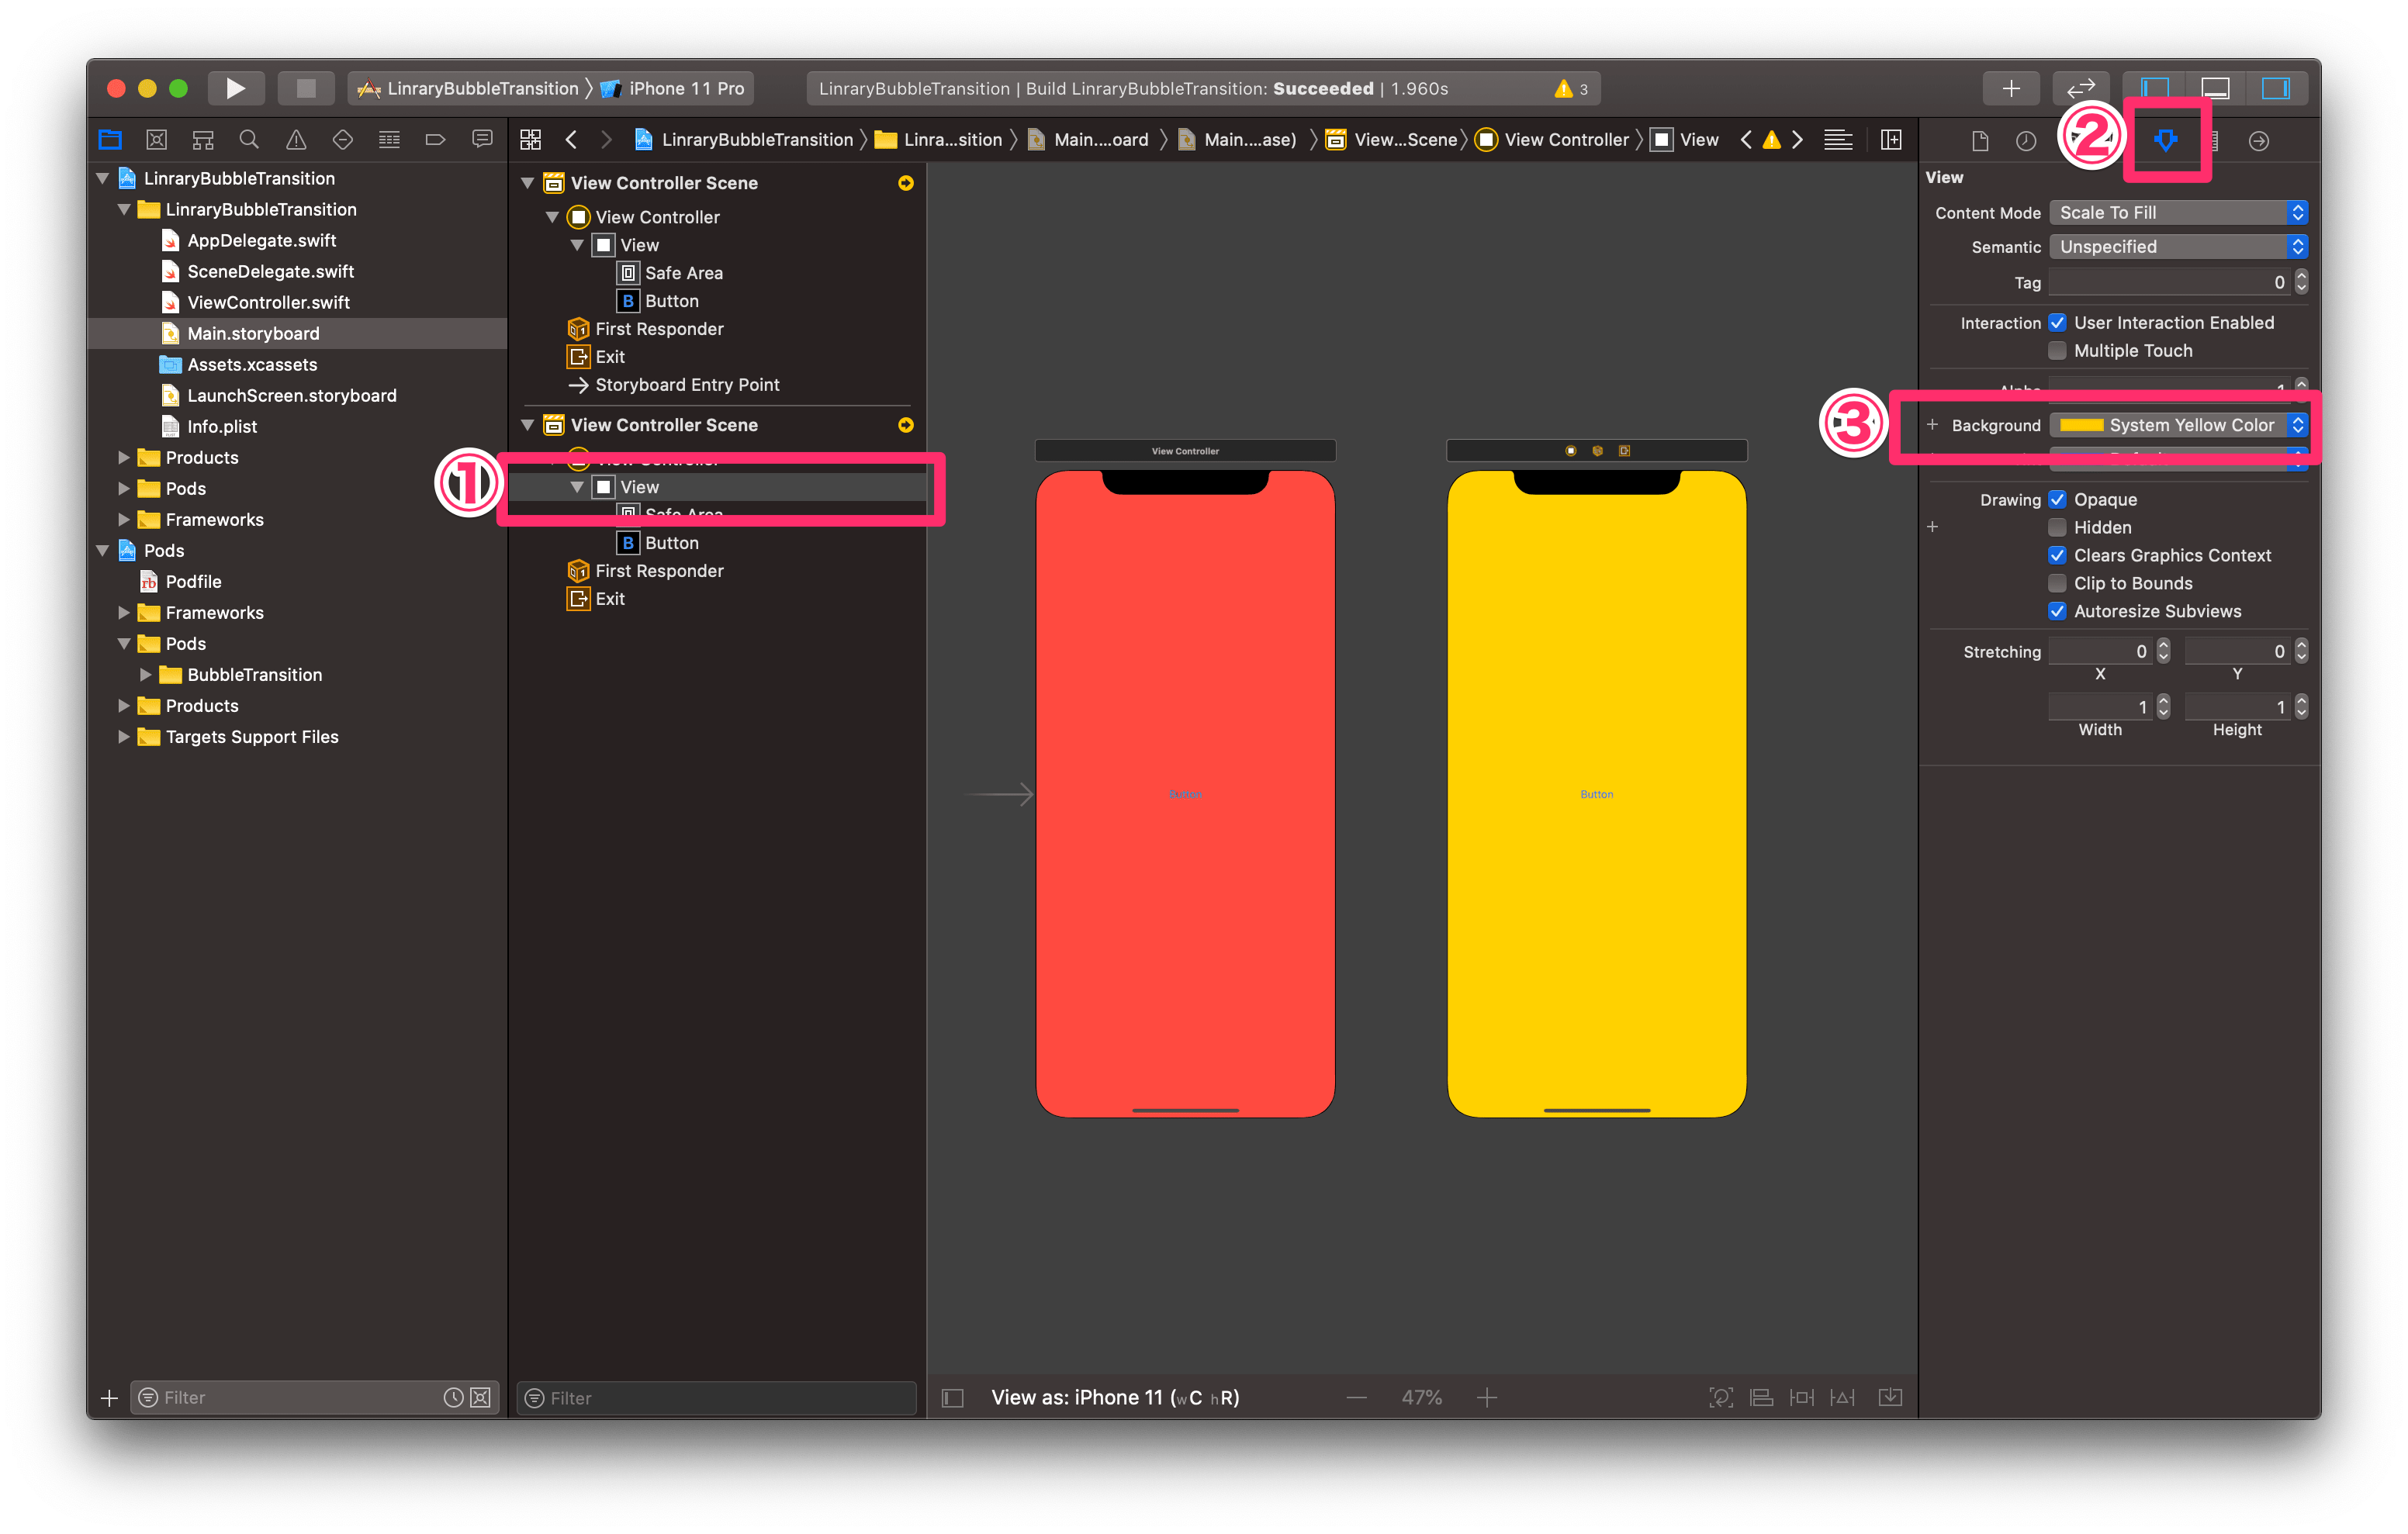
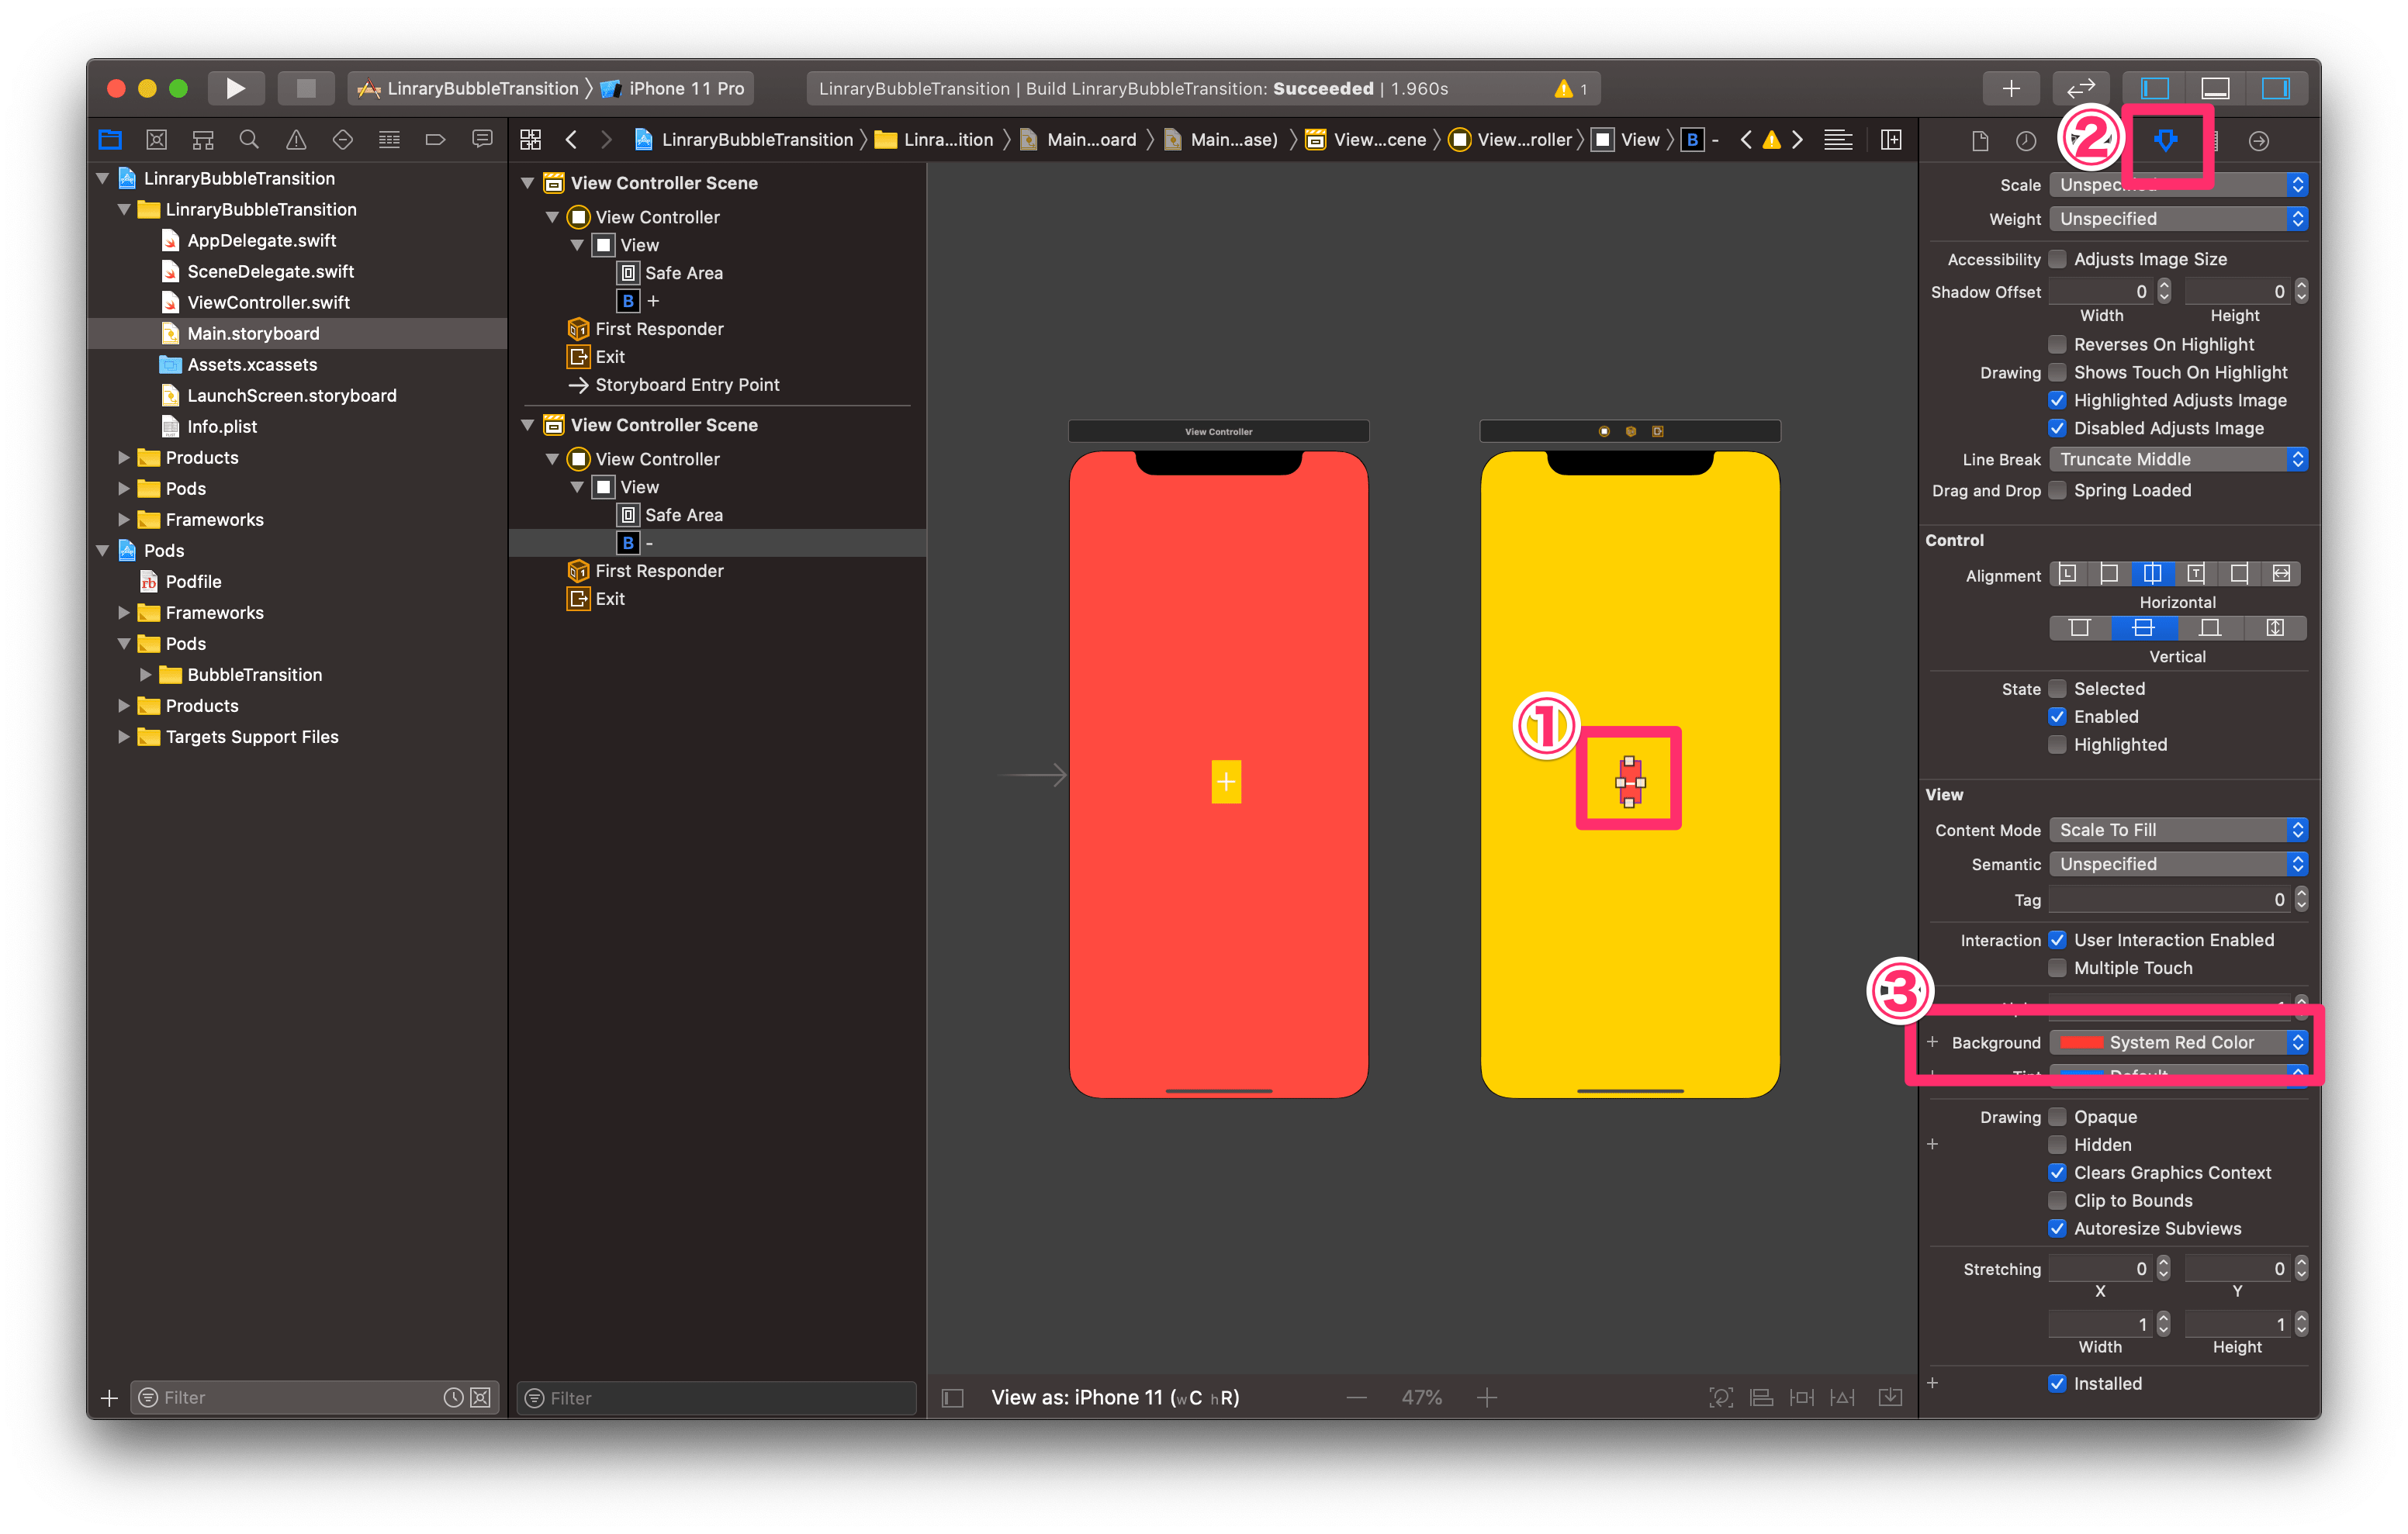
①下のViewを選択
② ![]() (inspector)を選択
(inspector)を選択
③BackgroundでSystem Yellow Colorを選択
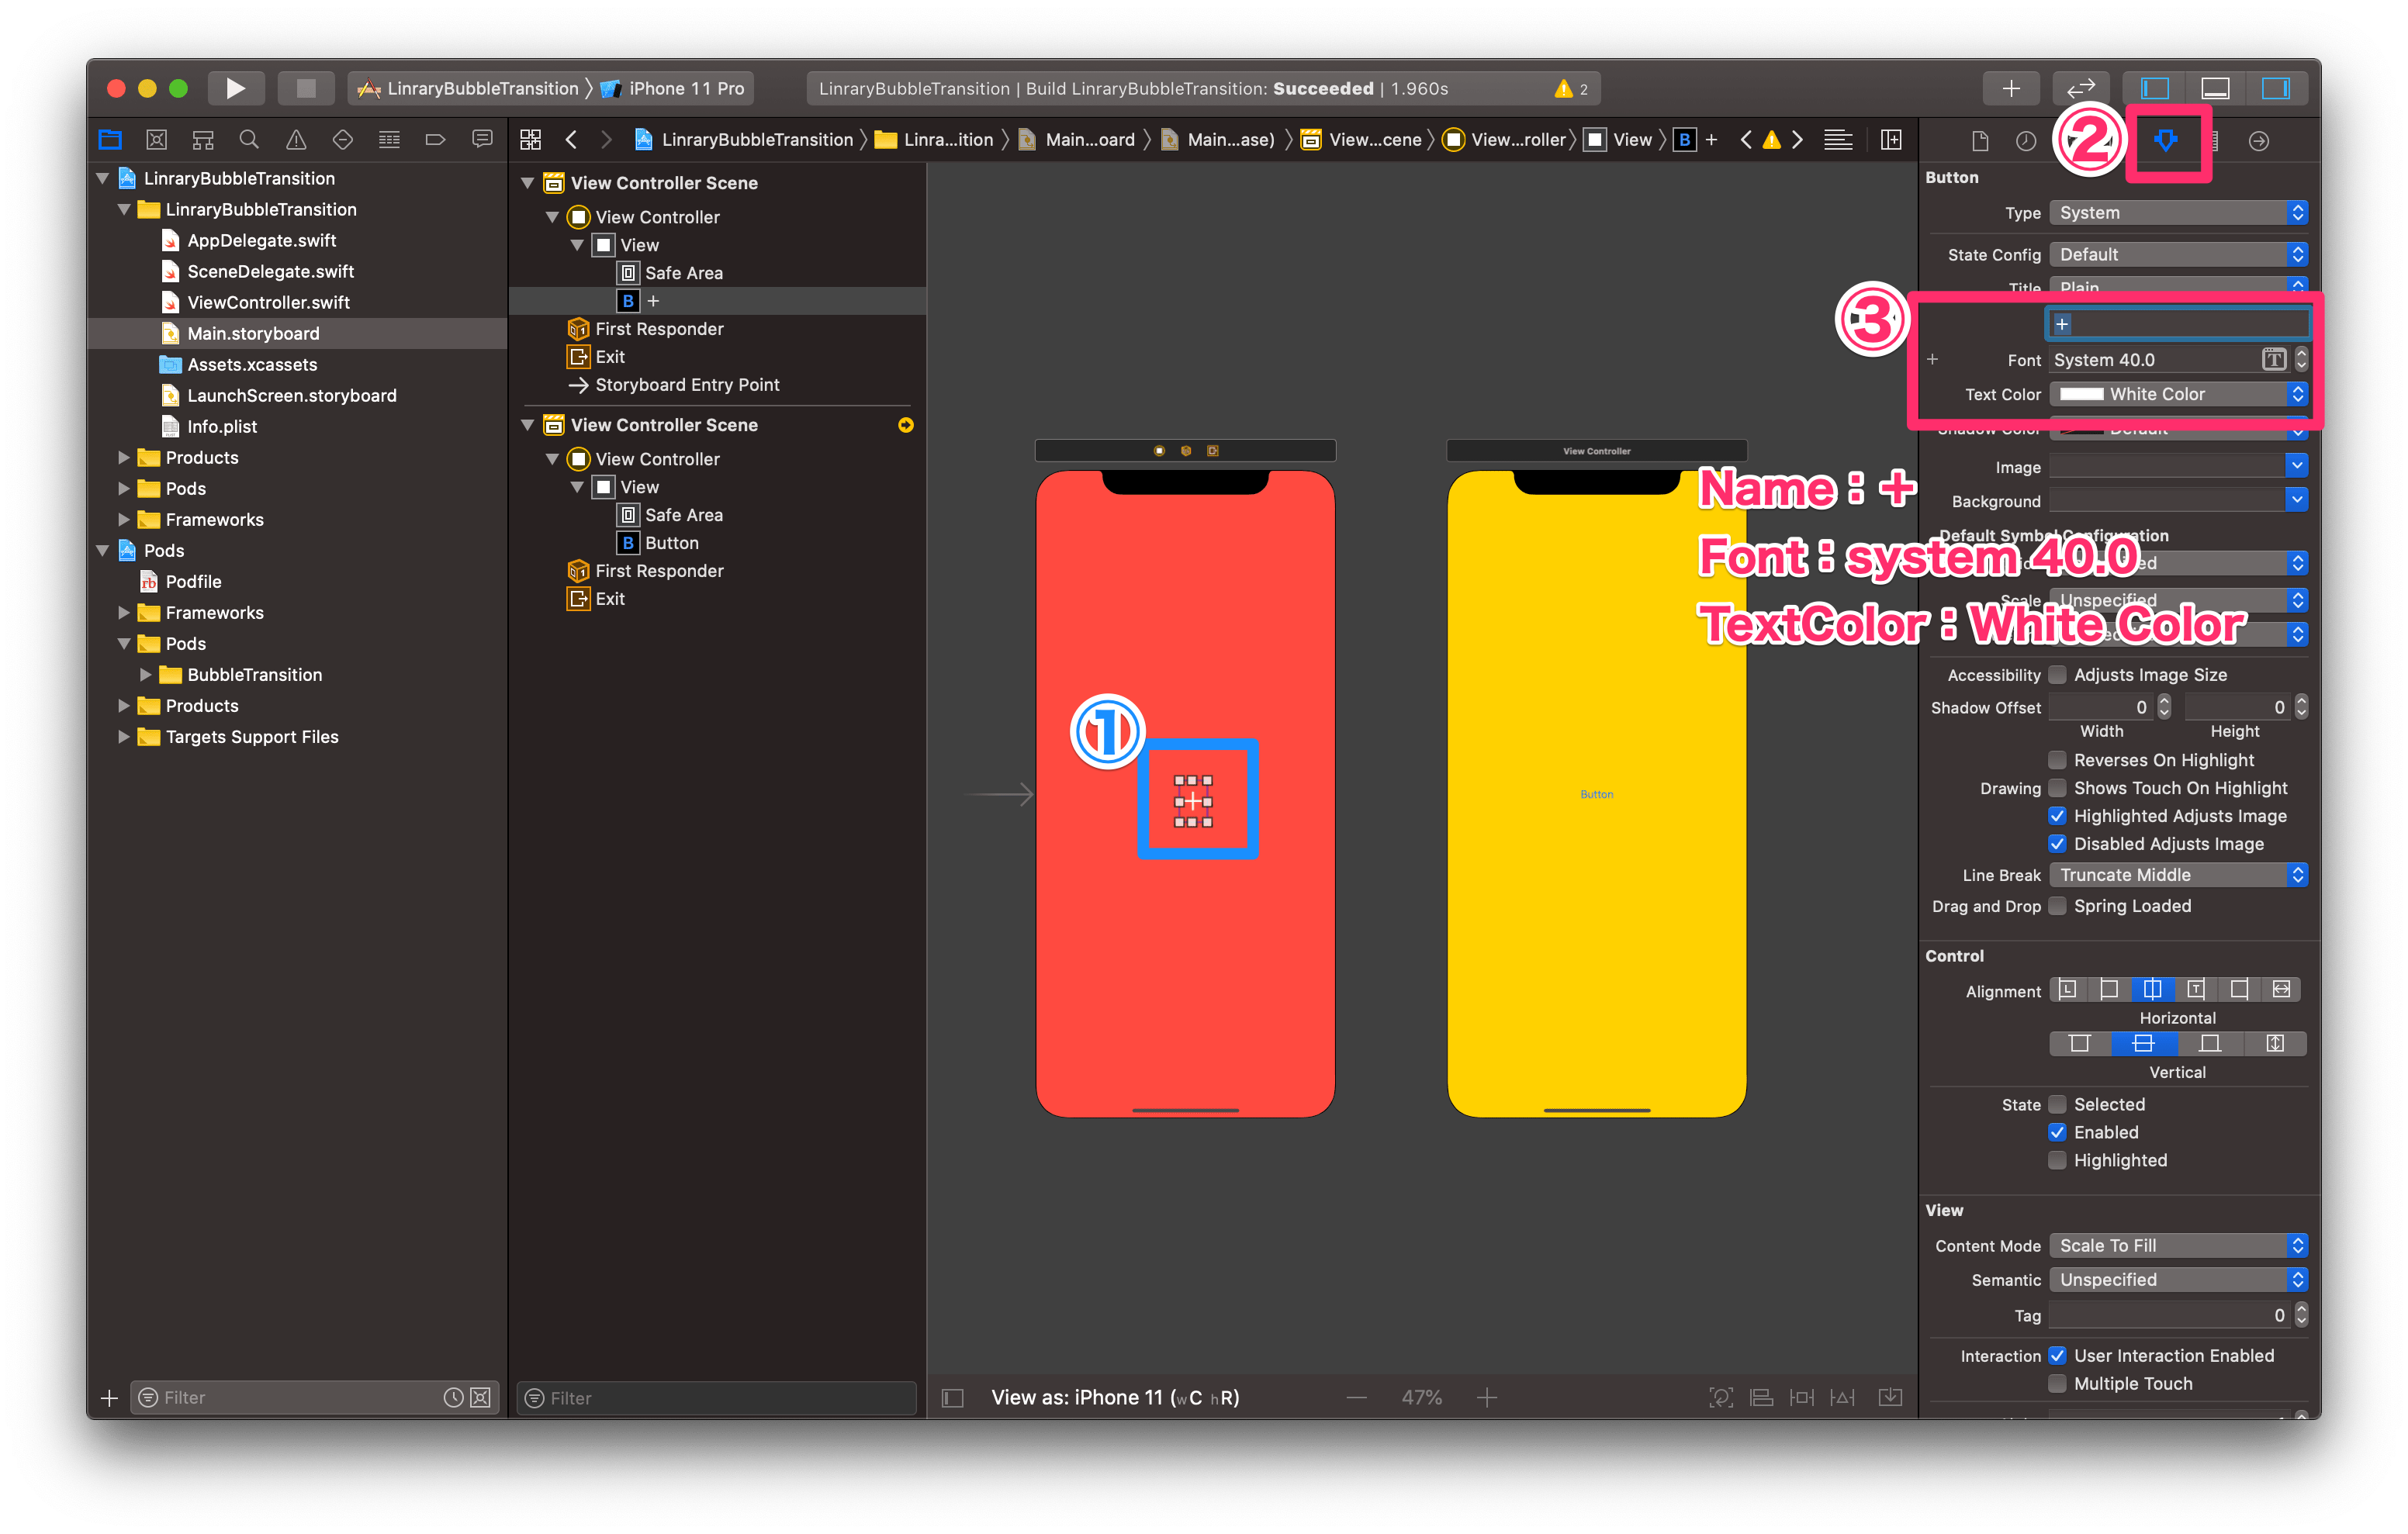
①ボタンを選択
② ![]() (inspector)を選択
(inspector)を選択
③以下のように記述
Name:+
Font:System 40.0
Text Color:White Color
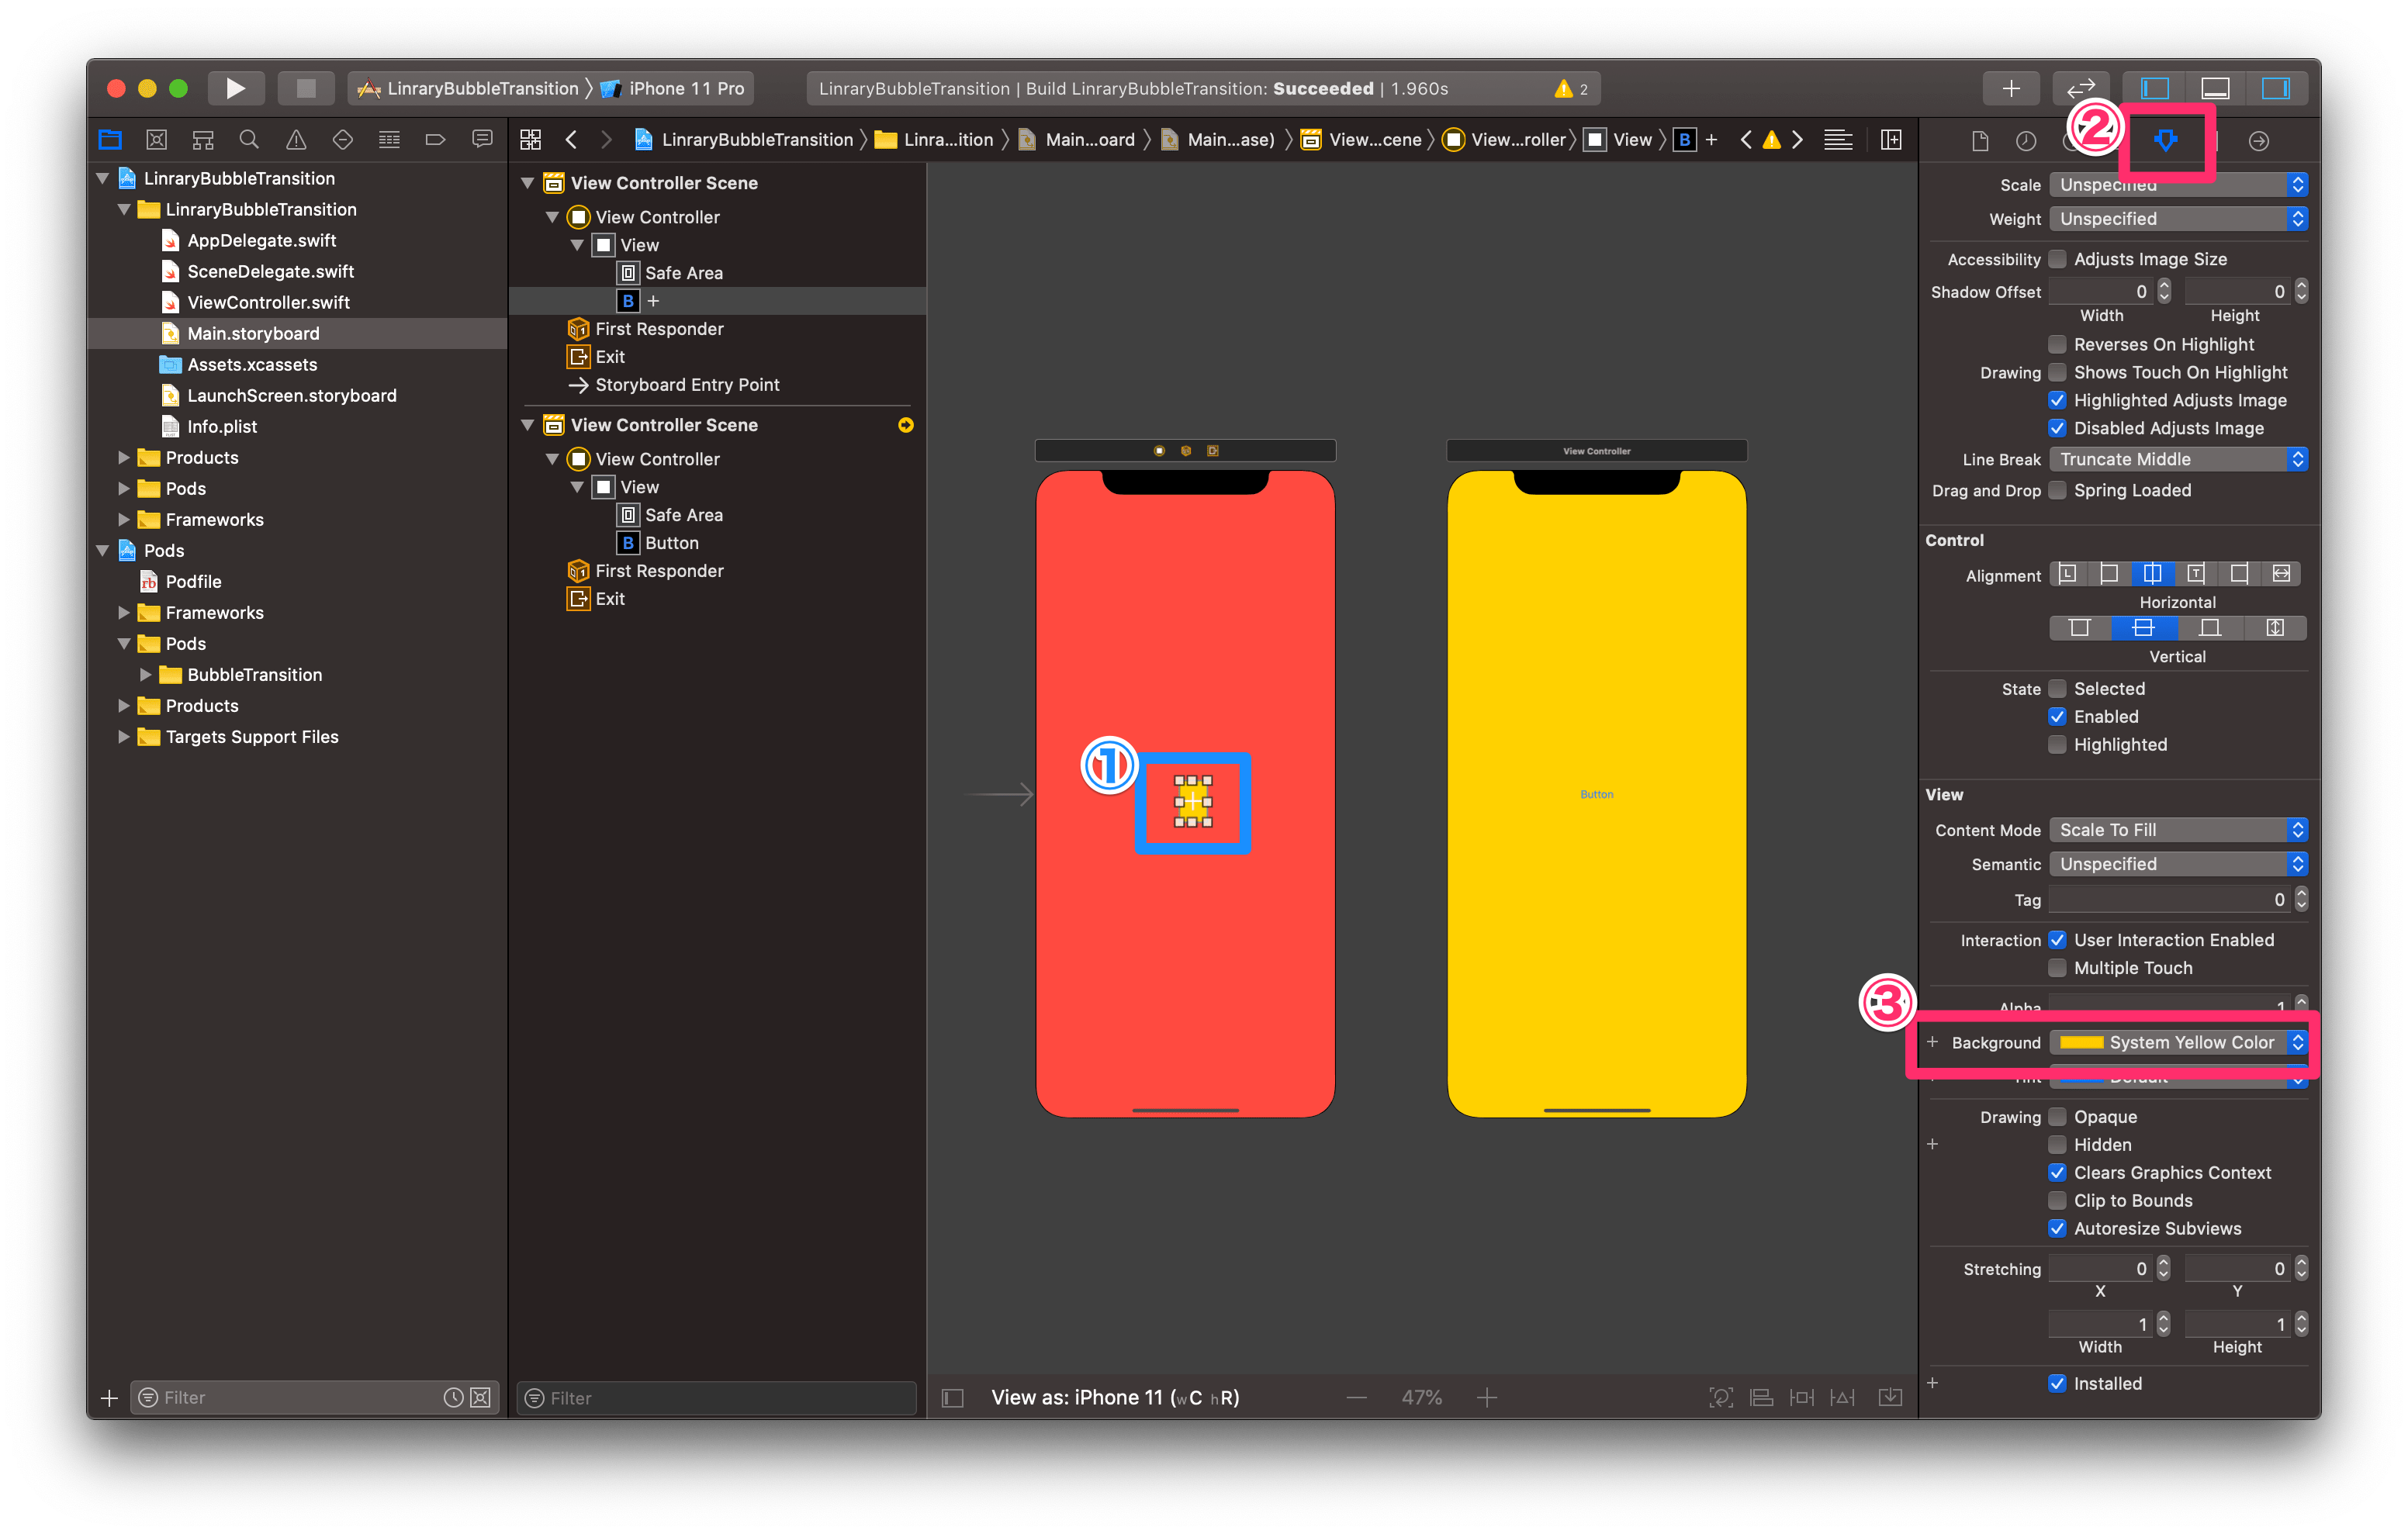
BackgroundをSystem Yellow Colorを選択
先ほどと同じように、もう1つの画面のボタンも変更します。
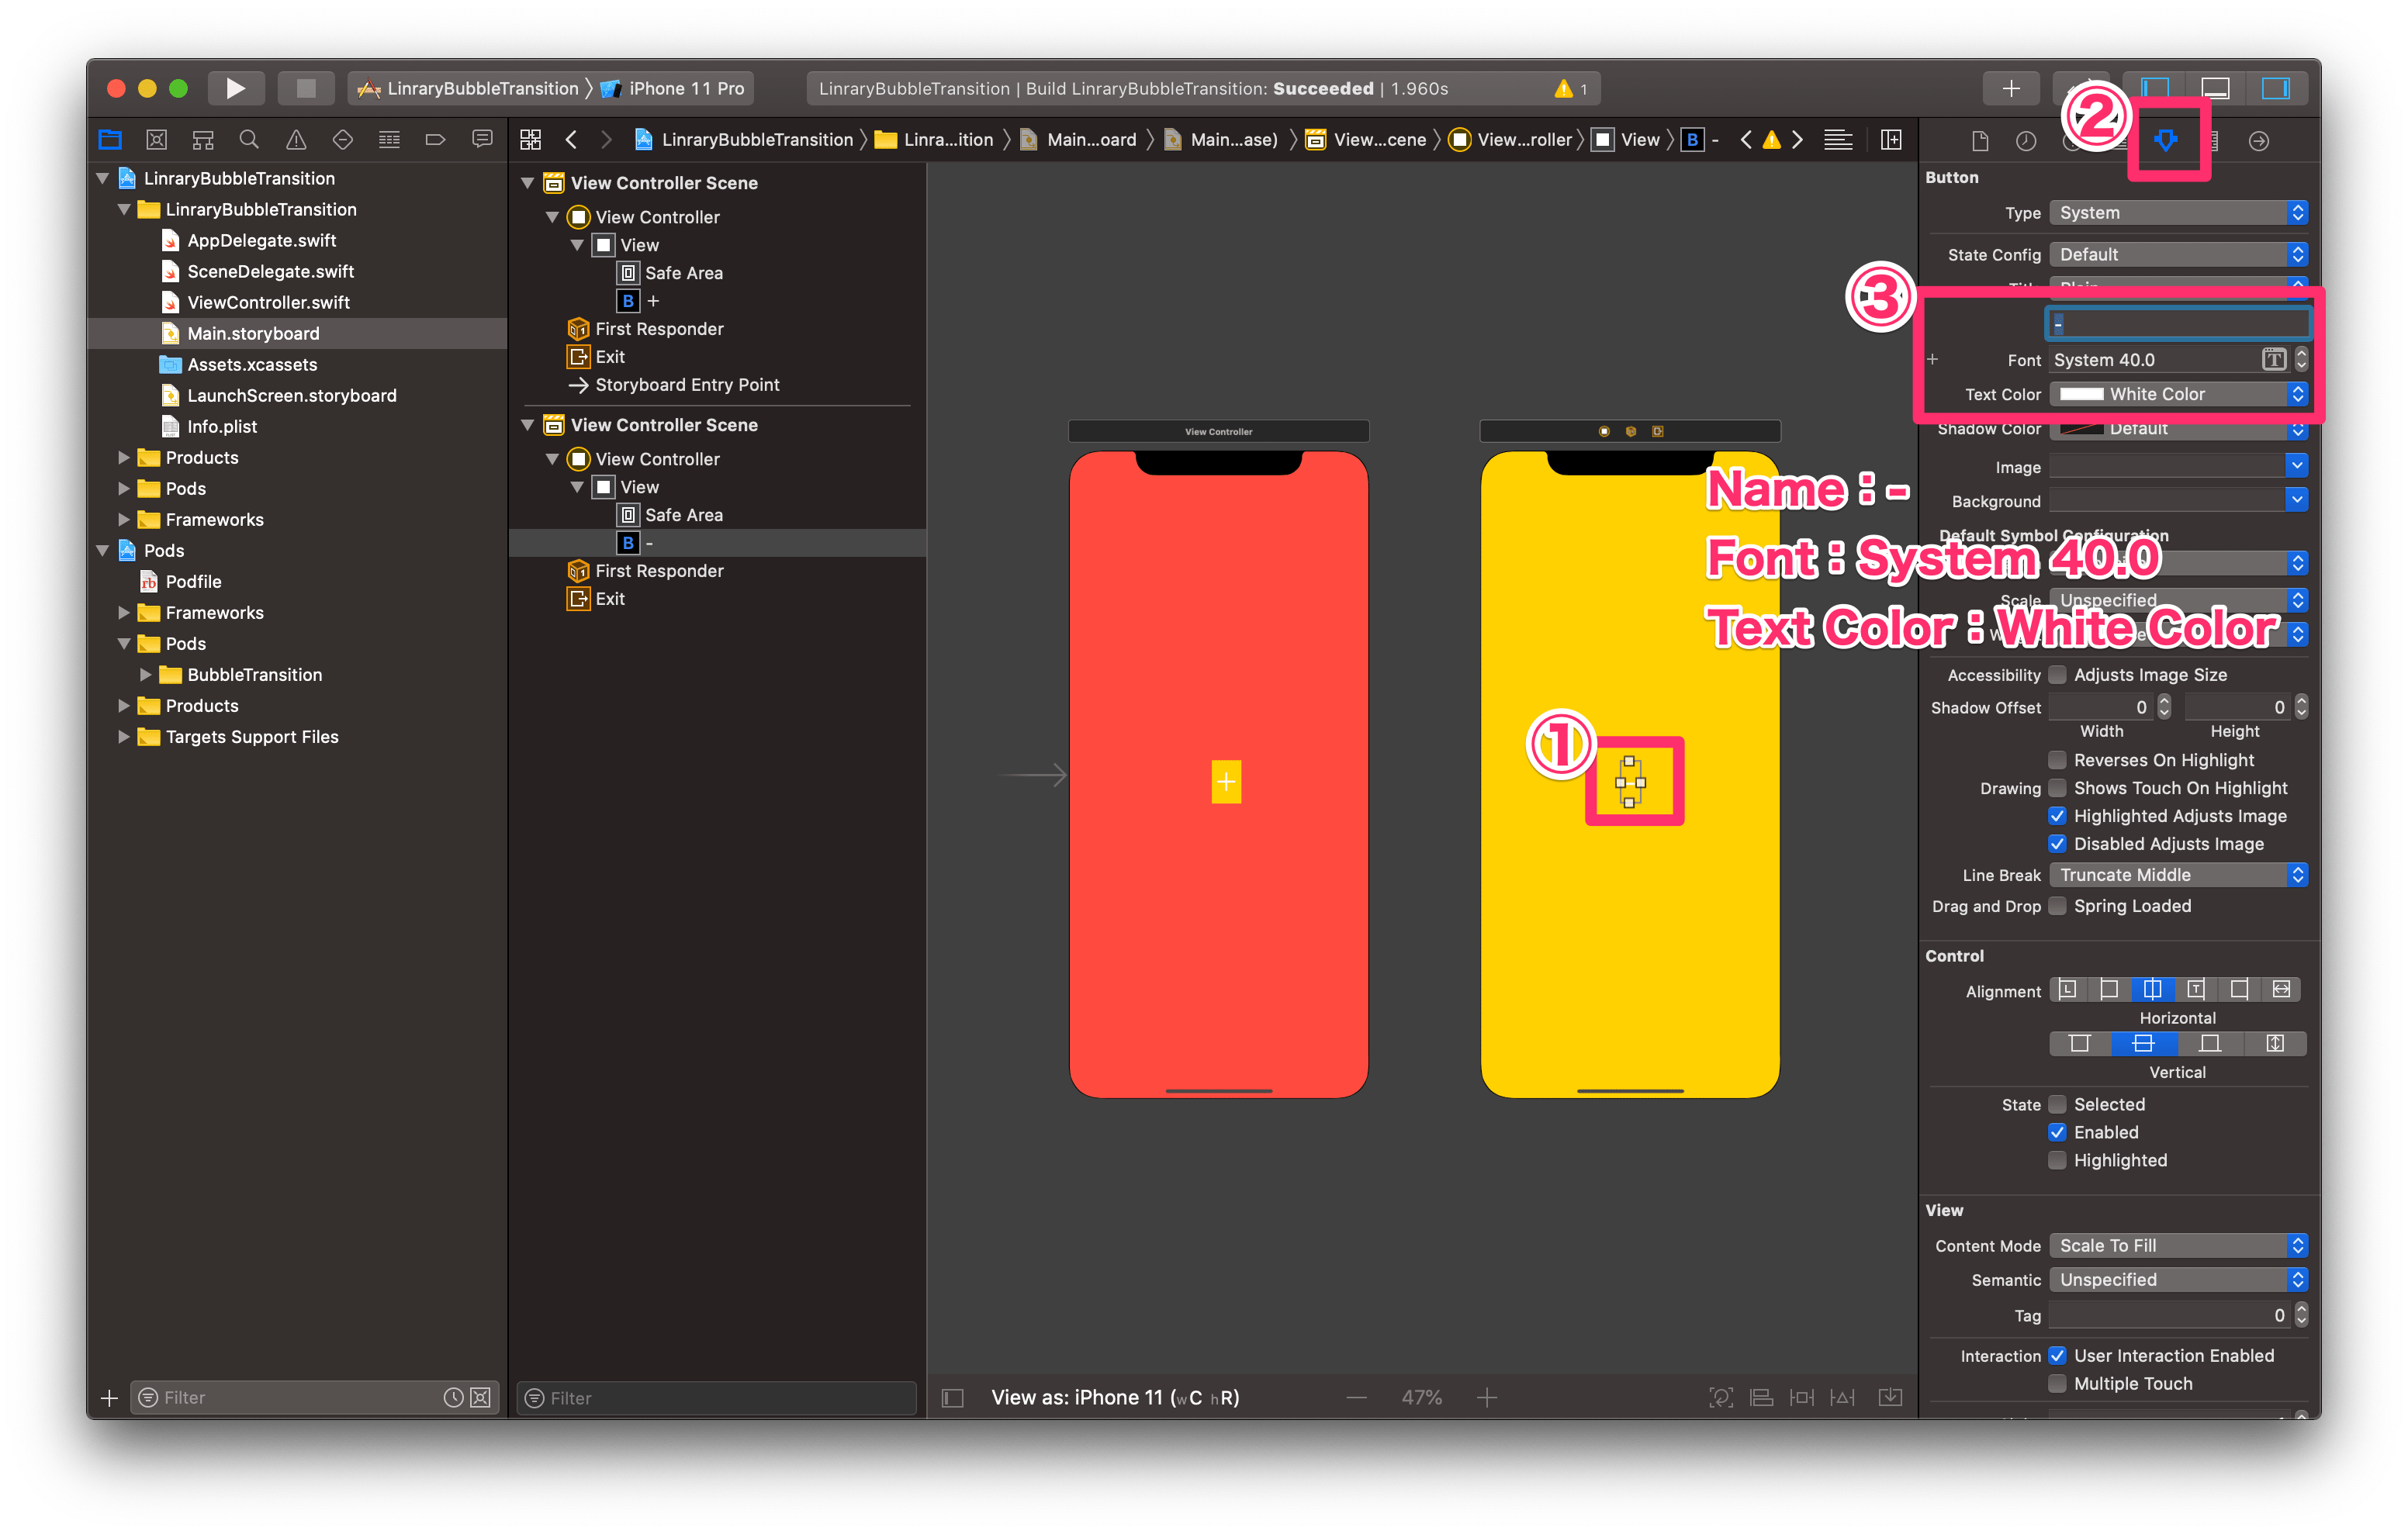
①ボタンを選択
② ![]() (inspector)を選択
(inspector)を選択
③以下のように記述
Name:-
Font:System 40.0
Text Color:White Color
BackgroundをSystem Red Colorを選択
次は、ボタンの位置を決めます。
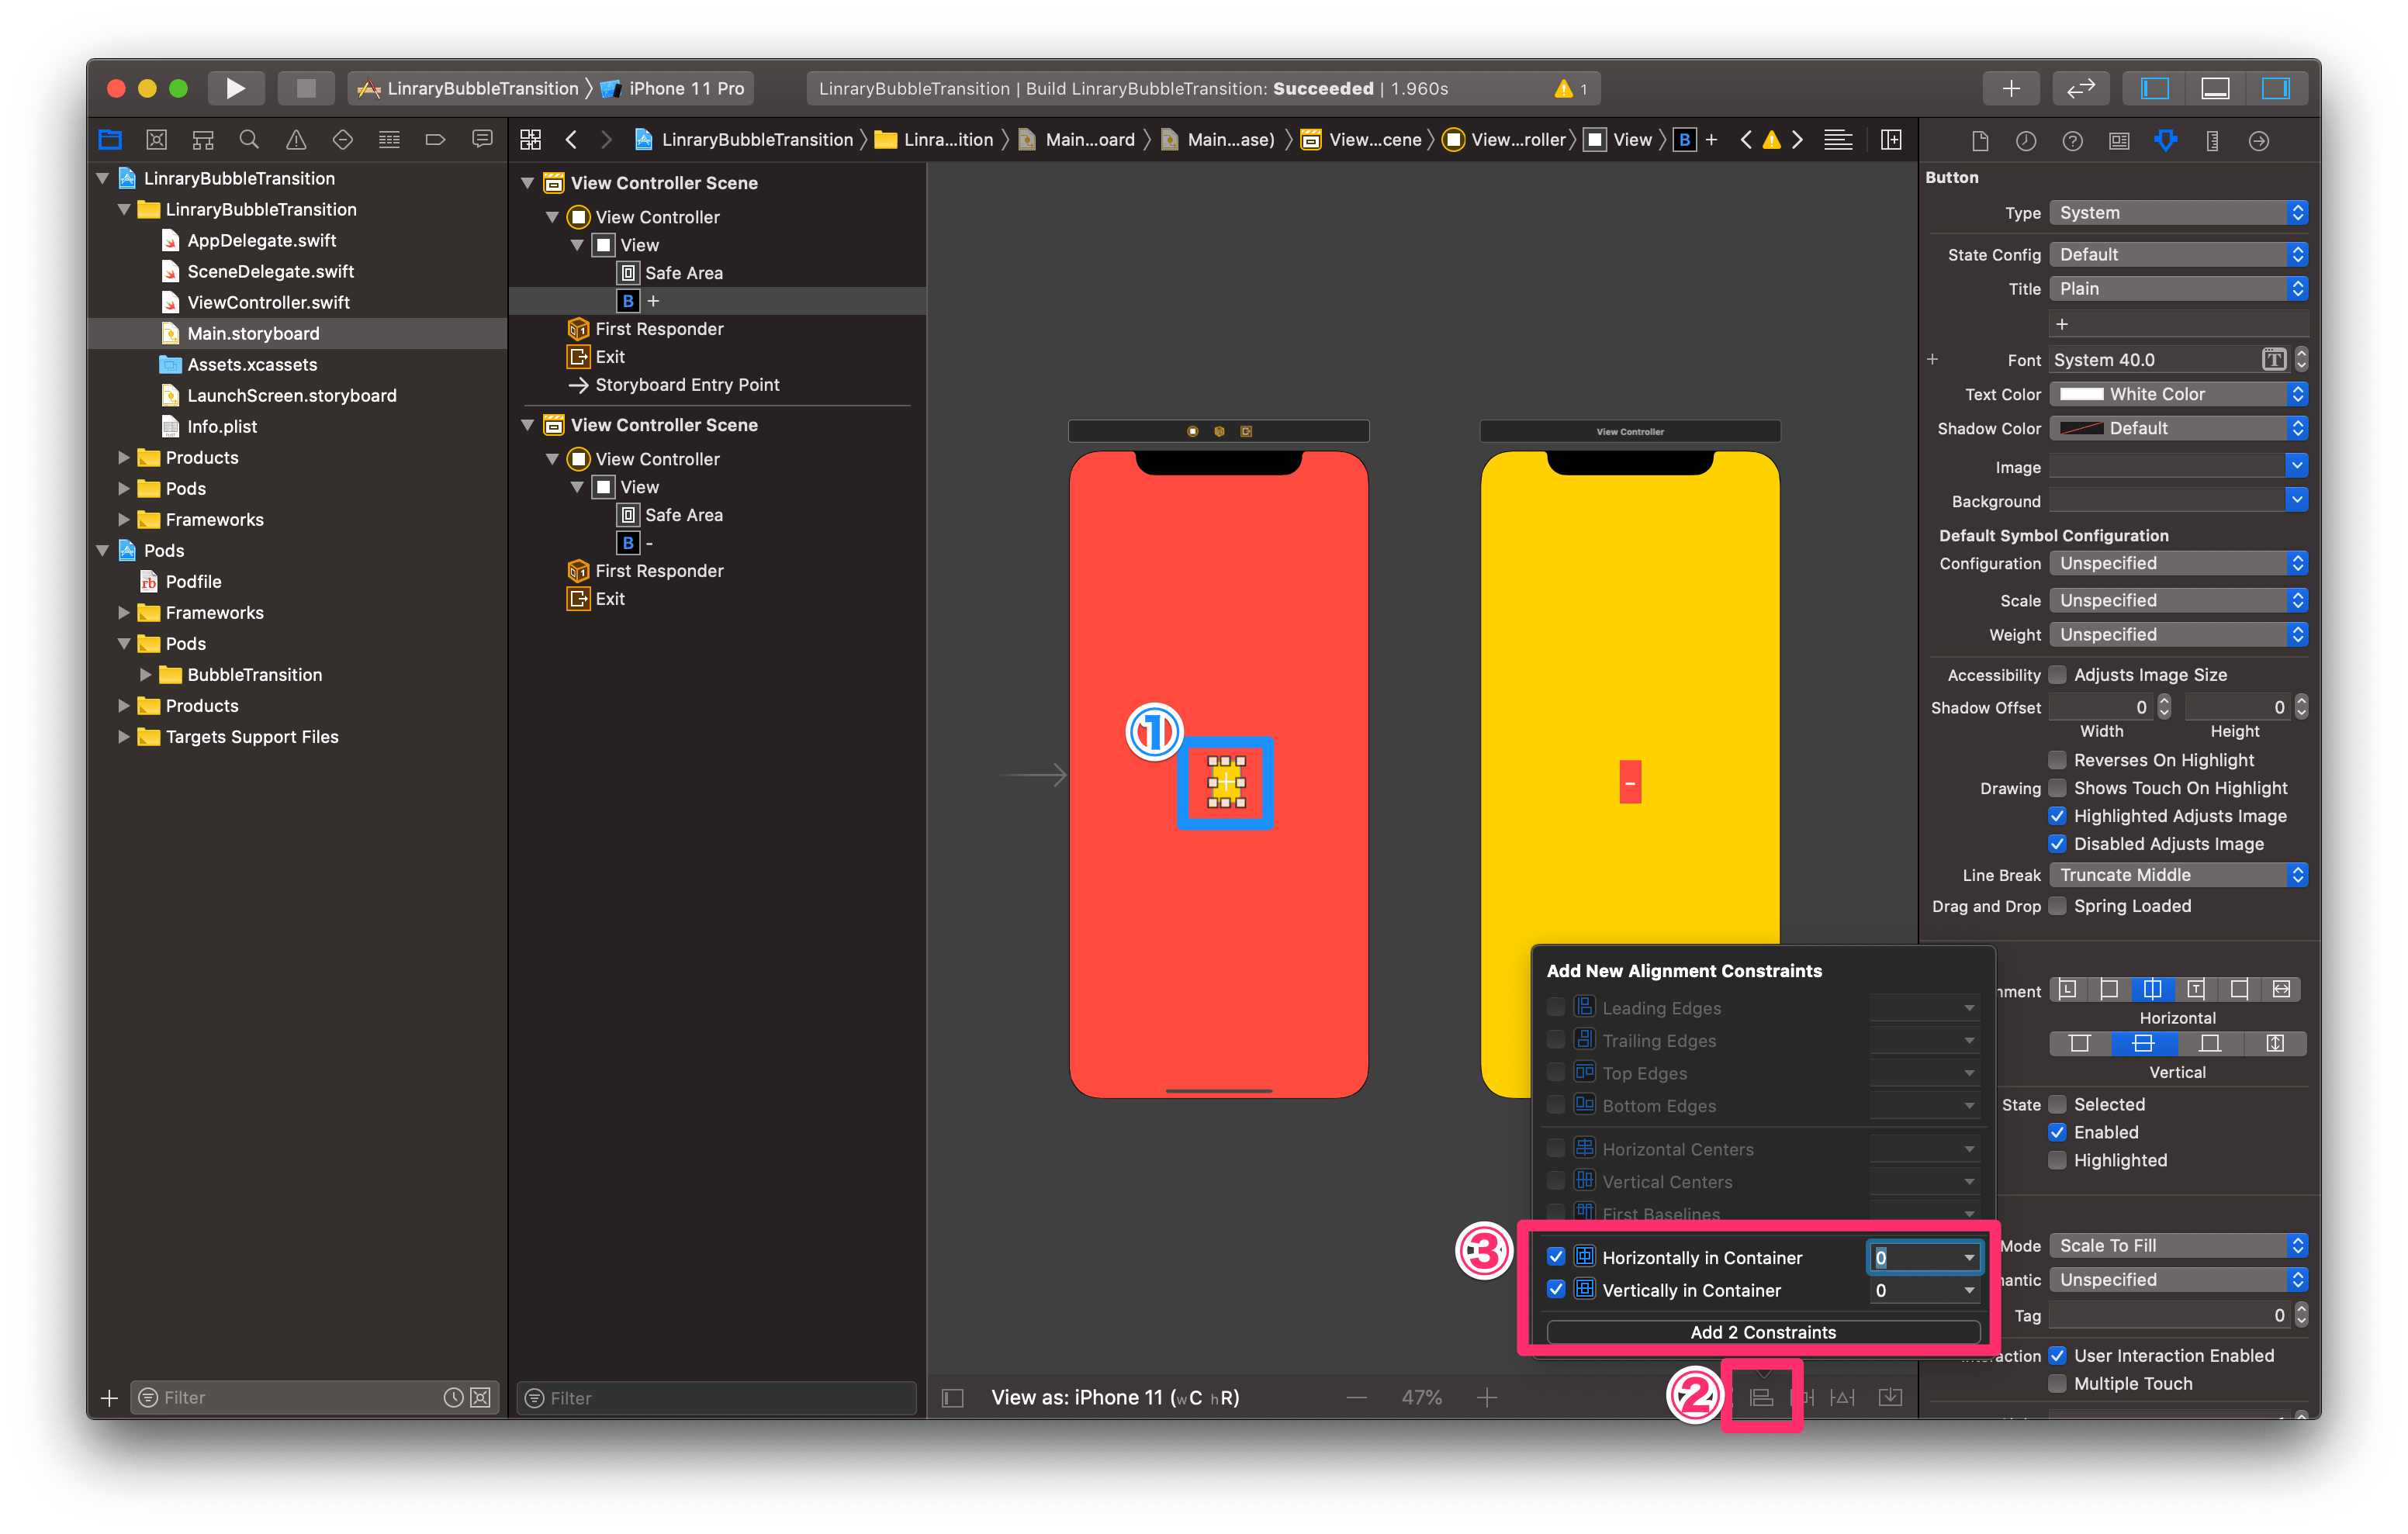
①ボタンを選択
② ![]() (Constraints)を選択
(Constraints)を選択
③Horizontally in ContainerとVertically in Containerの2つにチェックを入れ、「Add 2 Constraints」をクリック
次は、ボタンの大きさを決めます。
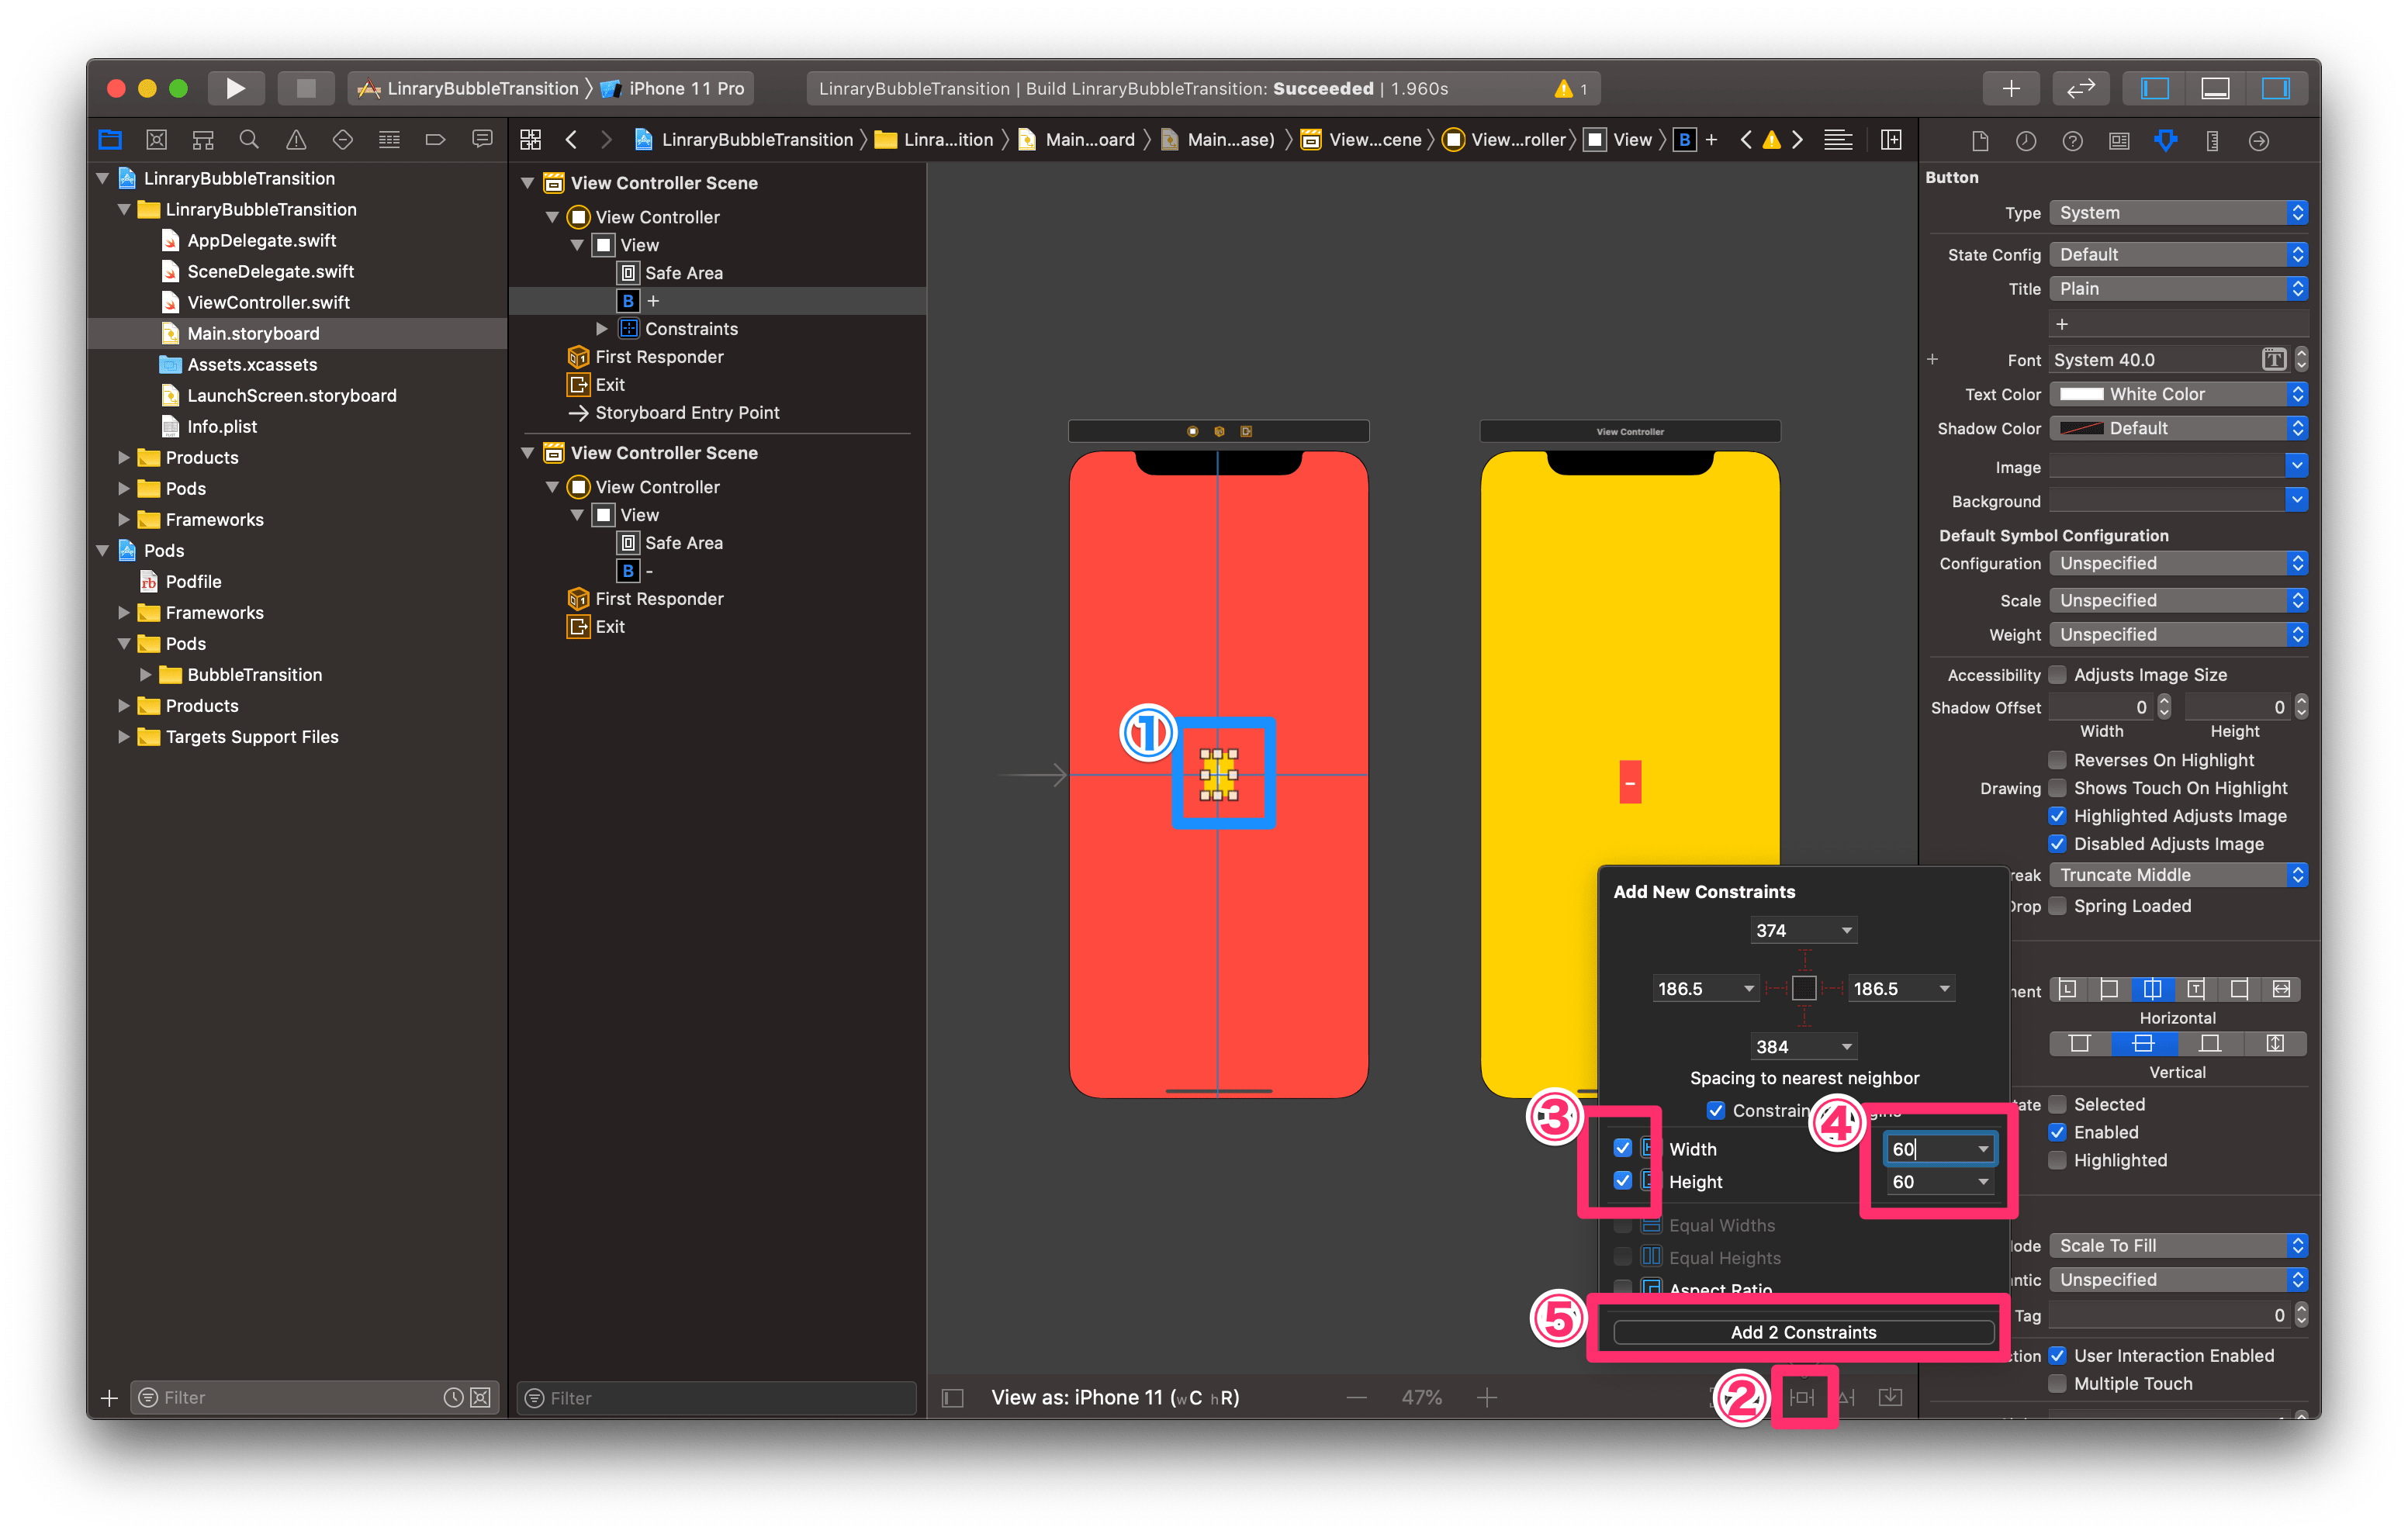
①ボタンを選択
② ![]() (Constraints)を選択
(Constraints)を選択
③WidthとHeightにチェックを入れる
④それぞれ60にする
⑤「Add 2 Constraints」をクリック
ボタンを押したら、画面遷移するように設定します。
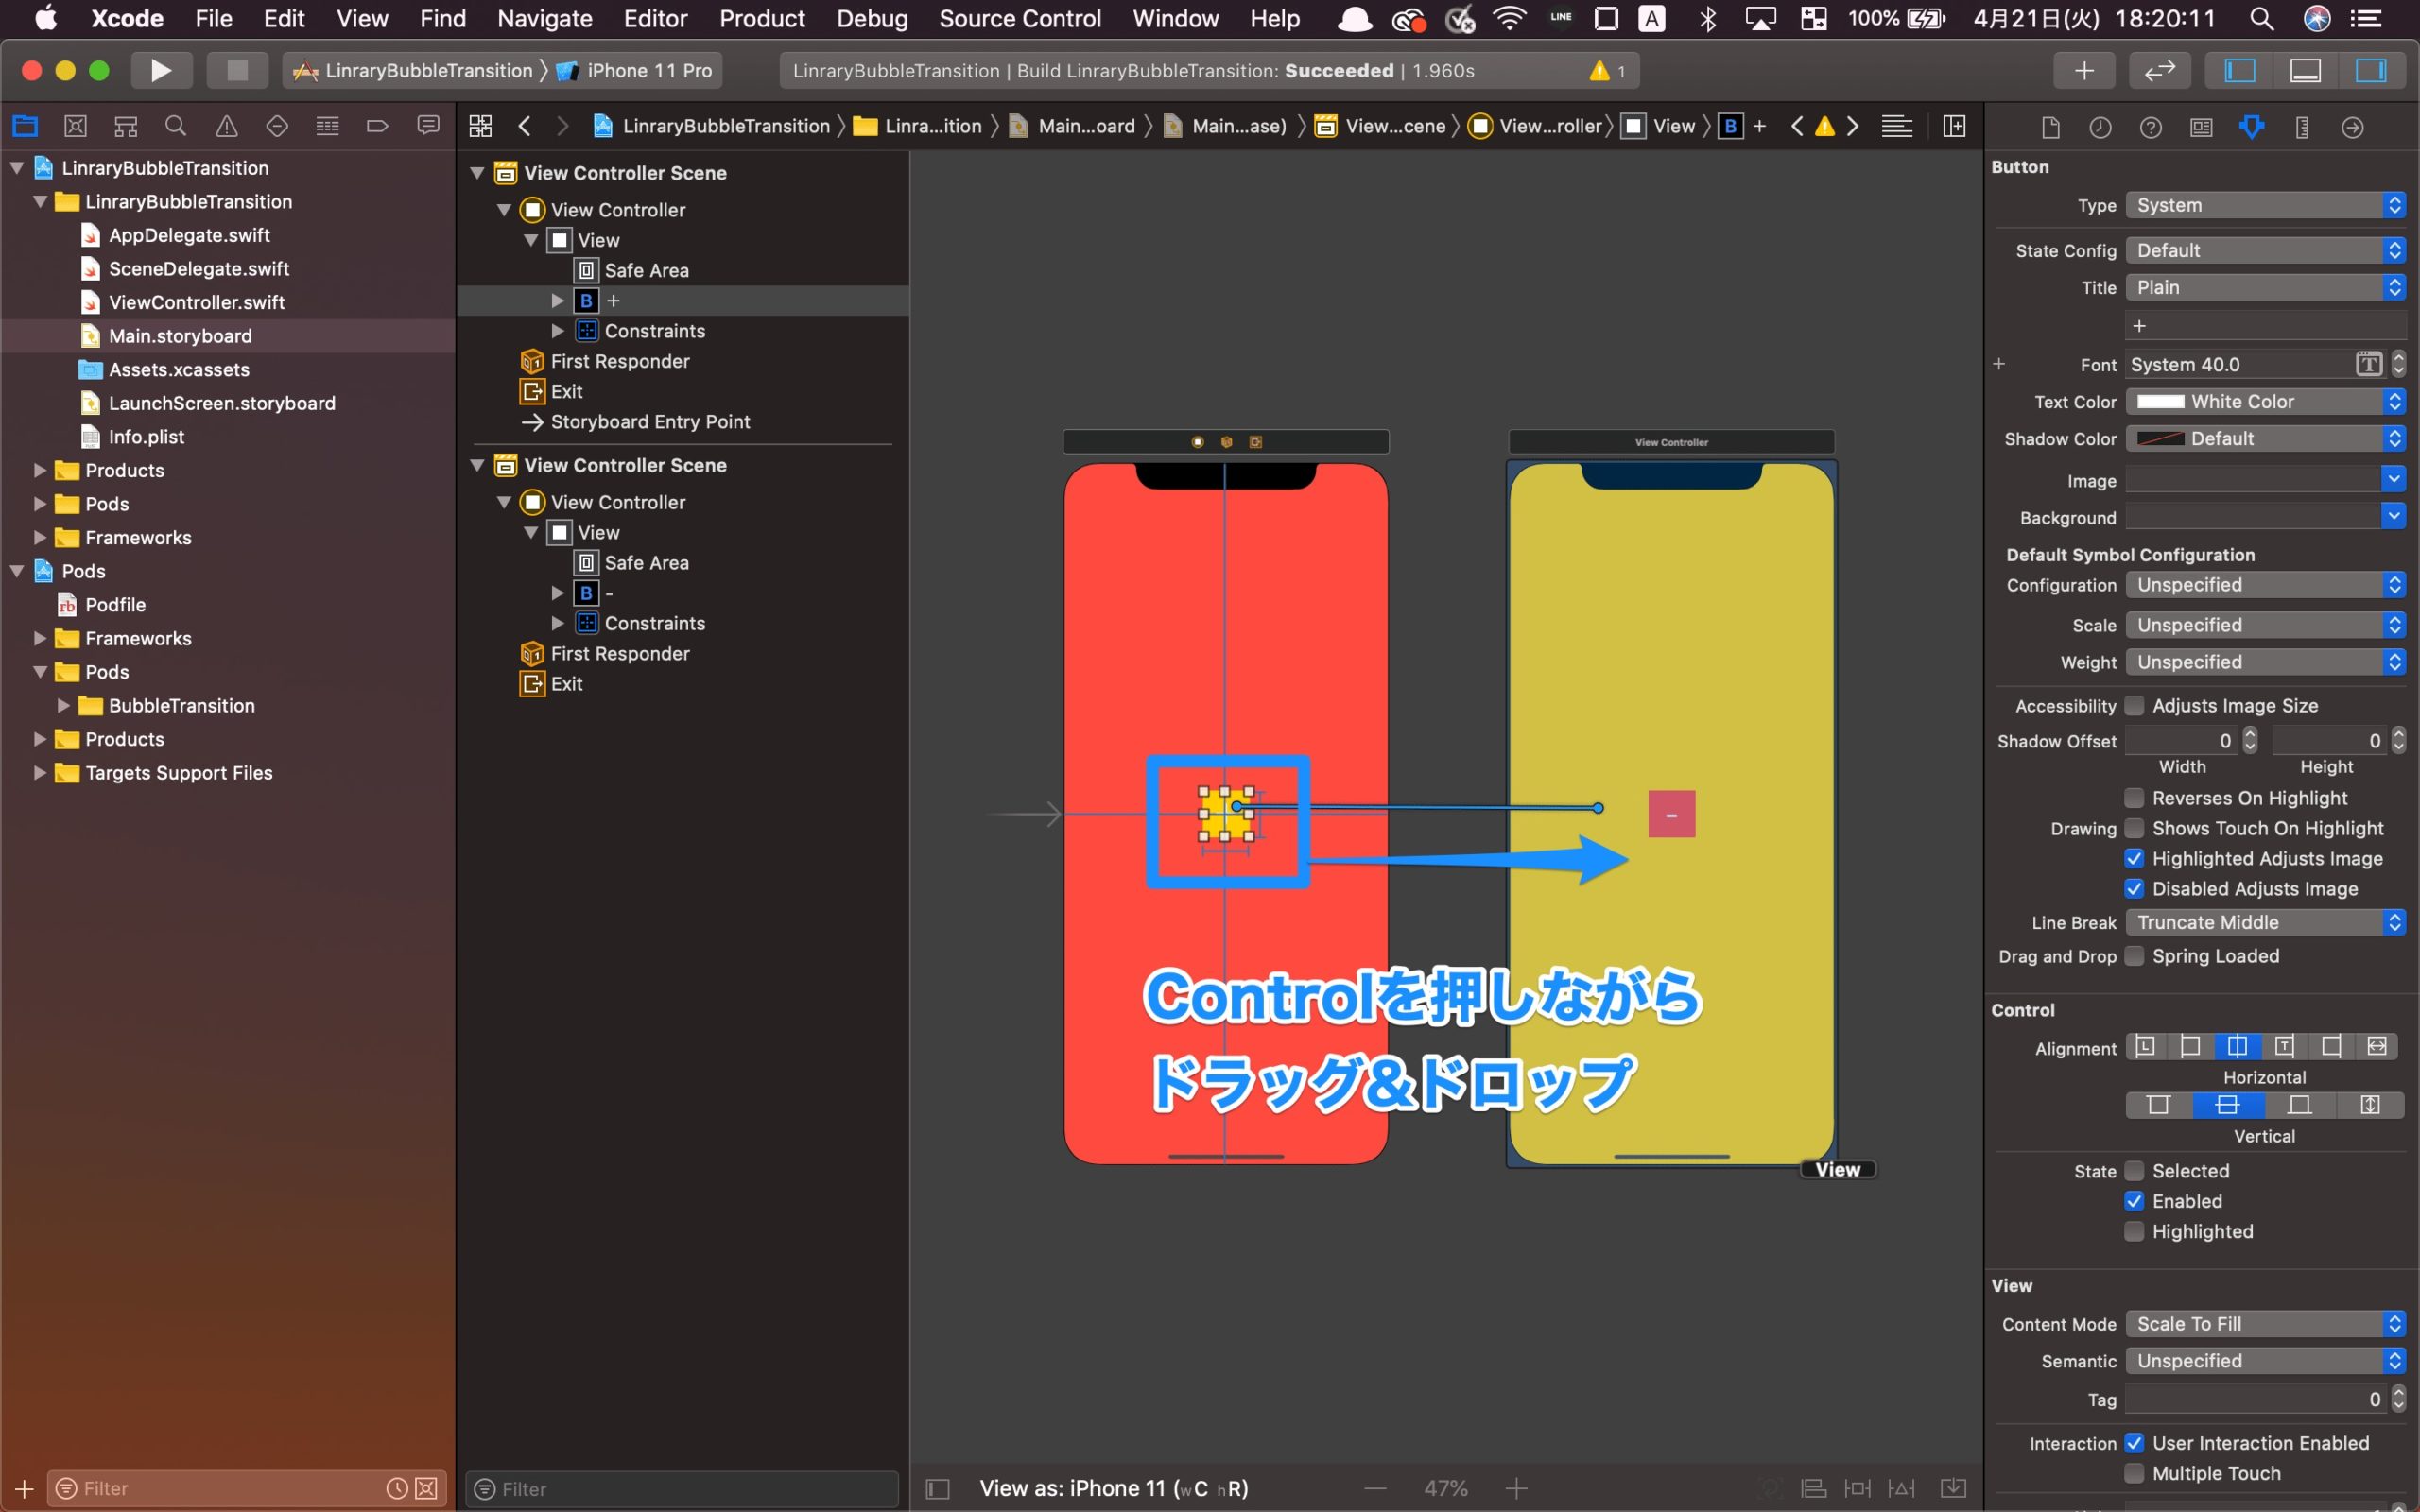
controlを押しながら、2つ目の画面にドラッグ&ドロップしましょう。

「Present Modally」を選択
画面遷移を設定すると、右側の画面の上に余白ができてしまうので、フルスクリーンにします。

①右側のボードの上のバーを選択
② ![]() (inspector)を選択
(inspector)を選択
③PresentationをFull Screenに変更
コードとストーリーボードを紐付ける
コードと紐づけるために、コード画面を出します。
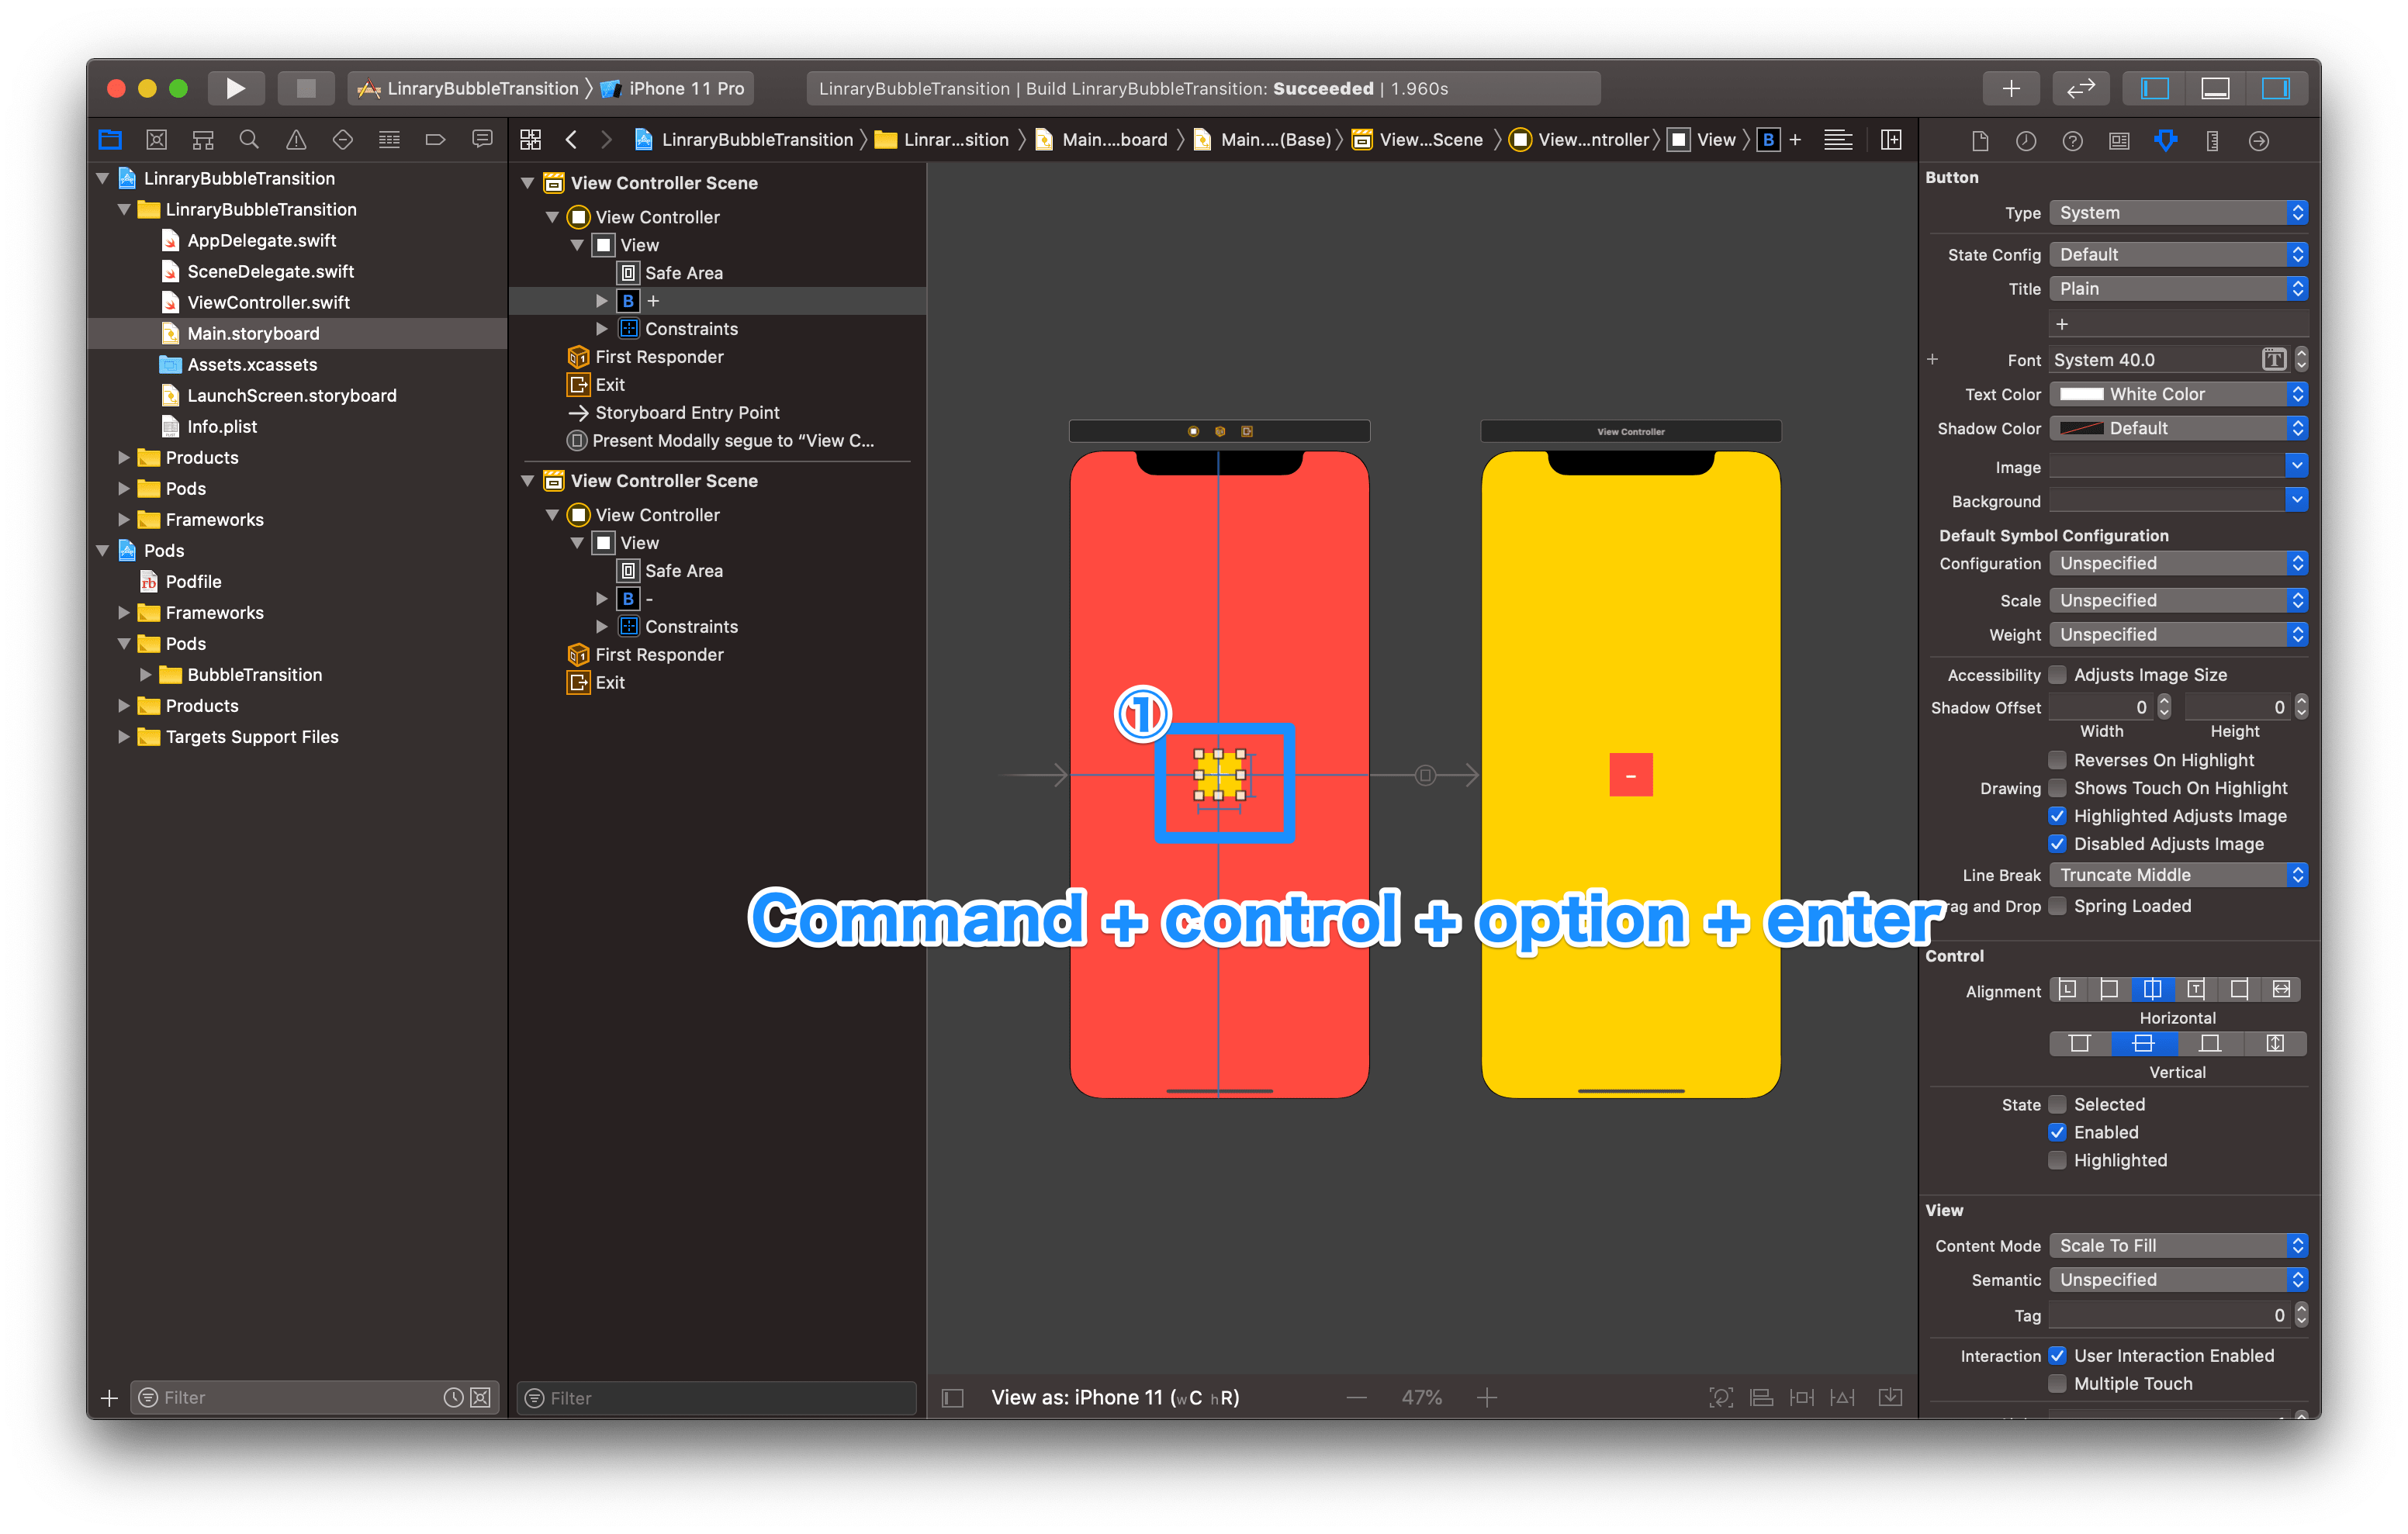
①ボタンを選択
②command + control + option + enterで、コード画面と2画面表示します。
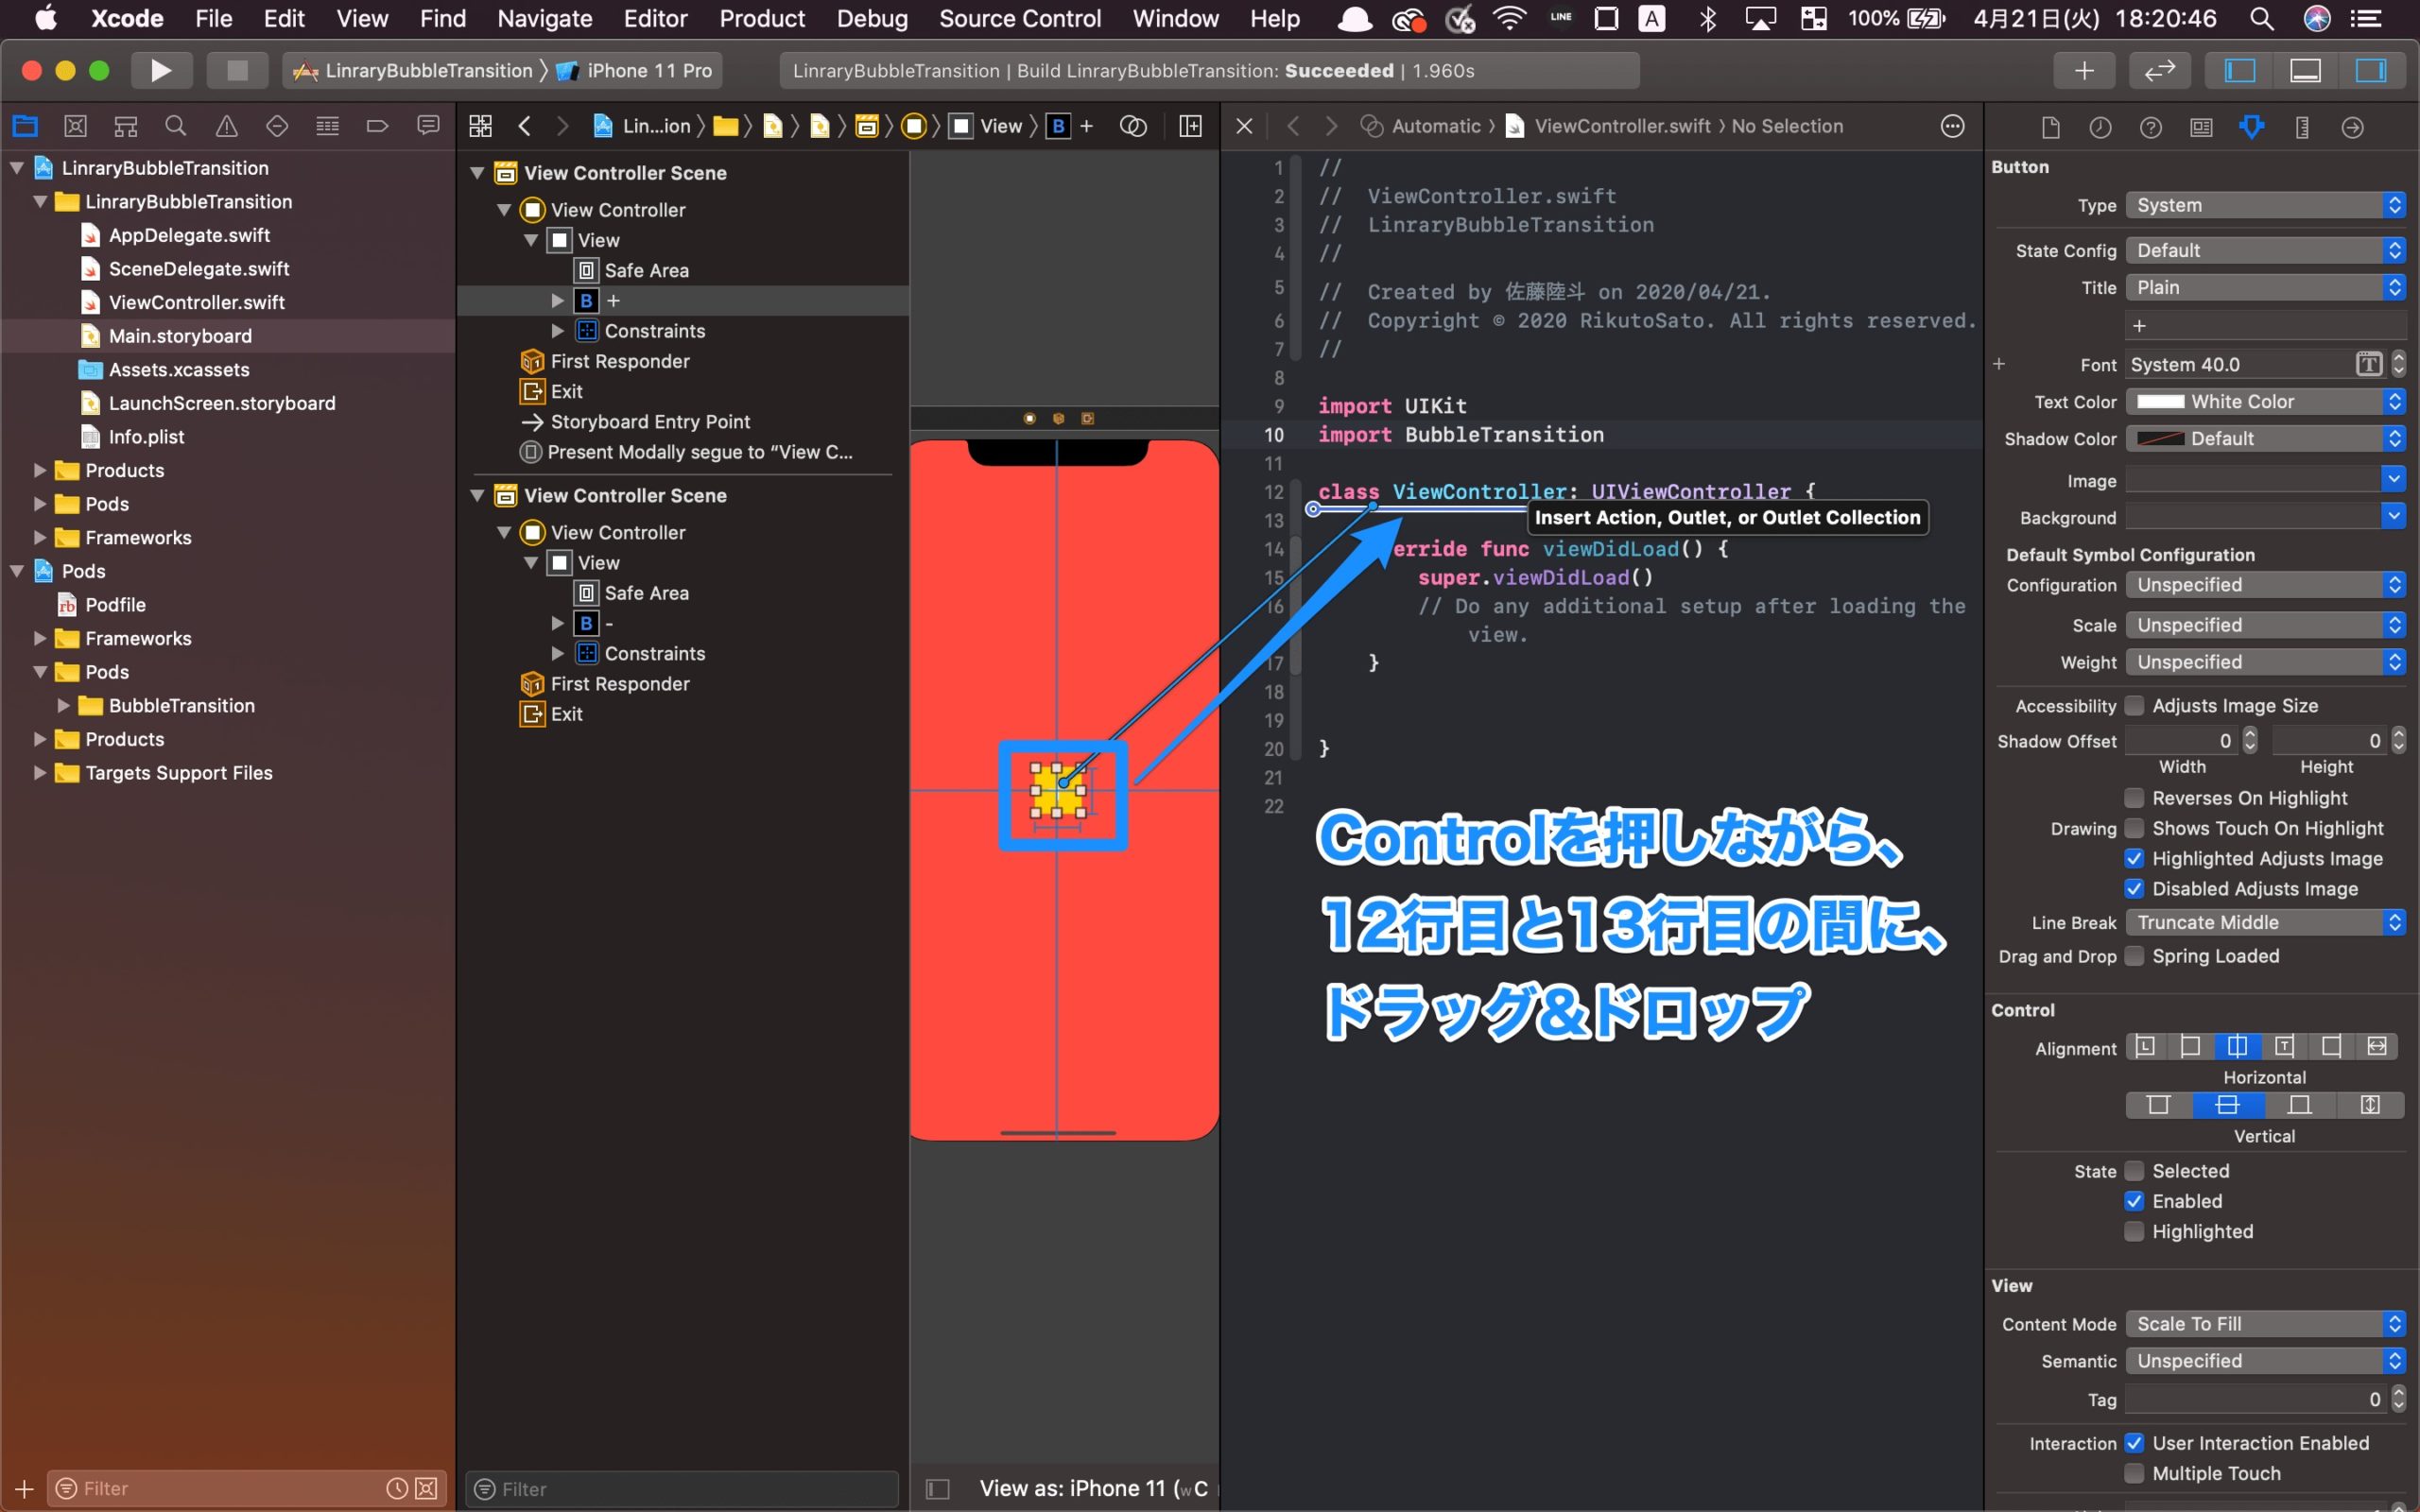
ボタンを選択し、controlを押しながら、12行目と13行目にドラッグ&ドロップ
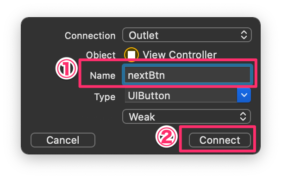
NameにnextBtnと入力し、「Connect」をクリック
次は、遷移先の画面のコードファイルを作成します。
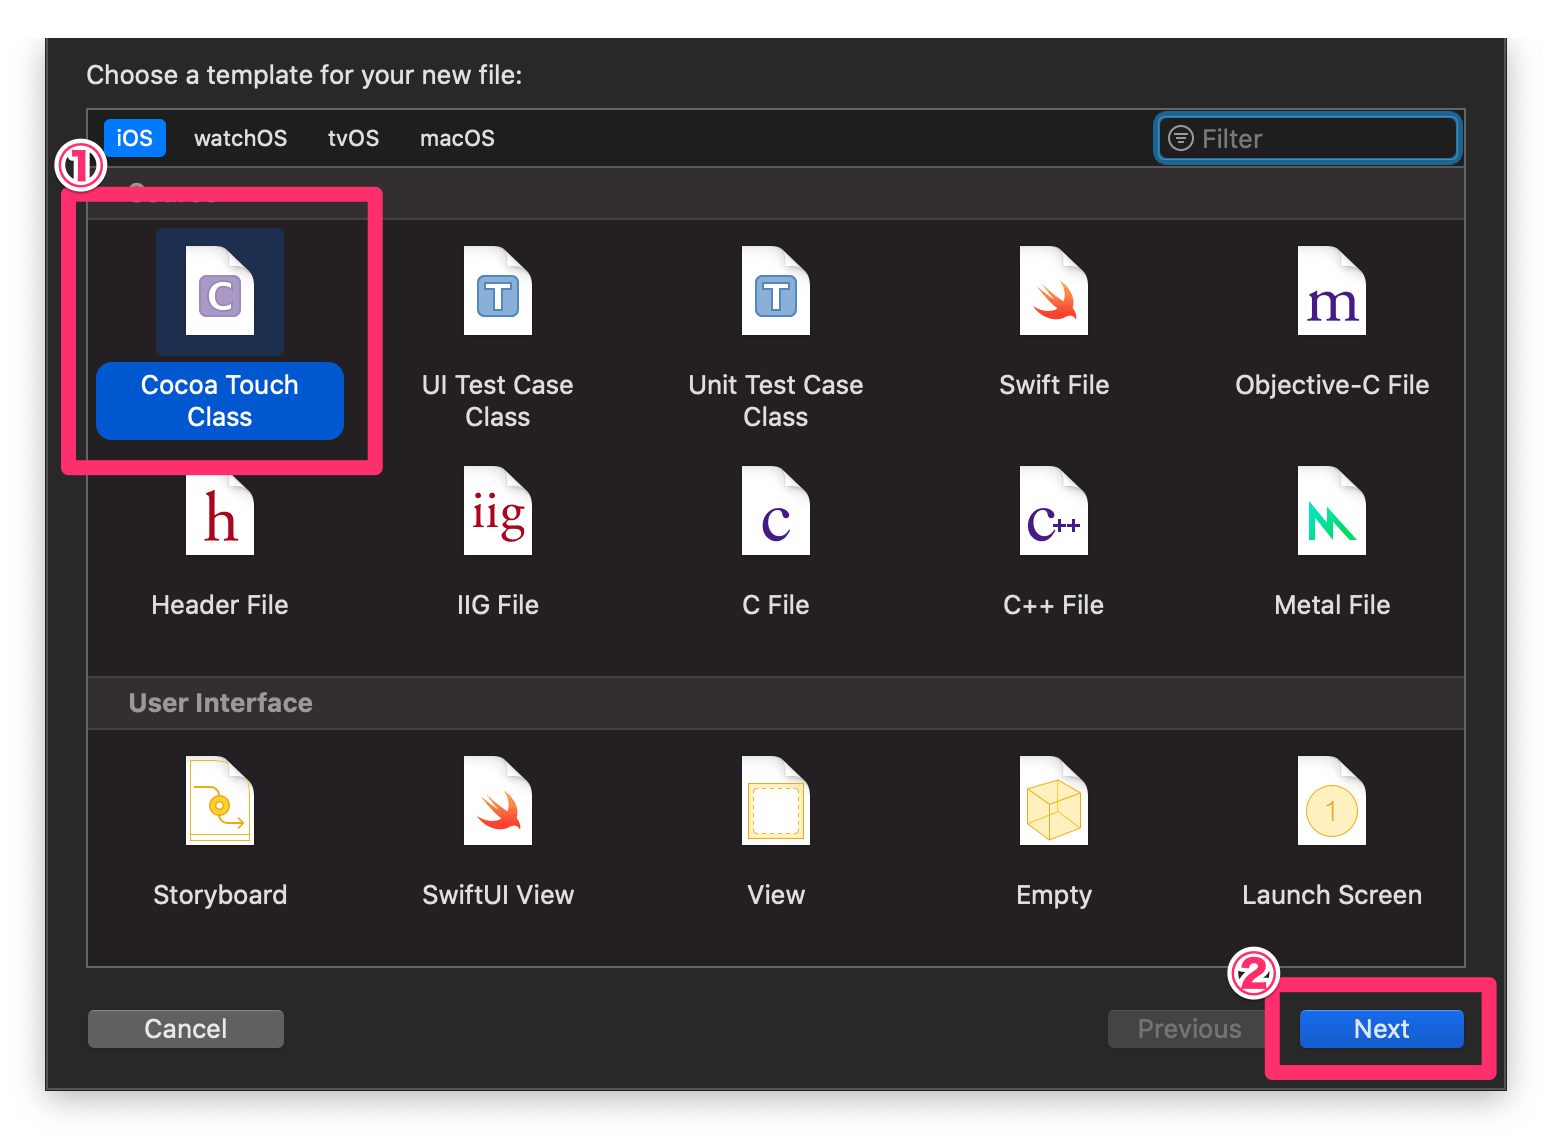
command + nで、ファイル作成画面を開く
①「Cocoa Touch Class」を選択
②「Next」をクリック
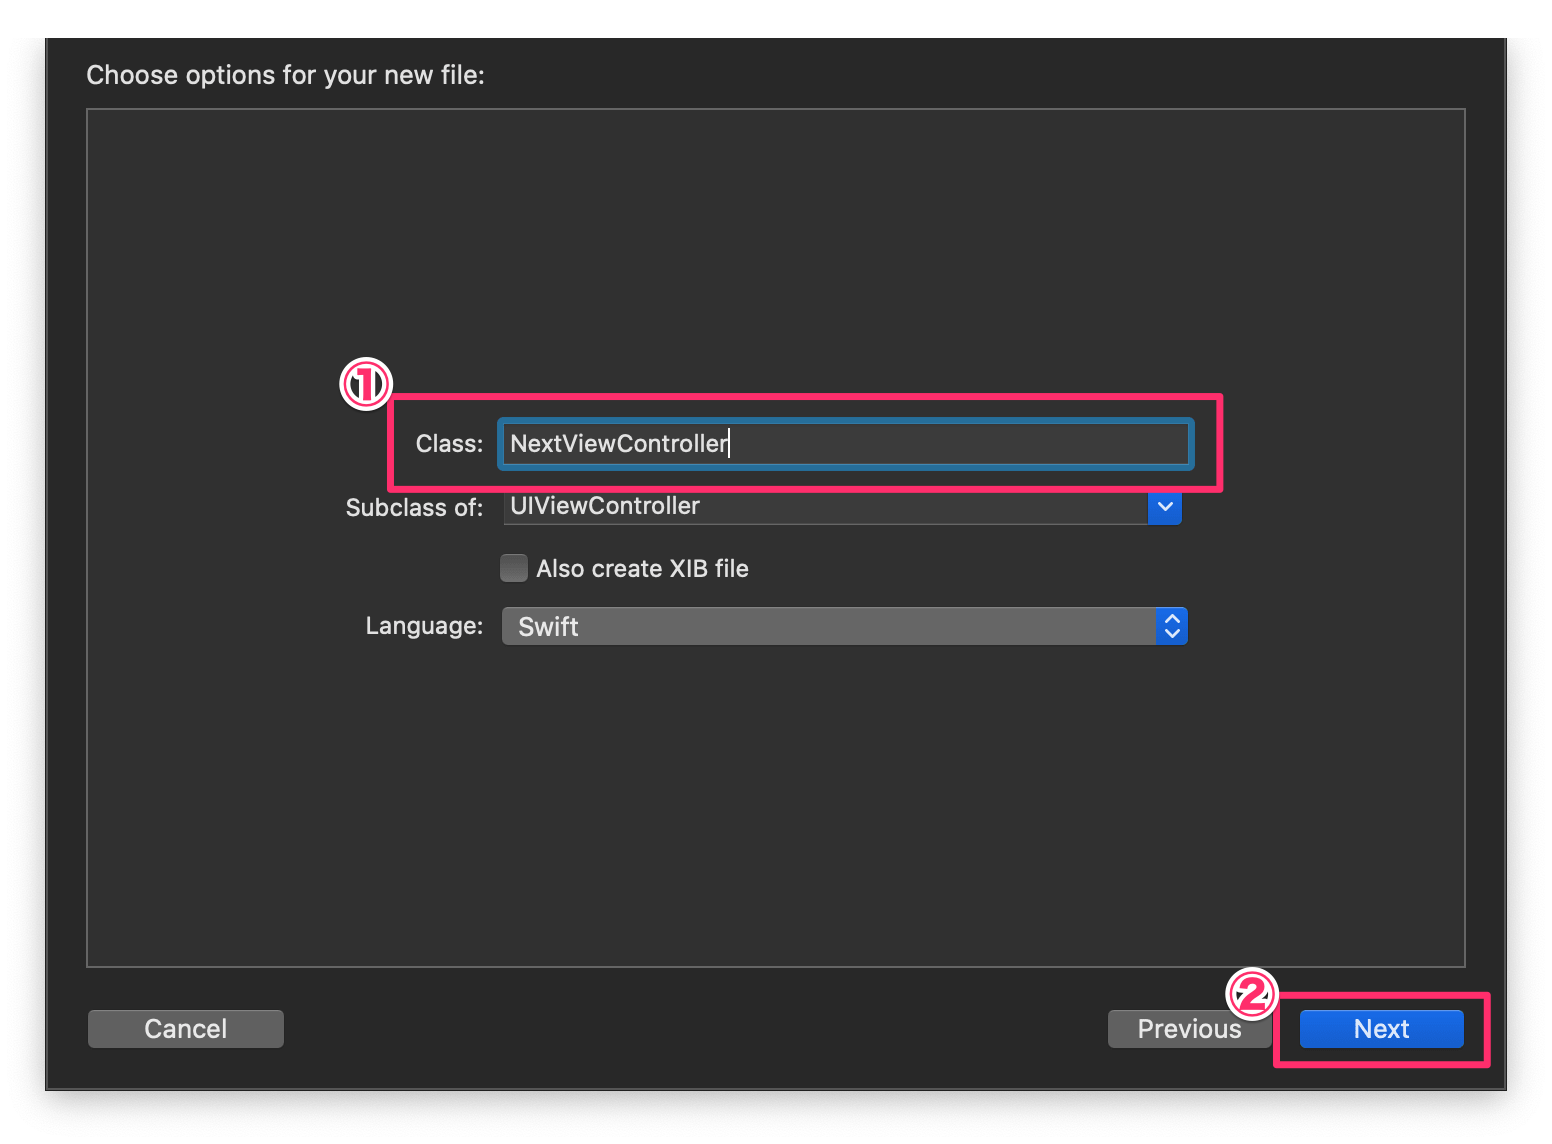
①ClassにNextViewControllerと入力
②「Next」をクリック
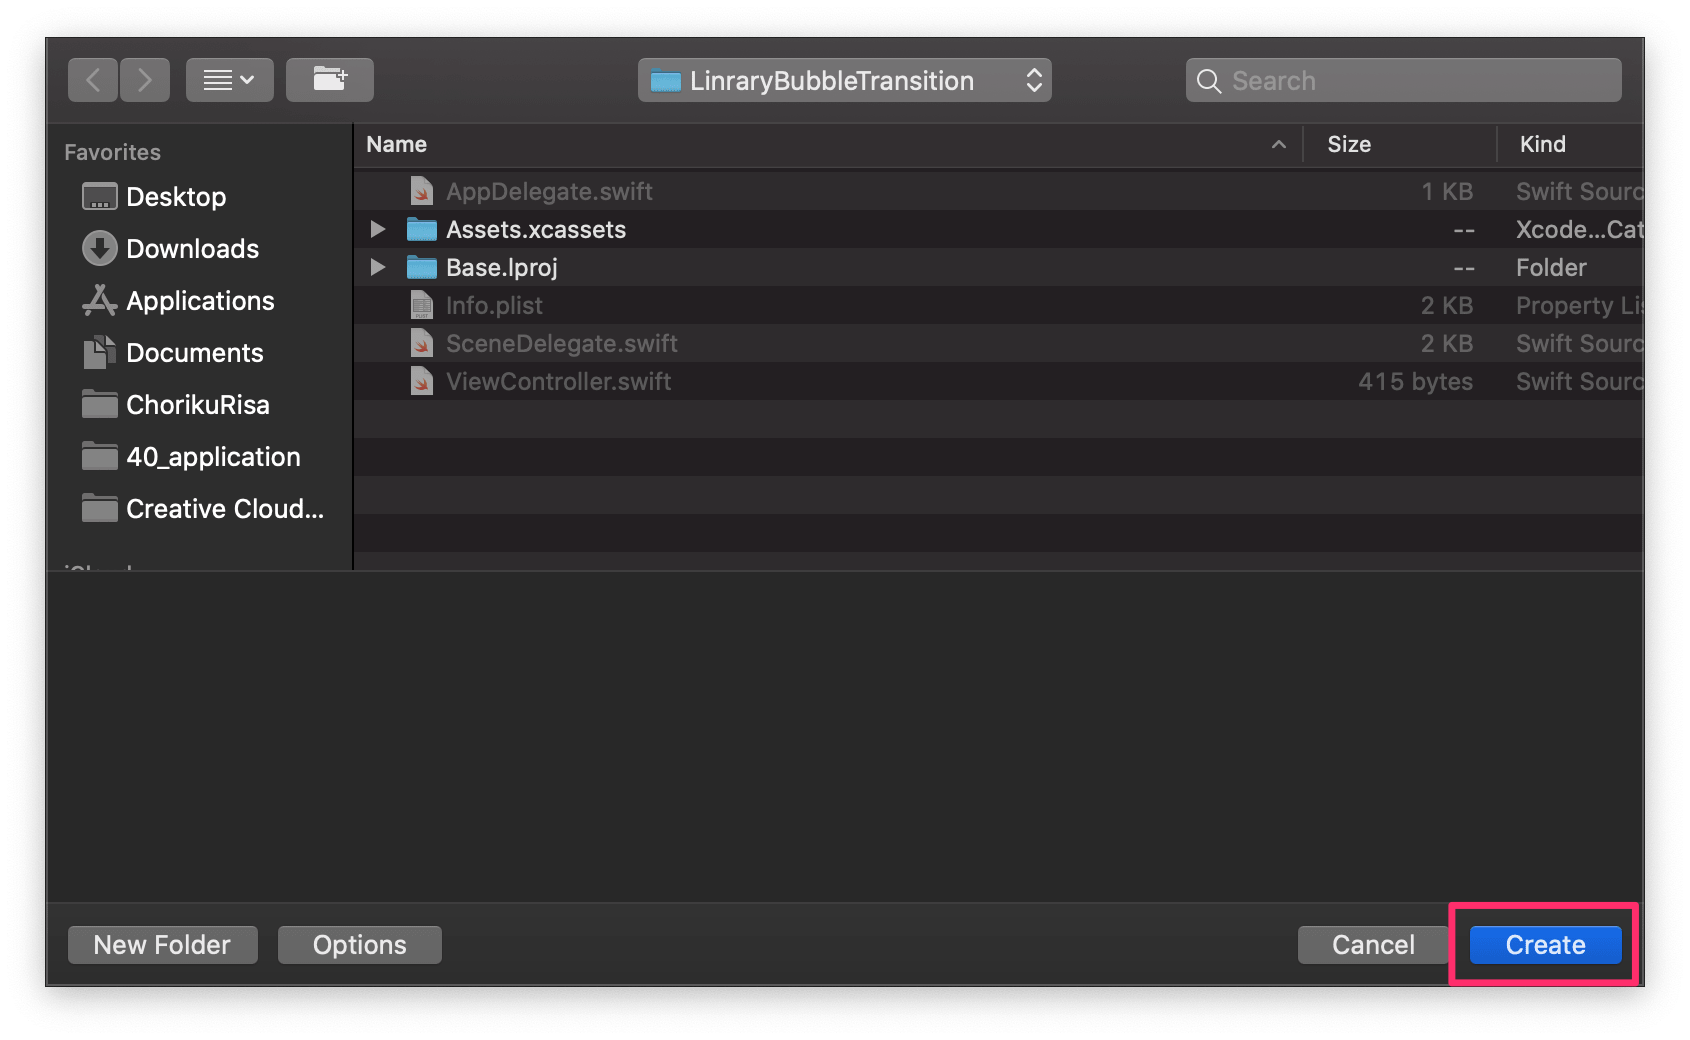
「Create」をクリック
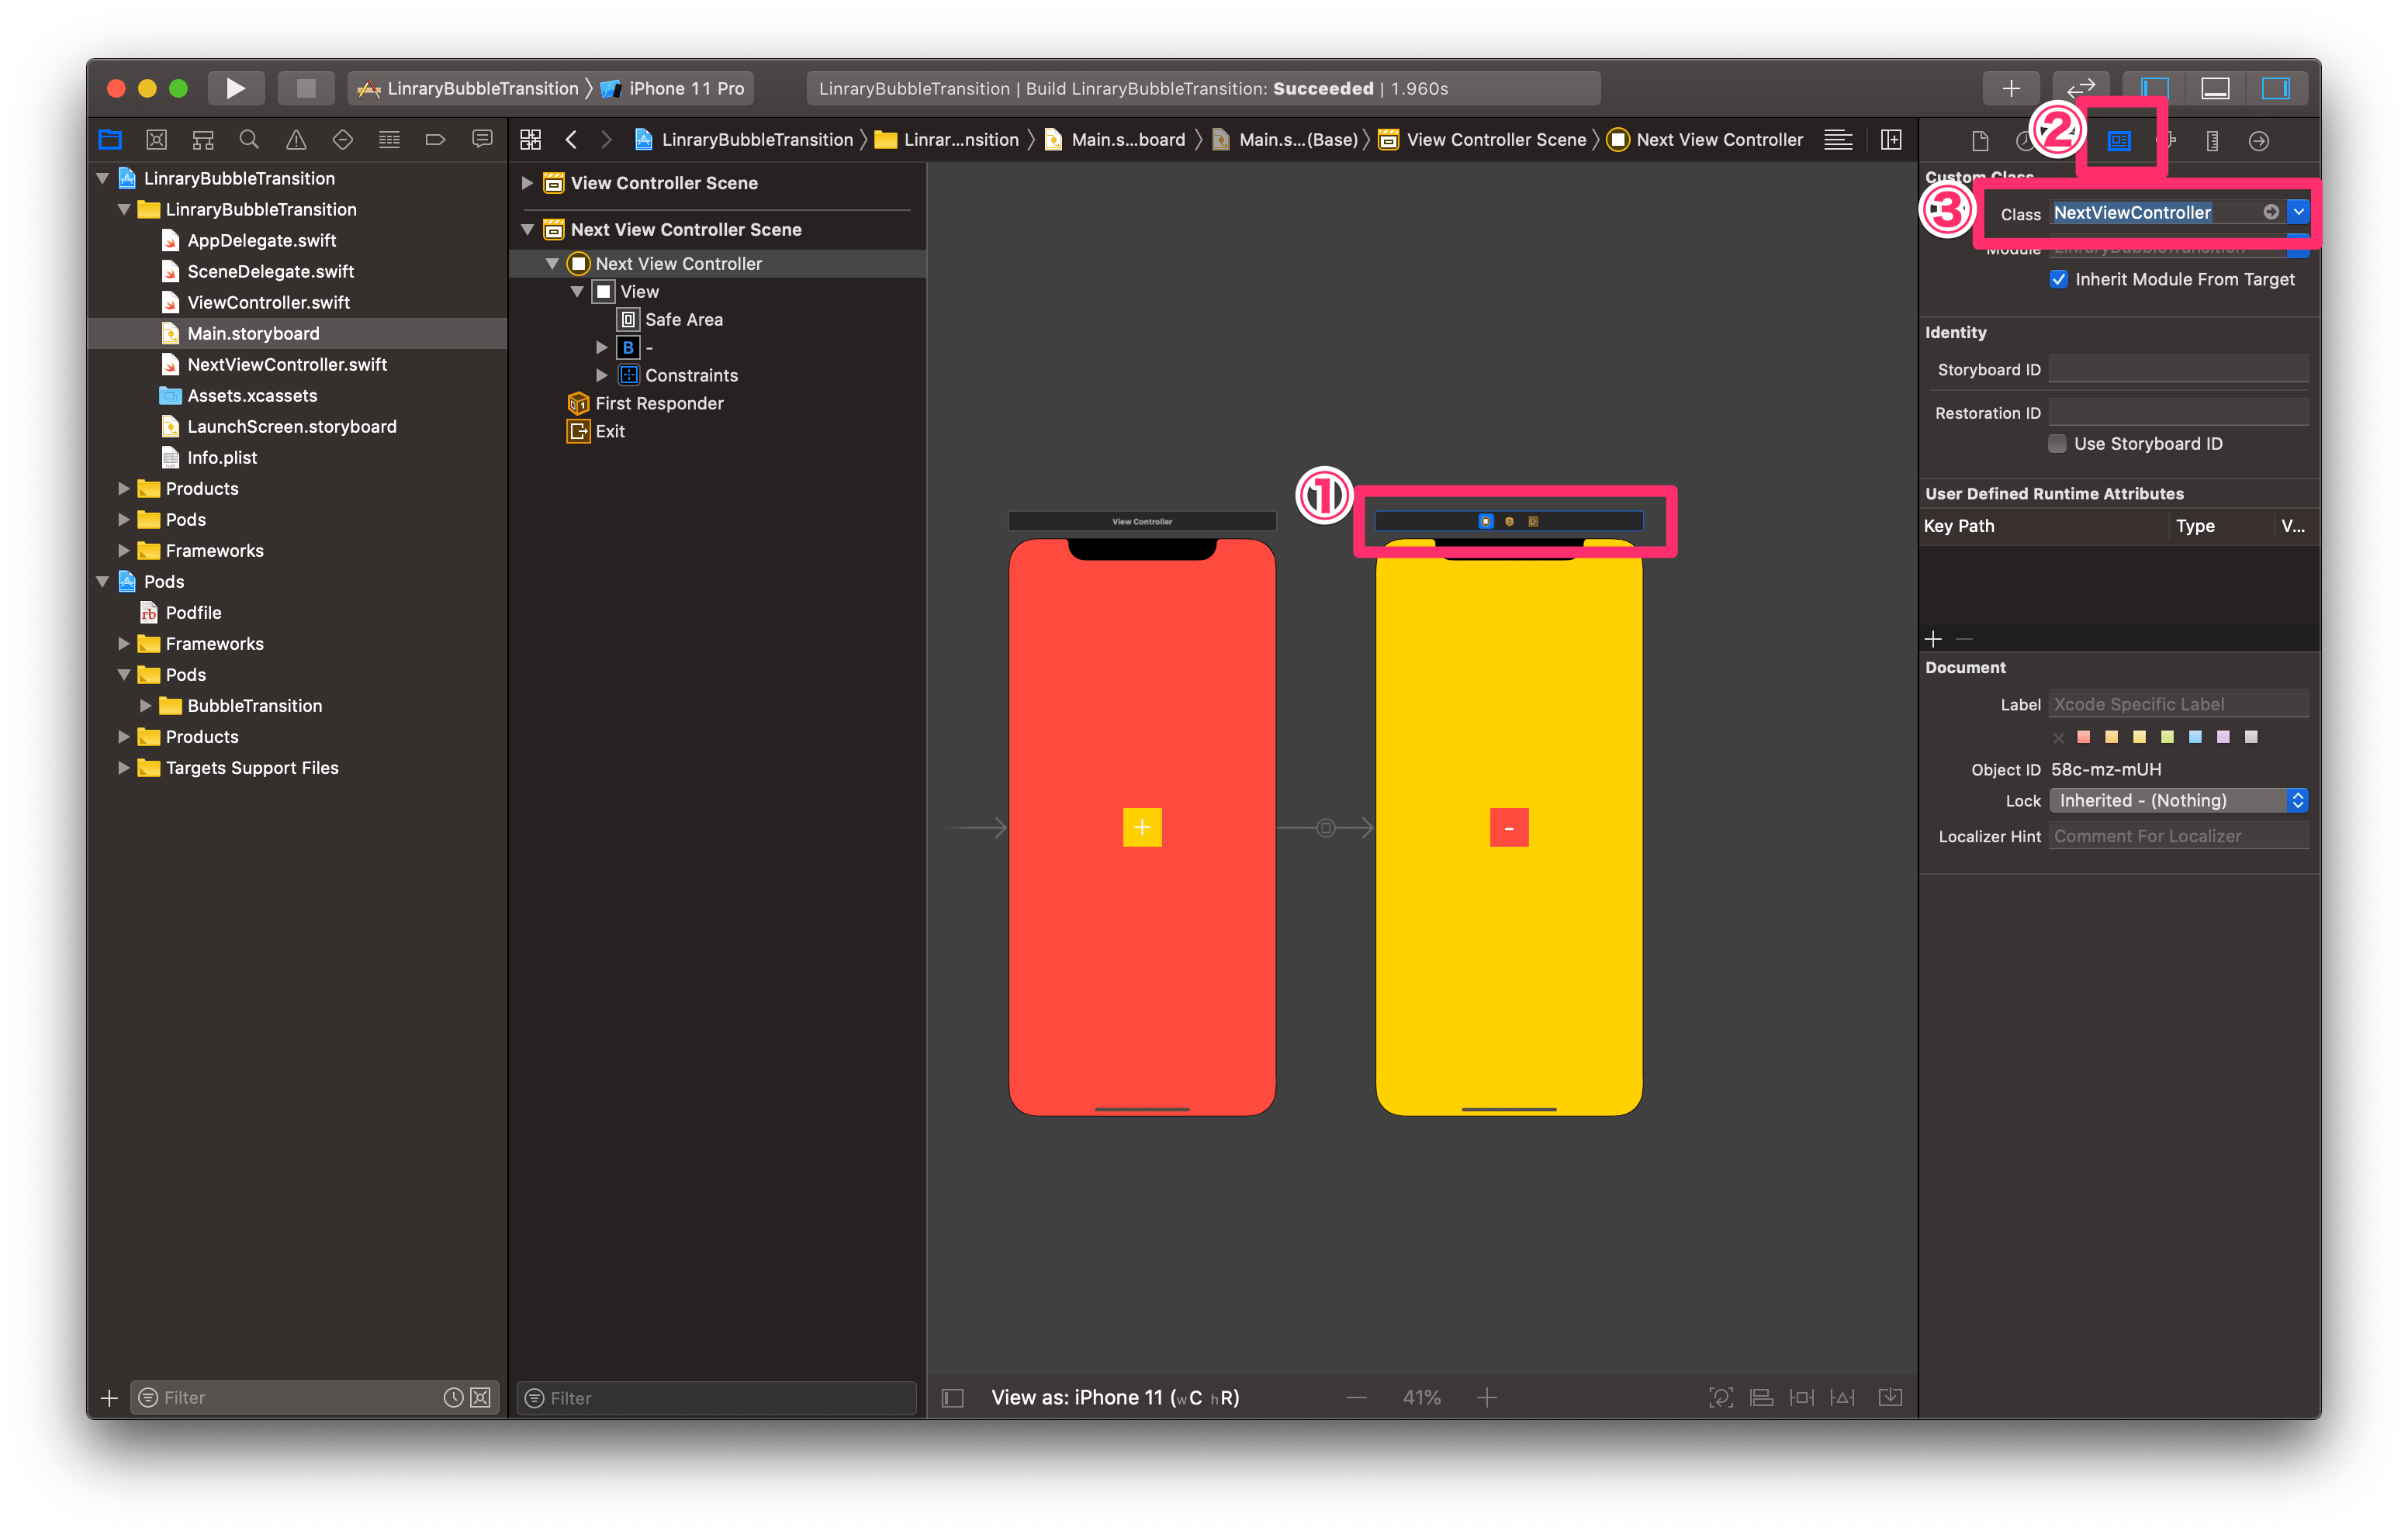
①遷移先のstoryboardの上のバーを選択
② ![]() (inspector)を選択
(inspector)を選択
③先ほど作成したファイルを選択
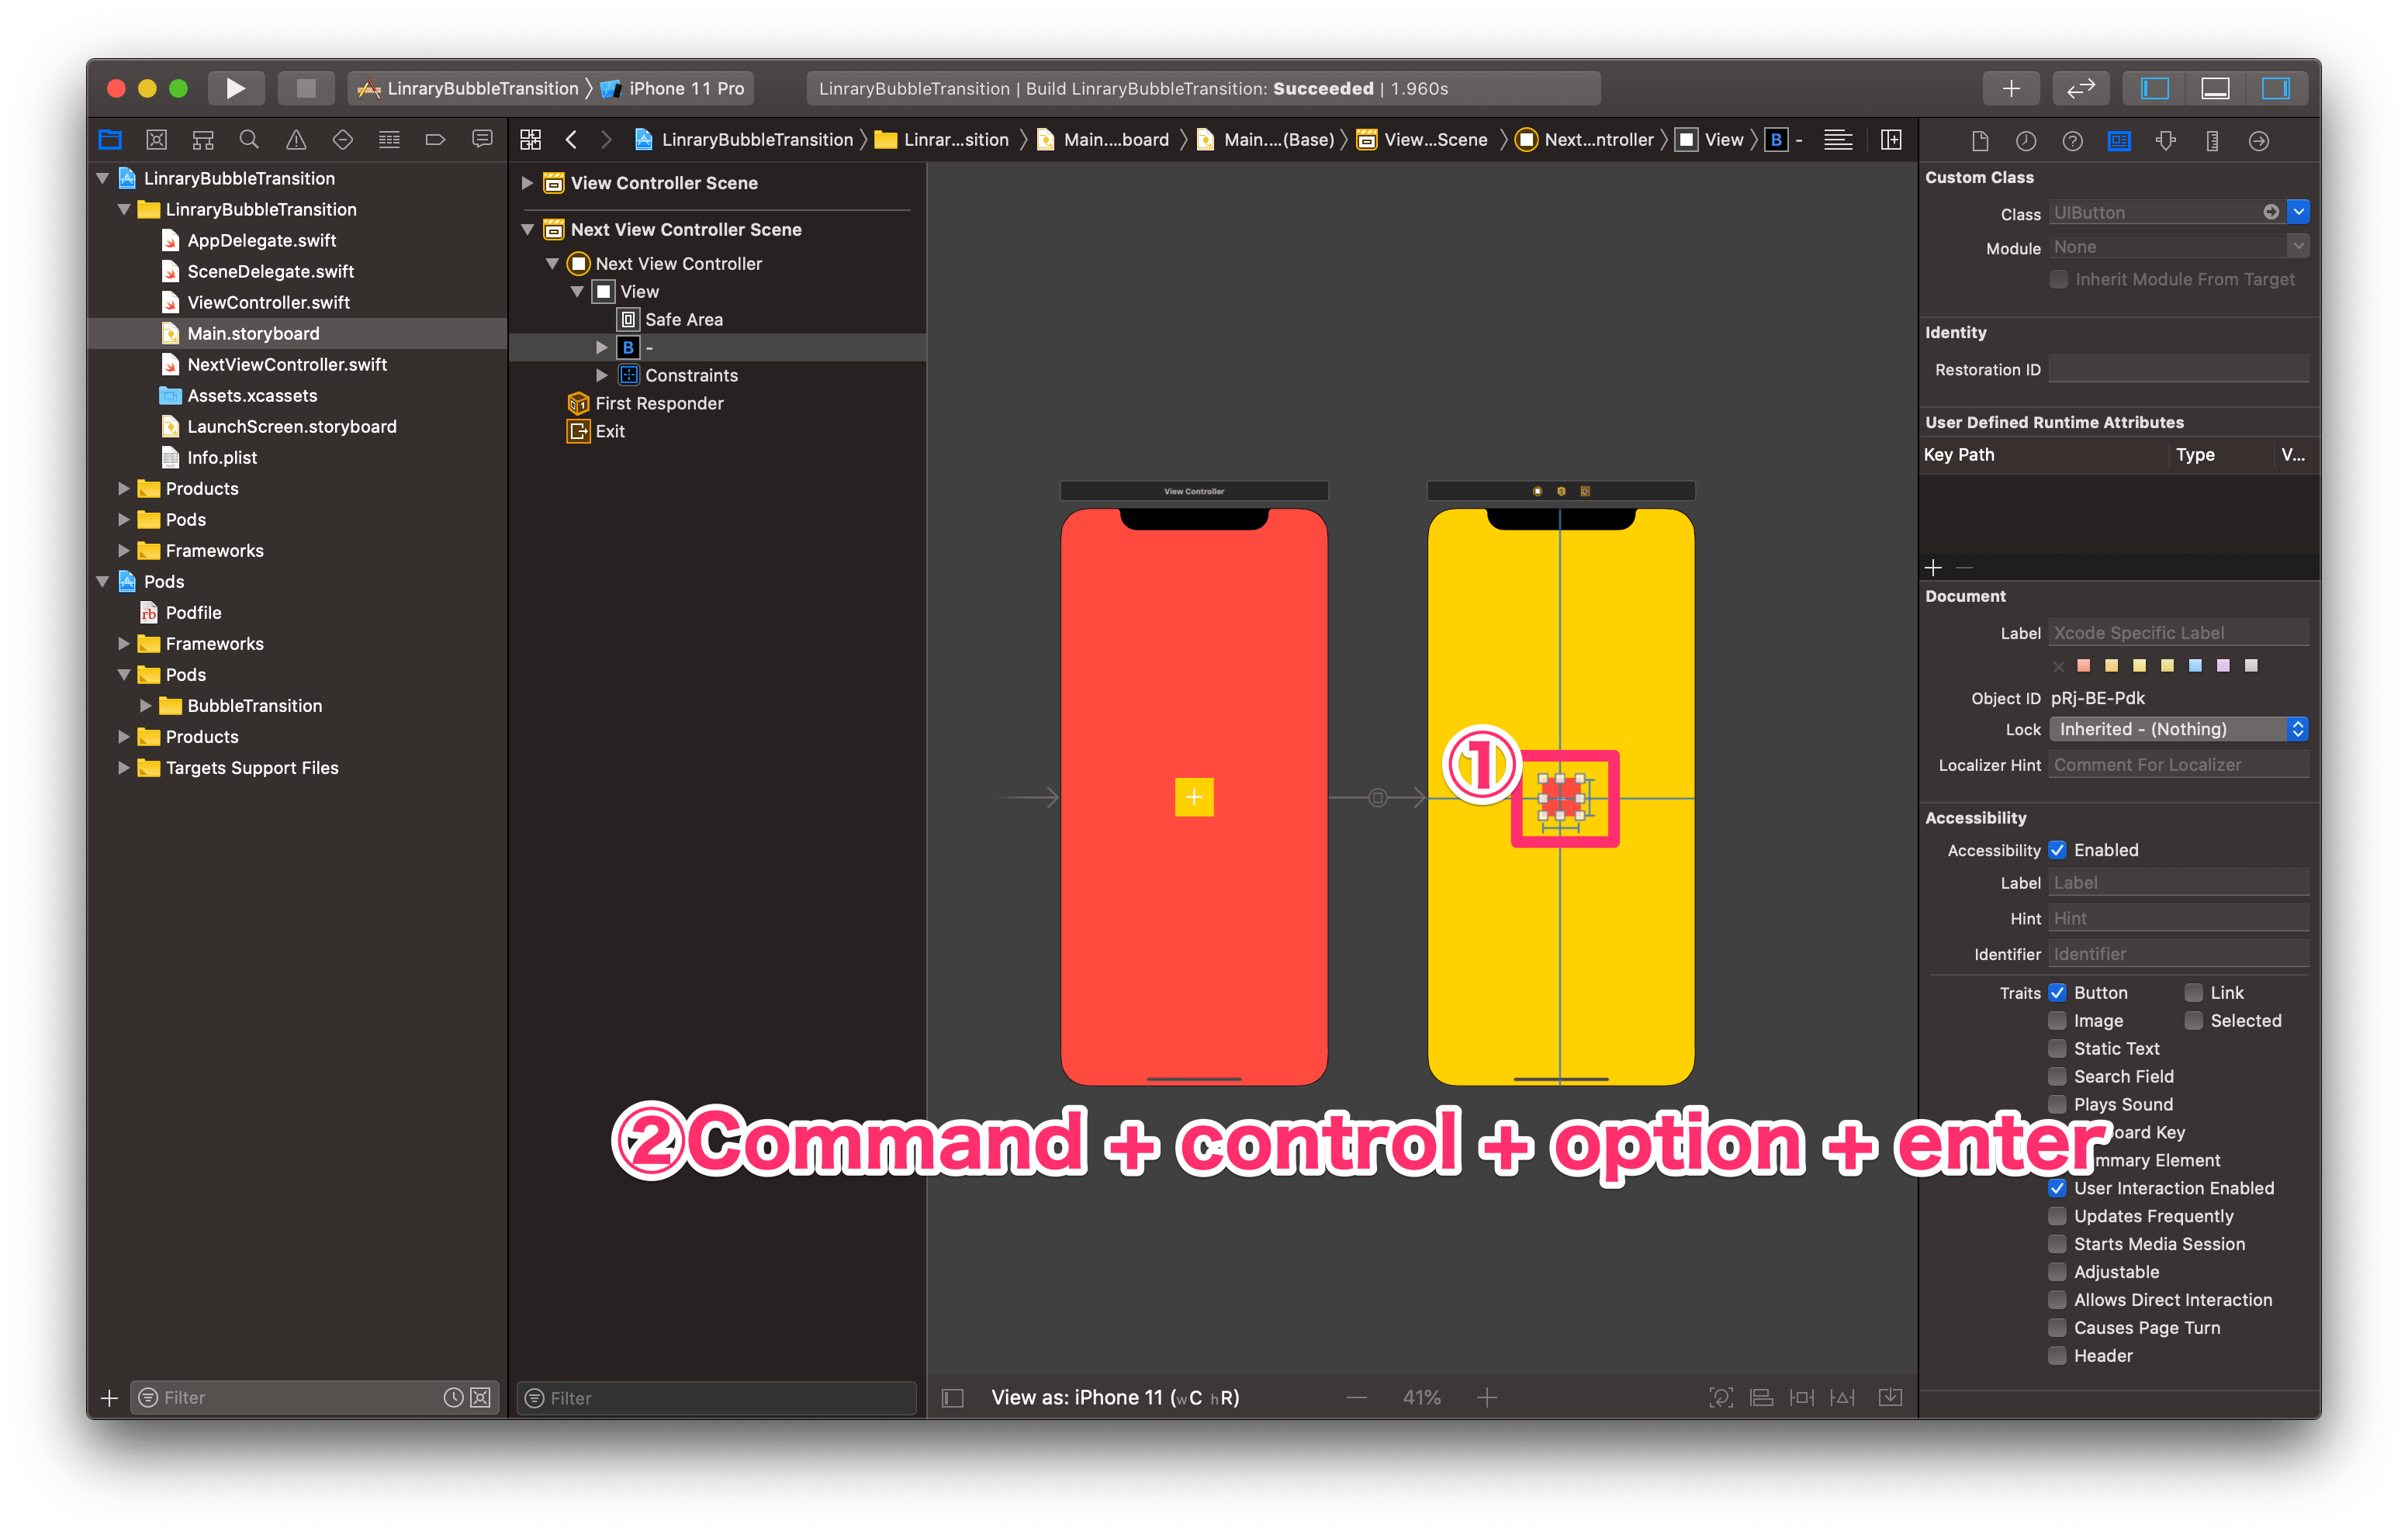
command + control + option + enterで2画面にします。
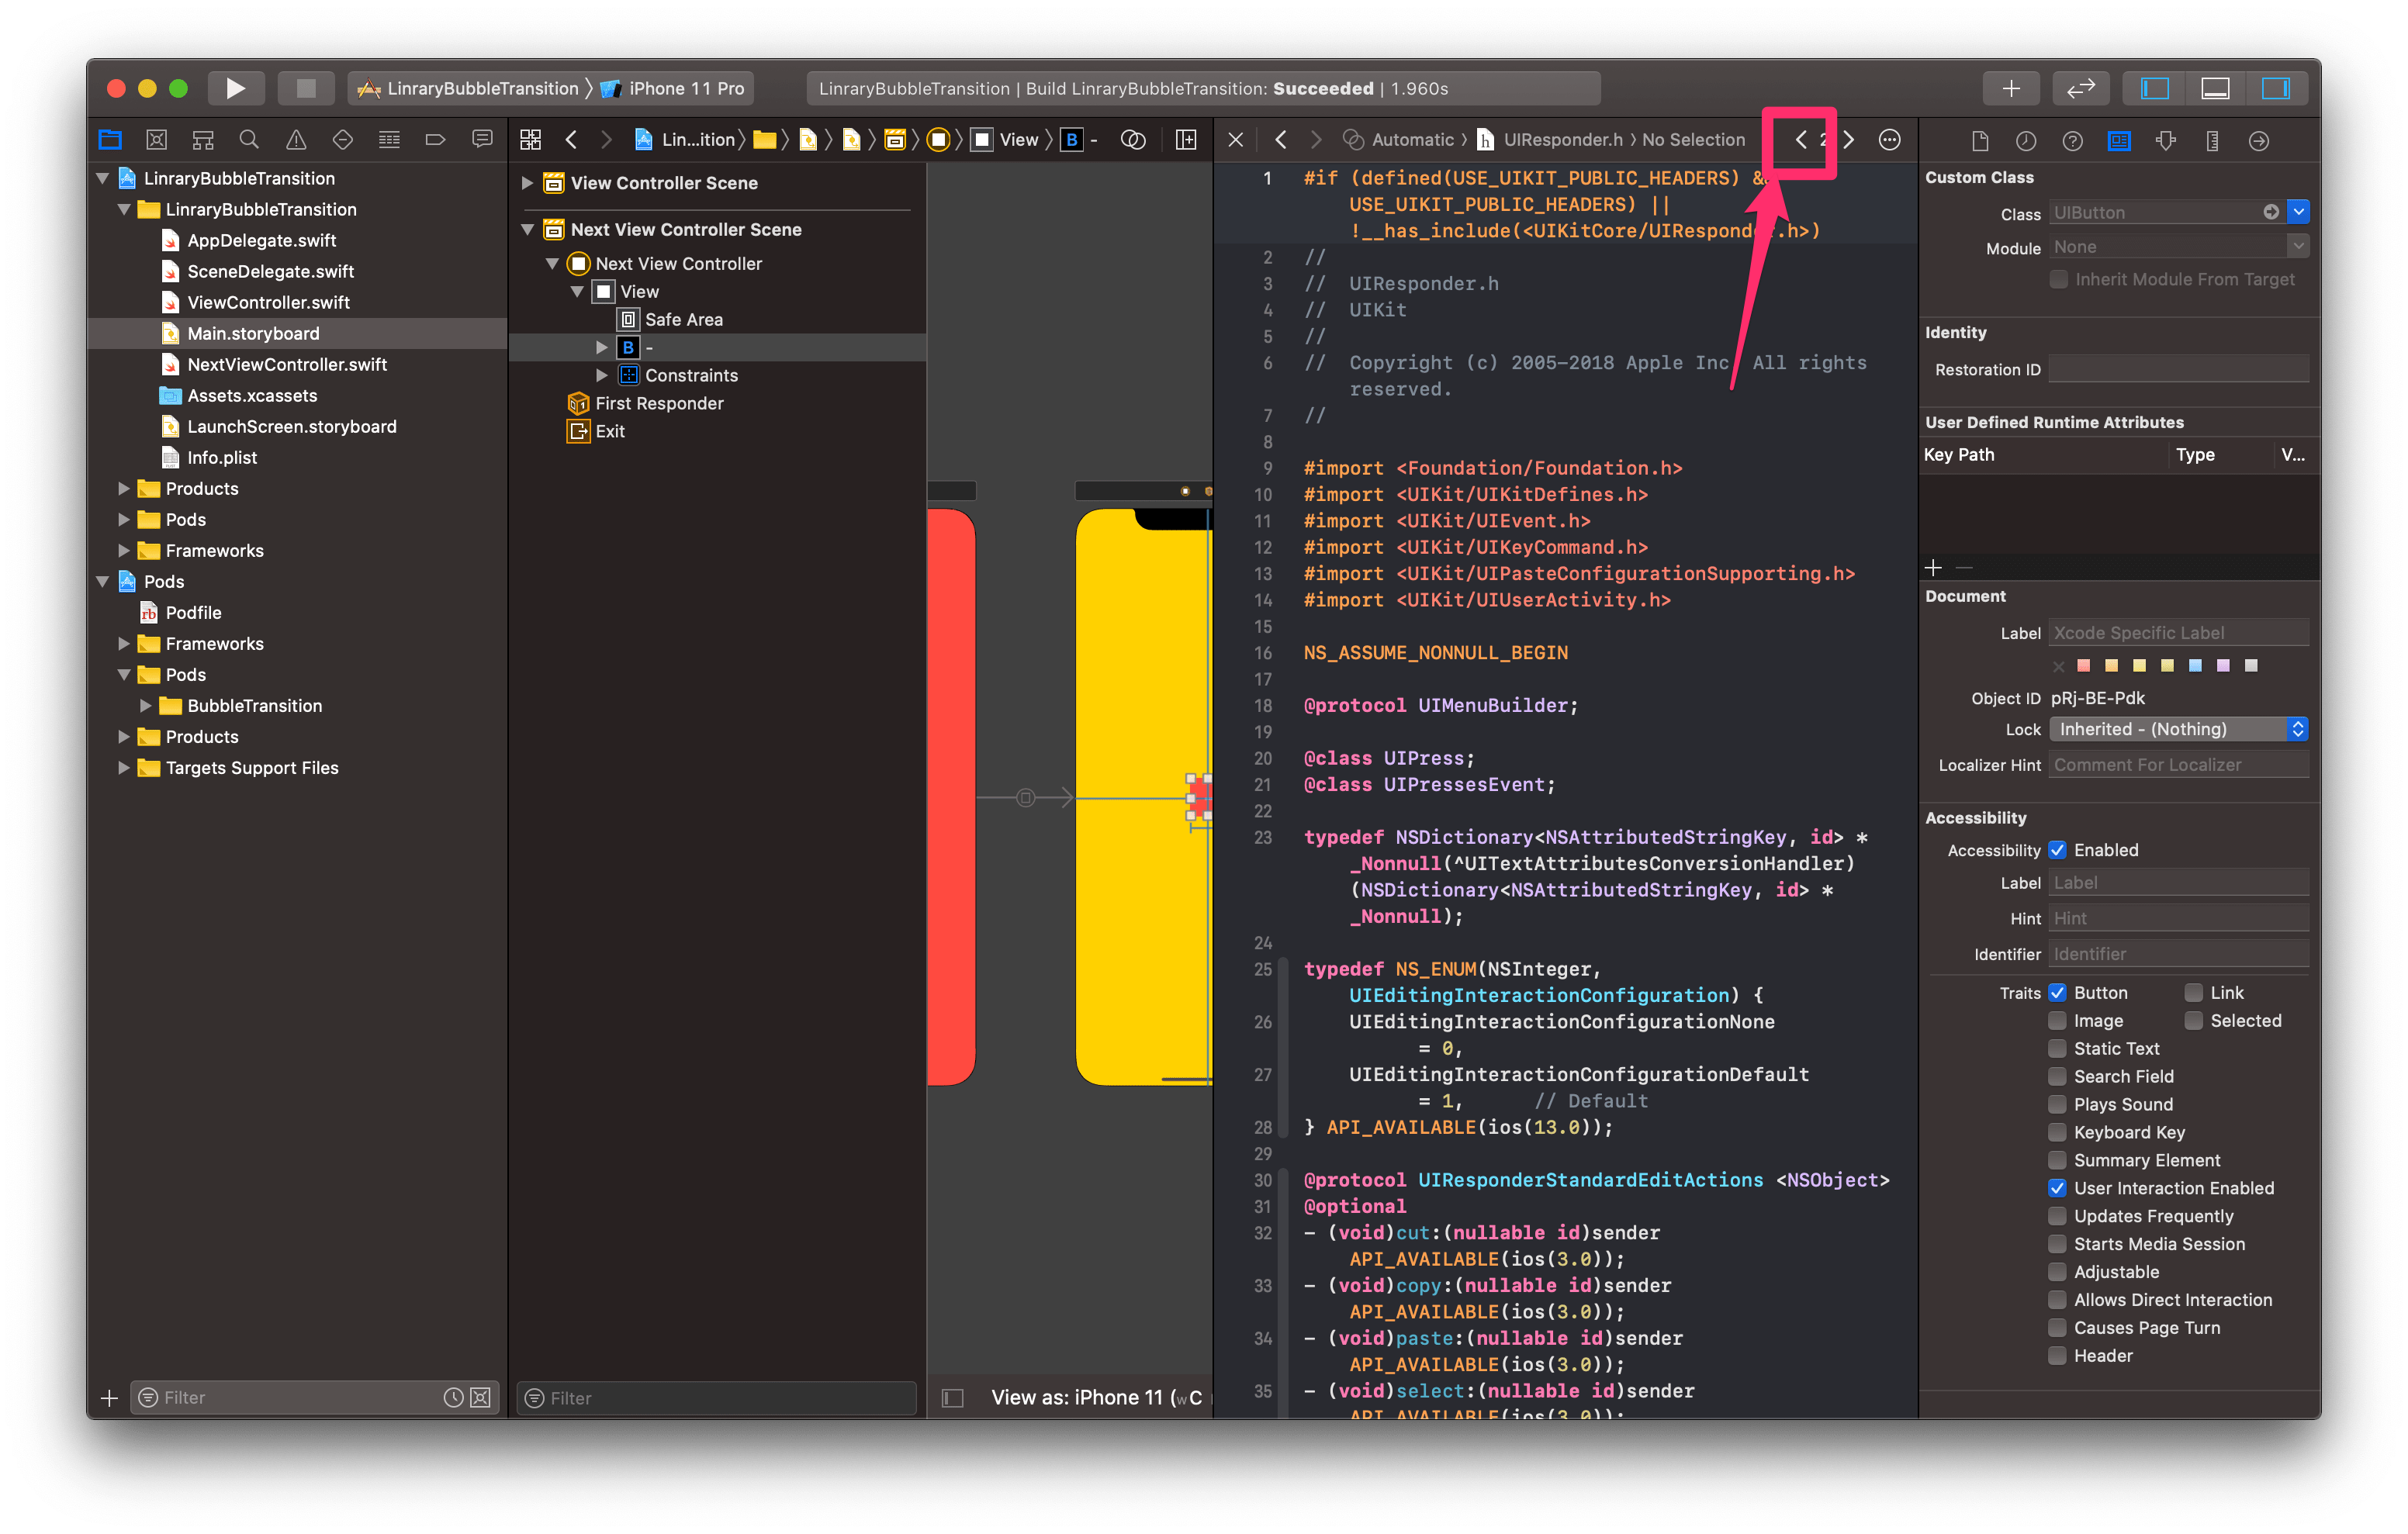
NextViewControllerが開かない場合、上記の画像のように、「<」をクリックし、NextViewControllerを開きます。
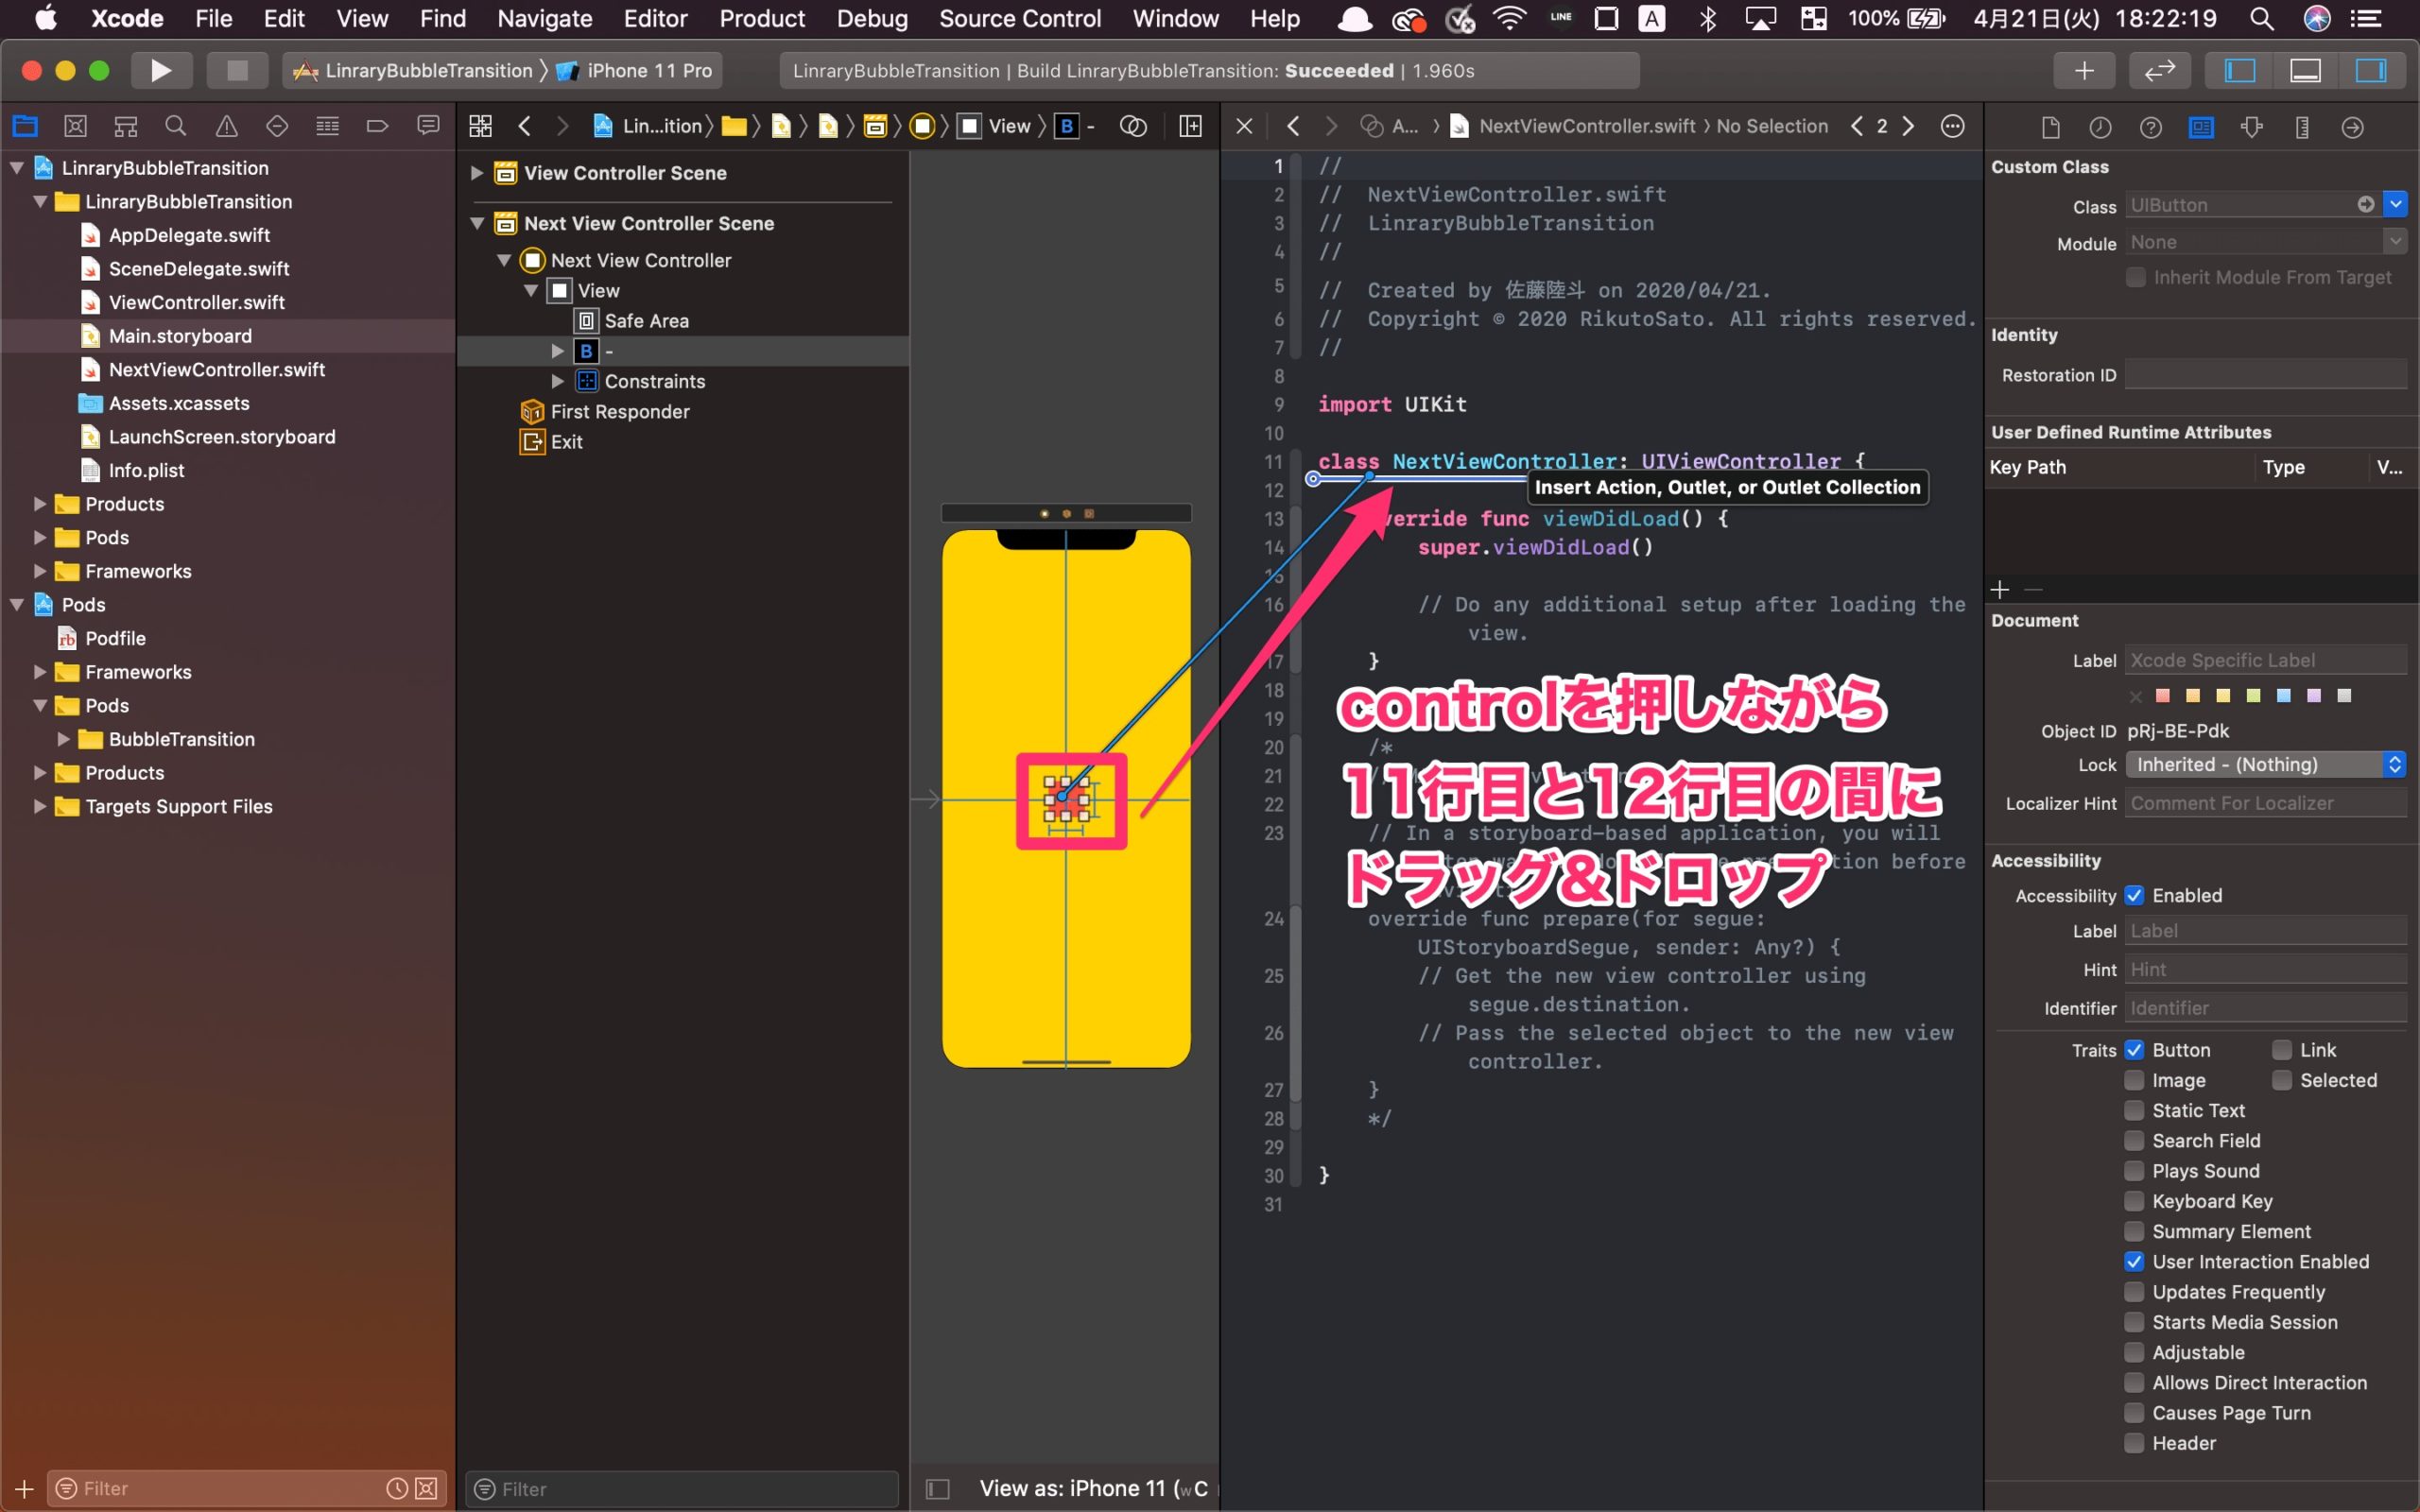
controlを押しながら、11行目と12行目の間にドラッグ&ドロップ
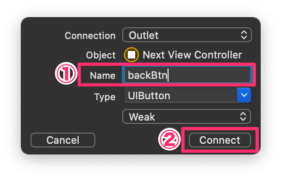
NameにbackBtnと入力し、「Connect」をクリック
ボタンが押した時の処理を紐付けます。
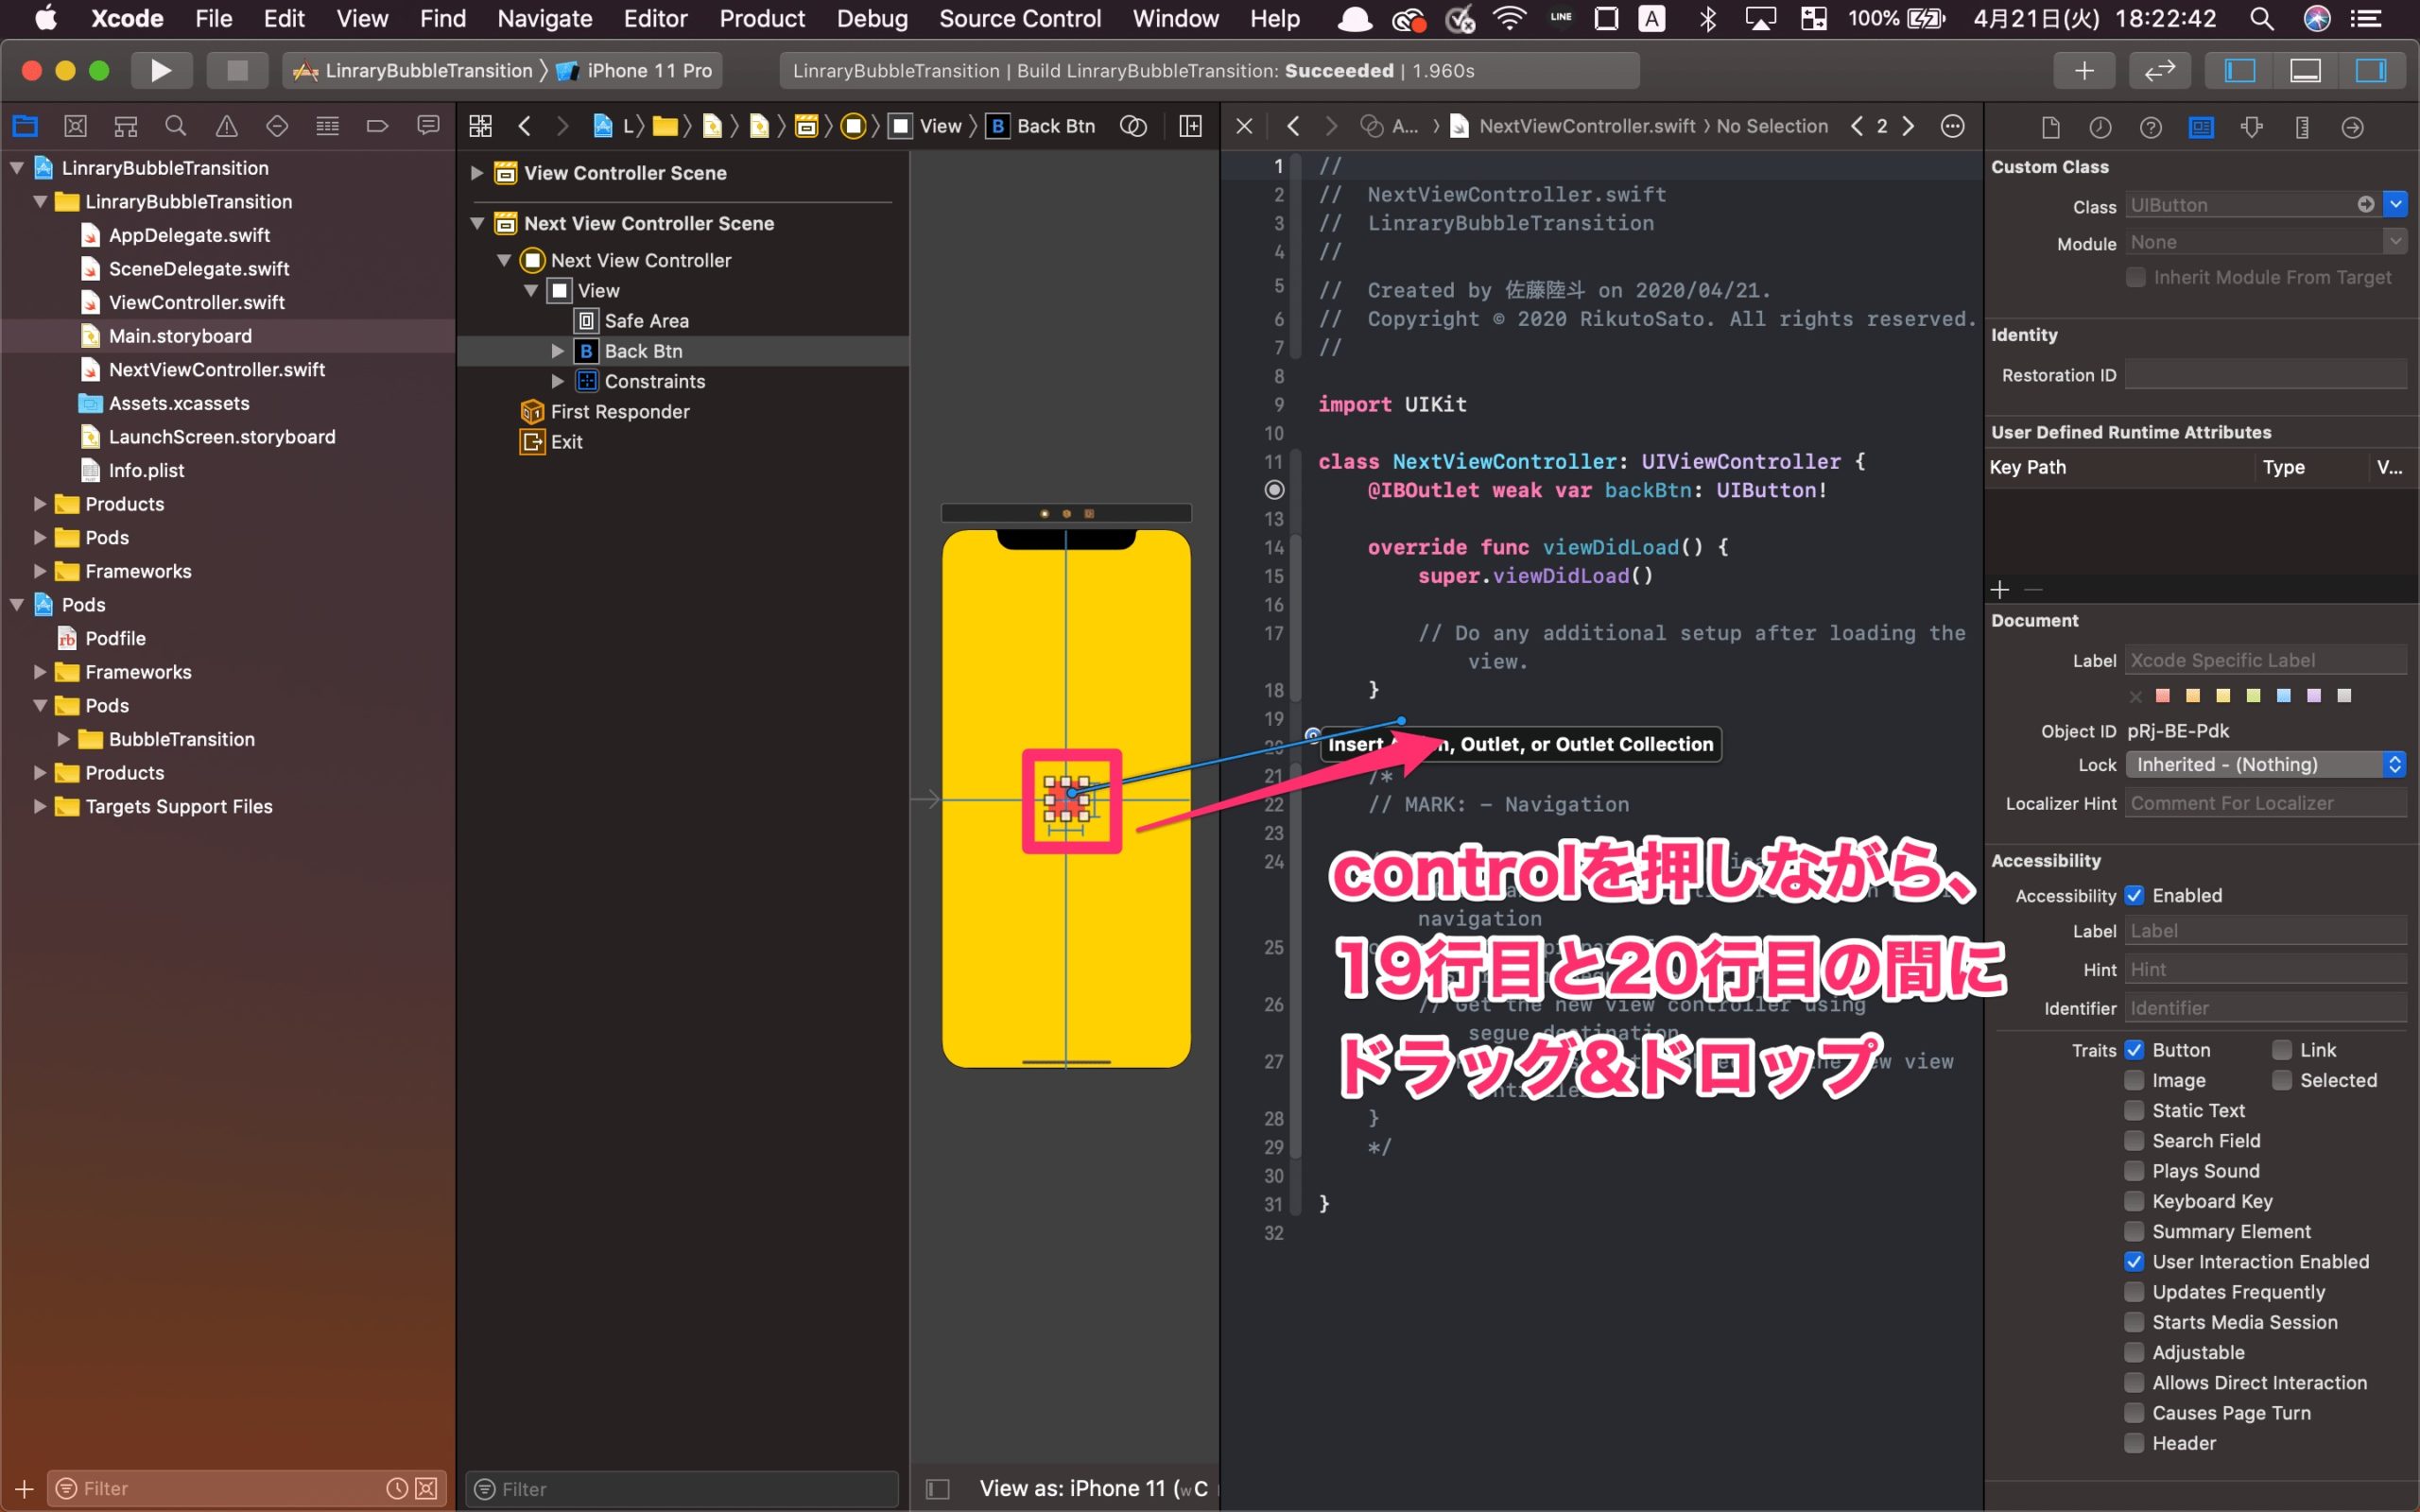
controlを押しながら、19行目と20行目の間にドラッグ&ドロップします。
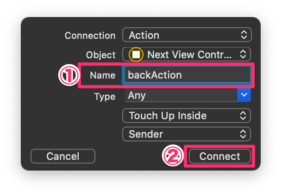
NameにbackActionと入力し、「Connect」をクリック
コーディング
続いて、コーディングします。
ViewControllerを以下のように、変更しましょう。
import UIKit
//追加①
import BubbleTransition

class ViewController: UIViewController {
    @IBOutlet weak var nextBtn: UIButton!

    //追加②
    let transition = BubbleTransition()

    override func viewDidLoad() {
        super.viewDidLoad()
     //追加③
        nextBtn.layer.cornerRadius = 30
        nextBtn.layer.masksToBounds = true
    }

    //追加④
    override func prepare(for segue: UIStoryboardSegue, sender: Any?) {
        let controller = segue.destination
        controller.transitioningDelegate = self
        controller.modalPresentationStyle = .custom
    }

}

//追加⑤
extension ViewController : UIViewControllerTransitioningDelegate {

    func animationController(forPresented presented: UIViewController, presenting: UIViewController, source: UIViewController) -> UIViewControllerAnimatedTransitioning? {
        transition.transitionMode = .present
        transition.startingPoint = nextBtn.center
        transition.bubbleColor = UIColor.systemYellow
        return transition
    }

    func animationController(forDismissed dismissed: UIViewController) -> UIViewControllerAnimatedTransitioning? {
        transition.transitionMode = .dismiss
        transition.startingPoint = nextBtn.center
        return transition
    }
}
簡単に説明すると、
①まずは、インポートする
②インスタンスを生成する
③ボタンを丸くする
④画面遷移のセグエに設定する
⑤アニメーションを追加する
こんな感じです。
次は、NextViewControllerを変更しましょう。
import UIKit

class NextViewController: UIViewController {
    @IBOutlet weak var backBtn: UIButton!

    override func viewDidLoad() {
        super.viewDidLoad()
        //追加①
        backBtn.layer.cornerRadius = 30
        backBtn.layer.masksToBounds = true
    }

    @IBAction func backAction(_ sender: Any) {
        //追加②
        self.dismiss(animated: true, completion: nil)
    }
}
簡単に説明すると
①ボタンを丸くする
②画面遷移元に戻る処理
 サトリク
サトリク
これで、実装完了です!
実行して確認してみてください。
まとめ
他にもたくさんのSwiftの記事を書いていますので、読んでみてください!

ブランドはじめました